Skip to content

Nearing Homestretch, Another Setback

Nearing Homestretch, Another Setback published on

86501545_XS

Not my hand. Came from Livestrong article.

Ah, ’twas only a week ago that a renovation deadline was mentioned. I’m not one to be superstitious but perhaps I jinxed myself. Oh, I’m going to be finished in May, dag nammit, but I’ll be crossing that finish line with one hand.

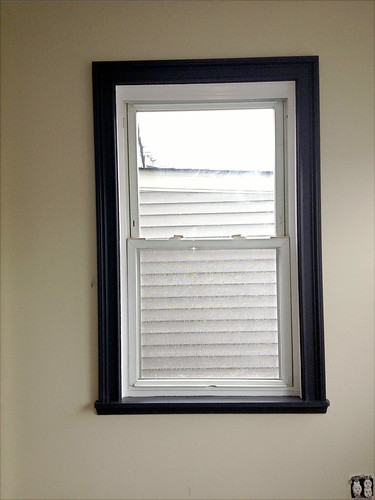
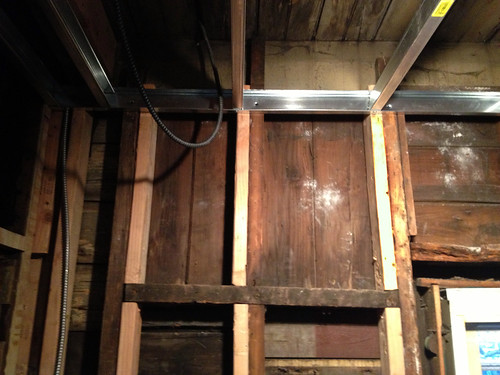
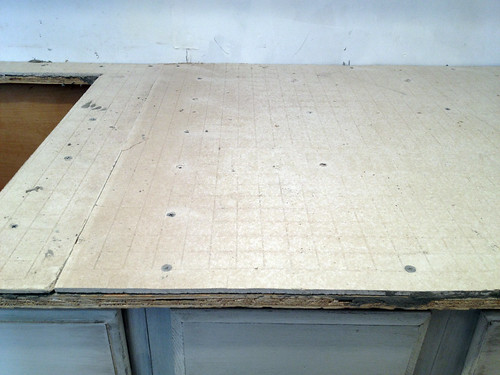
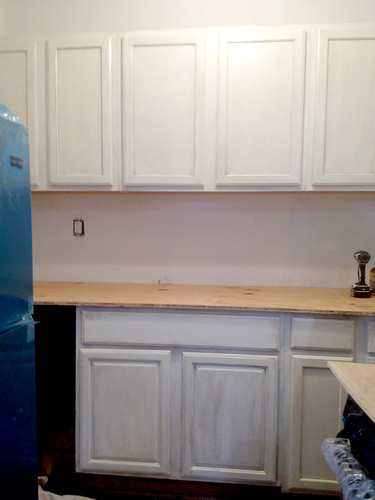
Last Wednesday I purchased the remainder of molding to be installed upstairs. Oddly enough, what seemed like only a few rooms cost nearly $700. All of my time consuming shopping at re-use stores went out the window in the interest of finishing quickly. So, Thursday I start painting all the pieces prior to installation. If I had only invested in a second sawhorse, you wouldn’t be reading this post, but because I had to keep moving the pieces from the sawhorse to the other room to dry, these long strips of molding took over the house.

So, I tripped on one.

I caught my fall with my hands, the way people often do. Only my left hand landed on a piece of corner trim. Had it landed on a flat surface like my right, I doubt I would’ve been hurt.

It was extremely painful but more than anything I was bummed about not being able to continue work. I put an Amy’s frozen veggie wrap (all I had in the house) on it and took 3 Advil, then waited about an hour. Nah, I really had to stop working. Couldn’t even change my clothes because I wouldn’t be able to tie my sneakers with one hand.

Yesterday I managed to do some work. I filled nail holes and caulked. I even lifted things with my good hand. I was feeling good that I could keep going. This morning I’m in pain from overdoing it but I think I’ll just suck it up and soldier on. I’m convinced that it’s just a swollen bruise and nothing is sprained or broken. I know because I’ve been there and done that too.

BTW, I’m right handed. Who needs the left anyway? It’s just a spare.

Deadline: May

Deadline: May published on

kitchen

A renovation that was supposed to take about two to three months turns into a nine month process when all is said and done. There were unforeseen circumstances along the way, like the worst storm ever to hit the Northeast and a car accident that kept me away from the house for a few weeks. Those things set me back about three months or so, but I have no one to blame but myself for the rest of it.

Apart from spending my budget on some of the wrong contractors up front and having to redo some of their work, the real stagnation started after Sandy. I was in no rush to spend all my money and time on a house that nobody would want to purchase at the price I need to charge. Now that Spring is in the air and Rockaway is getting ready for the summer season, it’s a mad dash to the finish line.

The two apartments are very close to being finished. Now comes the tedious task of finishing work, making sure every small detail is in place. I should say that “small details” mean touch up repainting every room, a kitchen countertop, painting cabinets, bathroom vanity and installing all light fixtures. More than a day’s work, but we’ve come so far.

The exterior needs some prettying up, as does the basement.

Notice I didn’t mention a specific May deadline date. I’m hoping for the first week. Actually, between you and I, I’d like to see it done by the end of this month but I’m also trying to be realistic.

The house will be for sale or rent. I’m resigned to the fact that I will probably have to rent it for a year or two before Rockaway really bounces back. Doesn’t mean I won’t try to sell as that was my original intention, but the price I need to ask and where the market is at now are two different places.

But it’s all good. Either way, I’m going to take the summer off. A much needed break from the physical and toxic work called renovation. I’ll probably take that spare time to work on my Bed Stuy house. D’oh!

PS: About the photo above. It looks like a “before” shot, but believe it or not, that’s a progress shot. The floor is tiled. The cabinets are installed but not painted. The dishwasher and radiator are hooked up. It’s come a long way from the partially gutted room it was.

Goodbye Rosin Paper. Hello Rubber Tiles

Goodbye Rosin Paper. Hello Rubber Tiles published on 1 Comment on Goodbye Rosin Paper. Hello Rubber Tiles

installation

The old standby in renovation floor protection is rosin paper. There are so many drawbacks though. It gets dirty, it tears, it’s time consuming to put down and worst of all, it really doesn’t protect the floors all that well.

Back when I actually had a crafts room in my house, I bought some interlocking rubber tiles at Lowes to protect my hardwood floors. I’ve since gotten rid of the work room (It’s now just a junk room that dreams of one day becoming a dining room.) so I took up those tiles and brought them to the house that’s under renovation.

Sure, the initial investment costs way more than some paper but if the renovation is going on long enough that you have to keep changing the paper or if you’re doing multiple renovations, I say it’s worth it.

The tiles can be washed or mopped so you don’t have to live with the dust. They are water proof apart from the seams. They’ll last forever and they’re totally reusable. No need to install them around the whole house. Just pick them up and take them from room to room as needed.

I purchased Flexco (shown above) because I wanted it to look good in my house but there are less expensive tiles out there if design doesn’t matter.

Before and After Windows

Before and After Windows published on

window4

Remember when I was bitching about how time consuming the finishing work is? Well, tada! The windows are finally done!

Can’t find the real “before” shots. Those would be initially clam shell molding with wood paneling. Then there was no molding with new sheetrock. Ok, so fast forward to dirty, uncaulked windows with 1 coat o’ paint molding. That would be the photo above.

window1

And this would be the “after”. Shush, I know there’s still touch up to do on that uneven line, but I swear I’m impressed with my cutting in skills. Never use tape. My hand is steady, Freddy.

window2

So, when it’s not so steady (see mark on wall, left side of window) nothing a little touch up can’t fix.

Rebuilding Gutted Rooms

Rebuilding Gutted Rooms published on

mud1

It’s been six months since renovations started on the Rockaway house. Yeah, I thought I’d be finished within three. Although most of the big, nasty damage was dealt with immediately, I ignored the worst problem until recently.

The rear deck was built into the house without thought of water infiltration. One stair stringer was supported by the house with vinyl siding cut around it and caulking to fill gaps. Gutters on the second floor were not properly cut and pulled away from the siding. Both the first and second floor rear mudrooms had mold and wood rot.

It’s not that the problem was ignored so much as put off. The two rooms were gutted and the deck was repaired to a point months ago. The tough thing was figuring out what to do with those stairs that were part of the house. Just patch it up the way it was?

Nah. Here’s where I needed an experienced company to come in. This wasn’t a DIY or jack of all trades handyman job. After a few phone calls, I went with Topline who does windows, siding and doors. We agreed that the best thing to do would be to take the stairs out completely and redo the entire back wall of siding and gutters, then rebuild self-supported stairs.

skylight

(Funny story. I left the room for 10 minutes and my husband created a “skylight”. Totally rotted ceiling/side replaced.)

But this isn’t about the vinyl siding or deck stairs. This is about the two mud rooms that can finally be dealt with because there are no longer leaks.

The entire house was not gutted. Probably should have been, but there were things I wanted to salvage, such as the floors. Anyway, whatever WAS gutted, we took great pains to repair properly.

What does that mean? It means replacing rotted wood. It means adding extra support where there wasn’t any before, including wall studs and flooring joists. It means new insulation.

It’s almost easier to rip everything out and start from scratch but if I did that, I would have to call this blog “Newly Renovated Home” rather than “Reclaimed Home”, now wouldn’t I?

All The Small Things

All The Small Things published on

window

So, your floors are finished, sheetrock is up, you’ve painted and the molding is installed. Think you’re done? Think again. The finish work is one of the most tedious and time consuming parts of the job. It doesn’t really take much skill but it does take patience.

The above photo is my before caulking window casing shot. I don’t have an after because I didn’t finish. Spent the morning vacuuming and wet-wiping dust. Caulked some, filled nail holes. Didn’t get to paint it.

Unfortunately, I had to save those old vinyl windows because it wasn’t in my budget to replace them. After cleaning them up (I forget whether this is the before or after clean shot) it looks like I’ll have to paint them. That’s the thing about adding even one new element to a room. Then everything else looks horrendous next to it.

Anyhoo, a few rooms in the house are so close to being finished. So close and yet so far.

DIY Concrete Countertop

DIY Concrete Countertop published on 6 Comments on DIY Concrete Countertop

final

Back in December I did a post about DIY concrete countertops. The method doesn’t involve any complicated pouring of concrete so I decided to give it a shot. Whaddya think? Not bad.

The photo above was taken before the sealer was dry so any dark areas you’re seeing are actually still wet. Also, pay no attention to the dirty sink that had been sitting in the backyard since the hurricane.

Would I recommend the Ardex Feather Finish that my husband said was basically thin set? Yes. For 30 bucks including shipping, I got myself a new counter and backsplash. The 10 pound bag wasn’t quite enough to smooth it out completely so I’d suggest getting more. I left the backsplash decidedly rough (I decided that I couldn’t be bothered) and the counter wasn’t completely flawless. This material can be sanded but again, because I didn’t have extra on hand, I didn’t want to go crazy sanding it.

I applied three coats of Ardex and three coats of Aqua Mix sealer, letting them dry thoroughly each time. Does this take any less time than pouring? No, but if you don’t feel like building the form, this is easier.

surface

Started with plywood and hardibacker.

1coat

First coat. Thought this would never disappear but it was gone once dry.

countersplash

Pre-sanded second coat. The counter is much smoother now but I left the lines and patches in the backsplash. Even thought it would be a cool idea to add fossils! But I didn’t have any on hand. Next time.

DIY: Installing Kitchen Cabinets

DIY: Installing Kitchen Cabinets published on

cabinets

Materials:

Level
Pencil
Screw Gun
Tape Measure
Stud Finder
Clamps
3½” long cabinet screws for cabinet to wall
2¼” trim head screw for cabinet to cabinet

cabinet1

*The cabinet is level but the wall isn’t.

1. Measure. Start from the bottom up. A standard base cabinet including the counter is about 36″ high. You want at least an 18″-20″ backsplash. So we’re talking setting the bottom of the wall cabinet at 56″.

2. Mark it and level. In an ideal world with perfectly level floors, I’d tell ya to measure left, right and center for that 56″ and draw your mark with the level. It’s good to do that anyway, but the level overrides the measurement. For instance, my floor had 1/2″ settlement on the right side so we had to shim up the base cabinets. Unfortunately, because the ceiling isn’t level either and the cabinets are, that slopey ceiling is pretty noticeable, but whatcha gonna do?

3. Find the studs. Maybe the guys helping you are studs, but I mean the ones in the wall. You can buy an electronic stud finder but they don’t always work 100%. If the walls are sheetrock, it’s sometimes possible to see screws and tape if there isn’t tons of paint. Also look for the outlets as they are usually screwed into a stud at the side. If all else fails, knock on the wall. Studs should be 16″ apart so if you find one, there is a good chance you can measure 16″ for the next one. Our crazy house was 24″ so we had to add extra support.

4. *Adding support* You need to take this step if your studs are too far apart. What we did was take two strips of plywood cut about 2″ wide and screw them into the length of the wall. Make sure they are fully secured to the studs. Now these strips will take the weight of the cabinets along with the studs.

5. Hang the cabinets. There are two ways to go about this. First way is to screw in a temporary ledger board just under the level line so you can rest the cabinets on it as you’re about to screw them in. Take the first two cabinets and screw them together. You’ll want to clamp the front of them together and make sure they are plumb and level. The second way only works if you have more than two people. Forget the board and hang one cabinet at a time, leveling and plumbing them up as you hang them. I say three people because it will take one to screw the cabinet and two to hold it up and check the level.

A few tips. It’s a good idea to pre-drill holes. Make sure to secure the cabinets at the thickest point. I hope you’re not trying to do this with the doors still on. I also hope you know that you should do the wall cabinets before the base.

6. Base cabinets. Well, this is a breeze since you don’t have to hold them up over your head. As mentioned earlier, not all floors are level so let’s assume yours is not. Start from the highest point to make your level mark and then you can always shim up. You’re pretty much going to follow the same directions as the upper cabinets. Just keep in mind that your sink base needs to be aligned with the plumbing and holes should be drilled before you install. (Duh)

Good luck!

Better than Faux

Better than Faux published on

wall2

It takes skills or money to hire people with said skills to create a faux aged plaster effect on the walls. But lookey what I uncovered the other day. Yes, it’s the real deal well preserved under wallpaper and skimcoat.

Is it taking just as long to painstakingly scrap down the wall? Yes. But hear me out, man. Cost: Time. Materials: Just a clear polyurethane to seal up that toxic lead paint I’m releasing into the air.

This is just a single, small wall at the top of the stairs. Nobody will ever notice it but I’m taking great pleasure in the process anyway.

How Not To Tape and Mud Drywall

How Not To Tape and Mud Drywall published on 2 Comments on How Not To Tape and Mud Drywall

taping

We all have our skills and limitations. For me, that limitation is drywall and plastering. I hate it like poison, which is probably why I’m not very good at doing it.

The correct way to tape and mud is to build the joint compound up 3 to 4 times while feathering it out with each coat. But that means 3 to 4 days between dry time and who has patience for that? I’ve learned the correct way to do it. And sometimes I do try. I really do. But it’s not so easy!

IMG_8853

You smooth one area out and the adjoining area gets messed up. The mud on your knife gets something in it and leaves a streak in your perfect layer. The tape bubbles.

That’s what sandpaper is for. They say a good plaster or taping job requires very little sanding. Well, at least you can make a bad job look decent with tons of sanding.

Watch the videos below for the correct way to tape and mud. Let’s see how well you do.

Paint Stripping Deja Vu

Paint Stripping Deja Vu published on 2 Comments on Paint Stripping Deja Vu

tub

Sadly, my Silent Paint Remover ended up under water during the flood. It’s possible that it survived but I’m scared to try it, so I’m waiting for The Husband to fiddle around with it. I’ll stand by to drive him to the emergency room if necessary because I’m a good wife.

Until he takes it apart, I’m stuck using chemical paint strippers. It’s bringing back some bad memories of stripping 5 marble fireplaces and a house full of wood molding with Rock Miracle. Don’t get me wrong, Rock Miracle is a great paint stripper, but since I discovered the SPR, I only use chemicals to smooth out the final (or rather, first) layer of paint instead of sanding.

The clawfoot tub I bought for $100 DELIVERED has at least eight coats of paint. It’s so thick that someone plastered in a patch where the paint had peeled. First I tried Peel Away for 36 hours. I spent half the day yesterday going through layer by layer with the Rock Miracle until I finally said “WTF am I doing? This is the side that’s going to be hidden against the wall.”

Is it nuts that I’m “doing the right thing” where nobody is gonna see it?

Anyway, if you don’t learn anything else from my DIY blog posts, listen to me now and hear me later. The Silent Paint Remover/Infrared Paint Stripper is the most friggin awesomest thing ever invented. It’s like 400 bucks, which is why I’m willing to send Hubby to the hospital rather than buy a new one, but it’s totally worth it! Multiple layers in a 12″x5″ area in one go. Saves tons of time and money spent on bullshit chemicals and make paint stripping a pleasure!

No, I’m not getting paid to say this. But then again, if the company wants to send me a new one, I would not turn it down.

I love you, Silent Paint Remover. And I miss you with all my heart.

Primary Sidebar