Skip to content

High End? Upscale? Luxury?

High End? Upscale? Luxury? published on

kitchen-floors-stove1

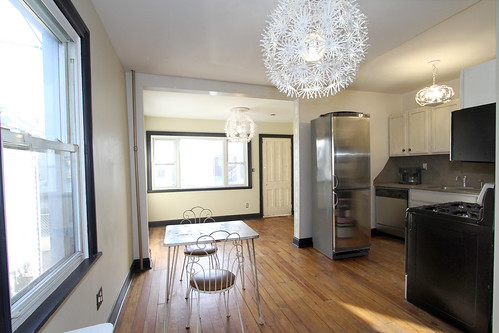
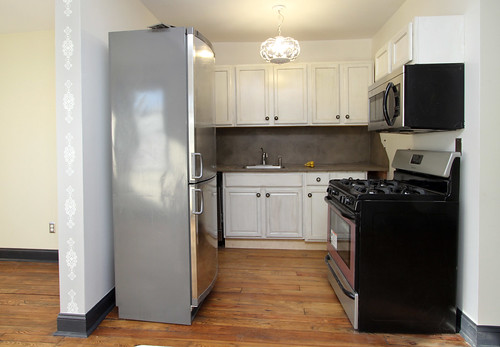
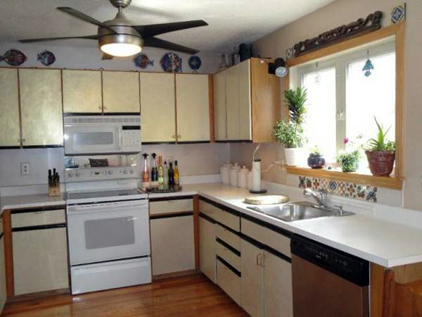
Now, THIS is a great kitchen!

If there’s anything in real estate that makes me cringe, it’s the overuse of words like “high end”, “luxury” and “upscale”. Ya know, one person’s “high end” is another person’s schlock. Don’t get me wrong. I’m not coming at ya from a snooty perspective. I wouldn’t know luxury if I was ensconced in it. But I do know my cheap-ass materials.

Yes, some of these “high end” fixtures can be expensive and look extravagant, but sometimes less is more. I can spot a generic Home Depot front door or bathroom vanity a mile away. And if you paid good money for something that I’m confusing with Home Depot shite, well then, you’ve paid too much.

So, what passes my “upscale” test? Well made. One of a kind. Designer. Did I mention well made?

Please, flippers and landlords, stop with all the luxury talk. Stainless appliances with cherry cabinets and a granite counter top is not necessarily high end. Subzero and Viking with custom, hand made cabinets and lava stone counter….now you’ve earned use of those words.

4_2604_9

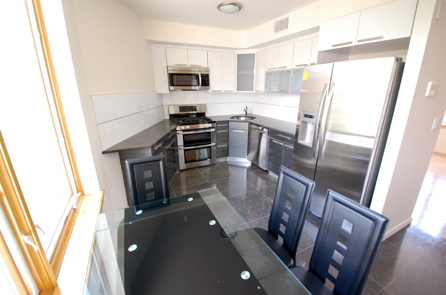
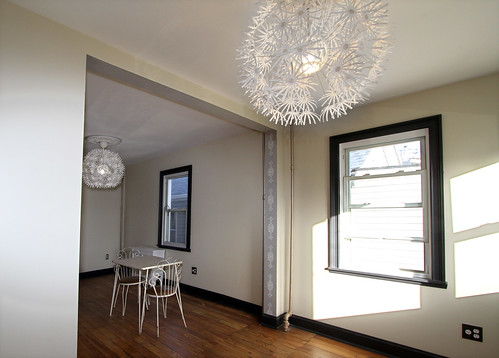
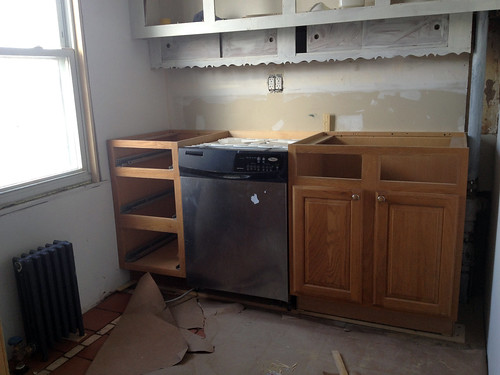
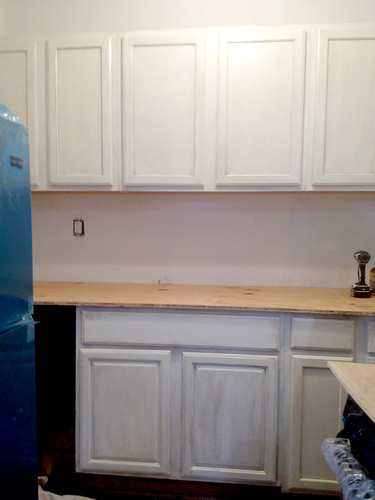
This kitchen was described as “luxury”. I spy Ikea. Now, hear me out. It’s a perfectly fine kitchen and there’s nothing wrong with Ikea, but one does not usually equate it with luxury. That light fixture is under ten bucks. I know because I’ve used them in many of my own downscale, low end renovations.

00H0H_apZQByahMDe_600x450

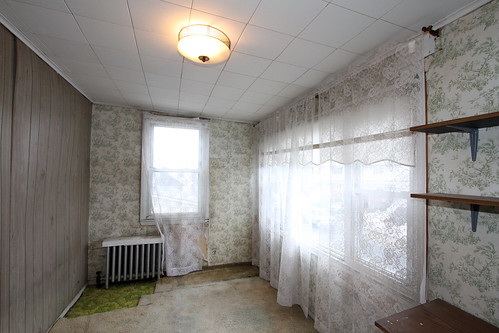
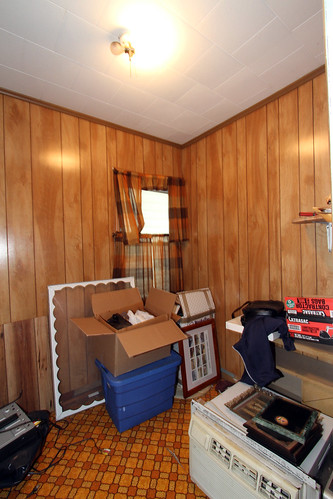
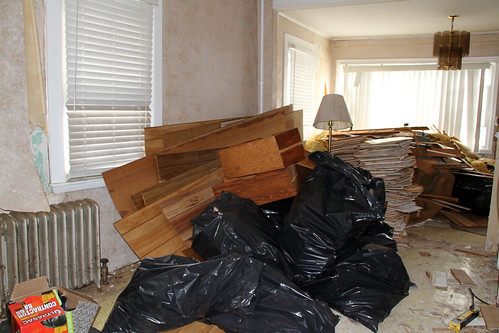
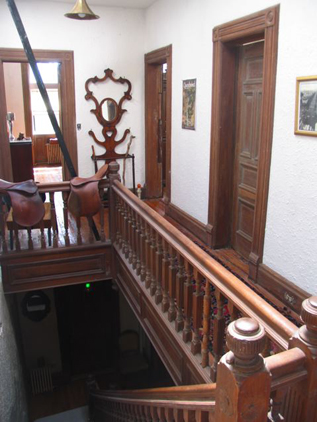
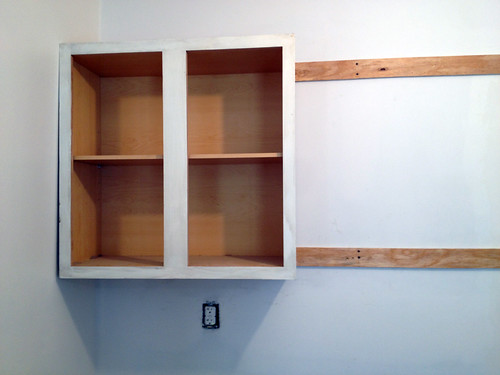
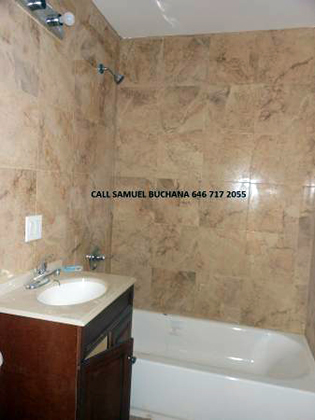
This was described as an “upscale townhouse”. I don’t even know where to begin. It wasn’t even upscale for 1975.

00J0J_bDusOsSCYyz_600x450

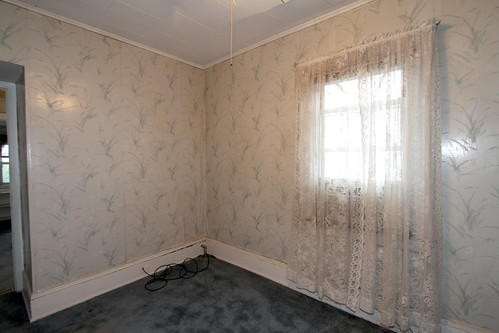
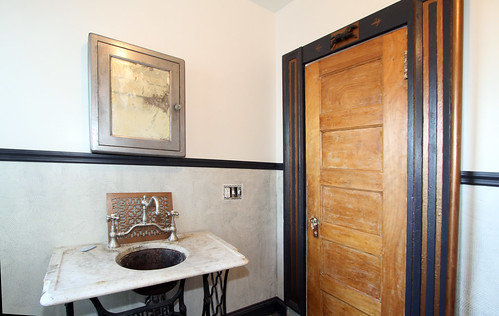
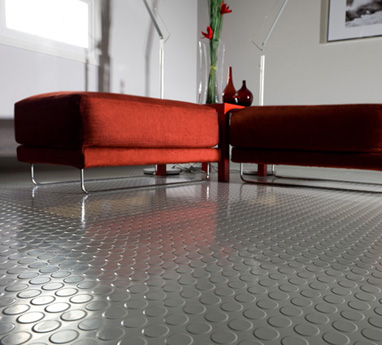
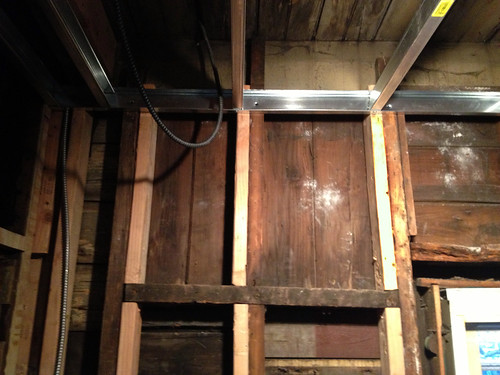
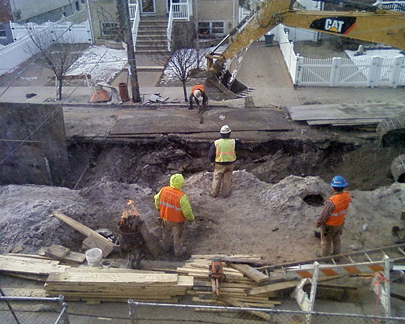
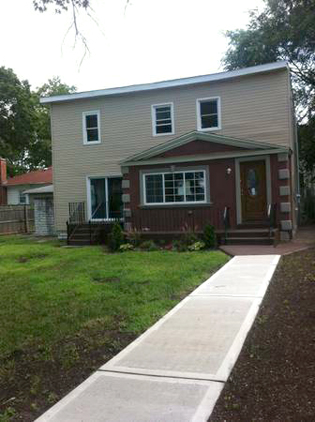
“Luxury brand new construction”

00707_6aCT6Md6WD7_600x450

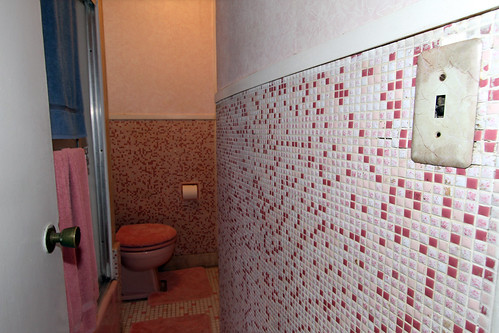
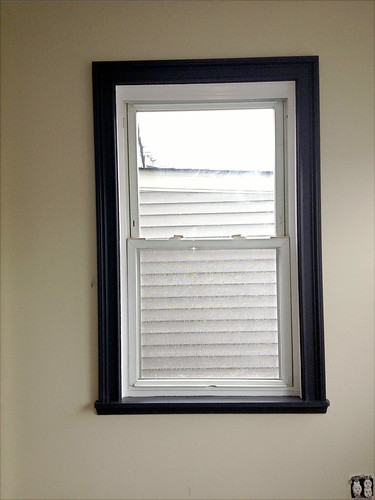
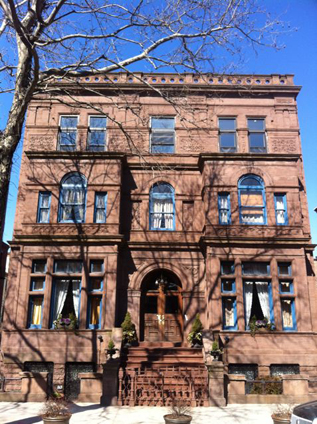
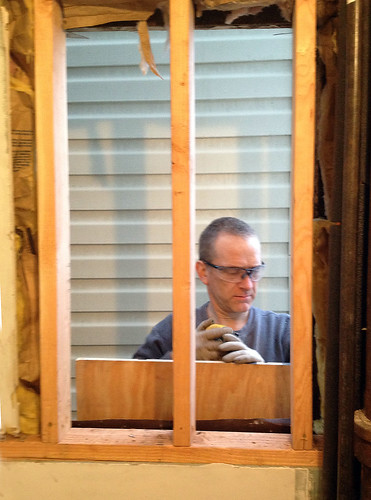
And the winner is… This “huge Victorian mansion. L-U-X-U-R-Y!!!!” Found on Craigslist. Right below this ad was another post, same text but with an image of a raised ranch. Neither photo depicts a luxurious Victorian mansion.

Occupied

Occupied published on

occupyourhome4250contrast

It’s been nearly a year since I started renovations on the Rockaway house. I can finally say that both apartments are fully occupied now and I get to have my life back!

The project was meant to be a flip that would take a few months. Ok, so it took a bit longer with some minor and major disasters. Lemme fill you in on my setbacks. May I?

1. Disaster One. Crappy contractors. I can’t even begin to imagine how badly contractors rip off folks who don’t know a thing about the renovation process. When pipes separate and fall inside the wall and paint starts to peel after a few days, you MUST know that shortcuts were taken, right? This is why I DIY. Unless you want to spend the big bucks on a high end licensed contractor who comes with a thousand percent positive referrals, be verrrry careful.

Slow contractors who didn’t know what they were doing, contractors whose work had to be done over cost me an extra month or two in the beginning (and throughout). A month that I might have been able to unload the house on some poor, unsuspecting sucker prior to….

2. Disaster Two. Sandy. Yes, Superstorm Sandy is listed second to bad contractors. Not that I would ever want for anyone to go through that again, but believe it or not, the combination of incompetent team members set me back worse than the worst storm of the century. All in all, I was lucky. Just basement damage and some siding. Some pocket change from insurance that helped pay for the new boiler. It wasn’t so much the money that got to me as it was the time and momentum that was lost. With an NYC gas shortage and no heat or power at the house, this would set me back close to 2 months.

3. Disaster Three. Oops. Wrecked my car. Well, that’s what we get for trying to spend New Year’s Day working on the house. Some dumb bitch ran the red light and next thing we know, the car was totaled. Another bad luck/good luck story: We walked away! Set back of about 2 weeks until I dealt with the situation and got another car to get over to the house. Remember that the trains were not running after the storm.

Ok, those were the major setbacks. What do setbacks mean? It means you can’t fold. You have to readjust the original plan. With the real estate market down in Rockaway after the hurricane, I knew I’d be stuck with the house for awhile and I’d have to rent instead of sell. On the plus side, I’ll be earning back some money I lost.

This could all be blessings in disguise. The universe works in mysterious ways. It fucks with you but for good reason. Putting me through tests? Hell yeah. Making me hang on to the house until Rockaway rebuilds stronger and better than ever, so my house will be worth a small fortune?

Let’s hope so.

Transformations

Transformations published on 1 Comment on Transformations

lr

What good is a renovation blog without before and after pictures?

The living room and bedrooms were mostly cosmetic but bathrooms and kitchens were gutted due to wood rot from leaky pipes and drains. I don’t think any of the original plumbing still exists in the house now.

kitchen

upstairs

pinkbath

A closet was taken down on the right side to add more width. A partition wall separating the toilet from the tub was also removed, letting the window light hit the rest of the bathroom.

downkitch

We totally flipped the first floor kitchen around. You’re not even looking at the same area, so technically it’s not really a before and after.

Apartment Two

Apartment Two published on 3 Comments on Apartment Two

tub

The Rockaway upstairs apartment is now ready for it’s (not so) close up! The original goal was to start showing by the end of May. (The original original goal was to have the house sold by the end of 2012, but we all know how that worked out.) Ok, so this new deadline was somewhat delayed due to the fact that I mistakenly decided to have a life and go away for Memorial Day weekend. But whatev. I’m back up to speed.

I wish every room could be as interesting as doing a bathroom or kitchen. Remember my original pink bathroom that I was determined to keep? Well, it has been resurrected! Still on the to do list: vanity pulls, scrape paint off door glass, lock set, stain saddle and a few other things that don’t show up in the photo.

kitchen

The decision to do a Mexican kitchen was born when I found the ceramic “terracotta” tiles at a Habitat Restore. The upper cabinets were there when I bought the house. Because of my not-so-great planning skills, the fridge, which was originally for the downstairs kitchen, was moved up here because it was too wide. It was meant to go on the opposite wall but proved too big for that also. I ended up tearing down some more cabinets to fit it in that corner. It works so much better there, but now I have to move an outlet. To do list: Move outlet, cabinet pulls, replace broken stove knob, switch plates.

livingroom

This is the living room. I stuck the chair in the photo because it looked so empty, but now it looks even more sad. To do list: Hang crystals from light fixture, re-coat window trim and inner white, switch plates.

frontroom

This is actually the small front room, but it looks bigger than the living room in this photo. It can be a second junior bedroom, an office or child’s room.

bedroom

The main bedroom is Manhattan sized also, but it has a room off of it with a closet that can act as a dressing room. Nothing at all interesting about this corner photo. I just wanted to show off yet another vintage light fixture.

Related: Apartment One

Here are some “before” shots…

IMG_8621

Front Room

IMG_8623

Living Room

IMG_8625

Kitchen

IMG_8629

Pink Bathroom

Apartment One

Apartment One published on 5 Comments on Apartment One

living1

Open living/dining/kitchen area.

One half of the two family Rockaway house will be liveable by June 1st! As in liveable for normal people, not someone like me who no longer notices lack of switchplates and doorknobs. The self imposed deadline was set for this weekend to take some pictures and start spreading the word. Although it’s ready for it’s close-up, it’s a few days from being ready to show. Show by next weekend? Yeah, probably!!

The entire house will be for sale or rent by the end of this month. I call it a two story bungalow. It’s a cozy (that means small in realtor speak) 2 BR over 1BR, just under 1000 square feet for the whole house. Gotta do some comps and math to come up with prices. The website will get started (but not finished) today.

I’m on a roll baby and it feels good!

arch

kitchen2

Yeah, that toe kick needs to be painted and stove needs backsplash.

sinkdoor

The old singer sewing machine base trick. A favorite of mine.

bedroom

Long, narrow bedroom in the back of the house. I want to work a little magic on those plain, white doors if I get the time.

IMG_8617

Kitchen area before.

IMG_8788

Living room during demo.

Nearing Homestretch, Another Setback

Nearing Homestretch, Another Setback published on

86501545_XS

Not my hand. Came from Livestrong article.

Ah, ’twas only a week ago that a renovation deadline was mentioned. I’m not one to be superstitious but perhaps I jinxed myself. Oh, I’m going to be finished in May, dag nammit, but I’ll be crossing that finish line with one hand.

Last Wednesday I purchased the remainder of molding to be installed upstairs. Oddly enough, what seemed like only a few rooms cost nearly $700. All of my time consuming shopping at re-use stores went out the window in the interest of finishing quickly. So, Thursday I start painting all the pieces prior to installation. If I had only invested in a second sawhorse, you wouldn’t be reading this post, but because I had to keep moving the pieces from the sawhorse to the other room to dry, these long strips of molding took over the house.

So, I tripped on one.

I caught my fall with my hands, the way people often do. Only my left hand landed on a piece of corner trim. Had it landed on a flat surface like my right, I doubt I would’ve been hurt.

It was extremely painful but more than anything I was bummed about not being able to continue work. I put an Amy’s frozen veggie wrap (all I had in the house) on it and took 3 Advil, then waited about an hour. Nah, I really had to stop working. Couldn’t even change my clothes because I wouldn’t be able to tie my sneakers with one hand.

Yesterday I managed to do some work. I filled nail holes and caulked. I even lifted things with my good hand. I was feeling good that I could keep going. This morning I’m in pain from overdoing it but I think I’ll just suck it up and soldier on. I’m convinced that it’s just a swollen bruise and nothing is sprained or broken. I know because I’ve been there and done that too.

BTW, I’m right handed. Who needs the left anyway? It’s just a spare.

Deadline: May

Deadline: May published on

kitchen

A renovation that was supposed to take about two to three months turns into a nine month process when all is said and done. There were unforeseen circumstances along the way, like the worst storm ever to hit the Northeast and a car accident that kept me away from the house for a few weeks. Those things set me back about three months or so, but I have no one to blame but myself for the rest of it.

Apart from spending my budget on some of the wrong contractors up front and having to redo some of their work, the real stagnation started after Sandy. I was in no rush to spend all my money and time on a house that nobody would want to purchase at the price I need to charge. Now that Spring is in the air and Rockaway is getting ready for the summer season, it’s a mad dash to the finish line.

The two apartments are very close to being finished. Now comes the tedious task of finishing work, making sure every small detail is in place. I should say that “small details” mean touch up repainting every room, a kitchen countertop, painting cabinets, bathroom vanity and installing all light fixtures. More than a day’s work, but we’ve come so far.

The exterior needs some prettying up, as does the basement.

Notice I didn’t mention a specific May deadline date. I’m hoping for the first week. Actually, between you and I, I’d like to see it done by the end of this month but I’m also trying to be realistic.

The house will be for sale or rent. I’m resigned to the fact that I will probably have to rent it for a year or two before Rockaway really bounces back. Doesn’t mean I won’t try to sell as that was my original intention, but the price I need to ask and where the market is at now are two different places.

But it’s all good. Either way, I’m going to take the summer off. A much needed break from the physical and toxic work called renovation. I’ll probably take that spare time to work on my Bed Stuy house. D’oh!

PS: About the photo above. It looks like a “before” shot, but believe it or not, that’s a progress shot. The floor is tiled. The cabinets are installed but not painted. The dishwasher and radiator are hooked up. It’s come a long way from the partially gutted room it was.

Connecticut Salvage

Connecticut Salvage published on 1 Comment on Connecticut Salvage

carousel

On the road again. Looking to pick up the last of the building materials this week as Passover week is going to be a non-stop work fest bringing us closer to Renovation’s End.

Have ye ever been to United House Wrecking? If not, you shouldn’t be waiting. This is the kind of place that makes me so sad that I live in a silly little brownstone and not a mansion or huge loft. I mean, check out the carousel above. Who wouldn’t want a carousel in their living room?

UHW has some top of the line architectural salvage. Stained glass, mantels, newell posts, doors. They have been sifted through and all are in good shape. This is where you go when you don’t feel like spending hours restoring the inexpensive stuff. That’s not to say the prices are outrageous here. They are not shocking at all. I saw some decent sized stained glass windows for $150 and a really nice antique chandelier on sale for $500.

shuffleboard

United House Wrecking isn’t just salvage. They do antique and reproduction furniture and design as well. Everything is staged so perfectly. A card table with a poker game already laid out, a bar, a child’s room, a mid-century living room that’s to die for. It’s kind of like ABC Carpet but without the cray-cray prices.

stereo

The Housatonic Habitat ReStore (Danbury) is 20 miles or so north of UHW. As with all restores, it’s hit or miss on what is needed that day. Yesterday I was in search of tiles because I remembered them having a bunch of awesome Waterworks ceramic. They did have the Waterworks and it was a lovely blue, except I need pink as I’m determined to keep the pink bathroom in the house as it was originally (well, when I bought it, anyway).

While I was there, an estate of some great Chinese furniture was coming in. Some real antique pieces mixed in with a few modern day made in China.

I loved this credenza that houses a stereo system. The side with closed door has room for a bar or record collection. The price was around $150 until the engineer comes around to get that system working and then it goes up.

Today I hit New Joisey.

Goodbye Rosin Paper. Hello Rubber Tiles

Goodbye Rosin Paper. Hello Rubber Tiles published on 1 Comment on Goodbye Rosin Paper. Hello Rubber Tiles

installation

The old standby in renovation floor protection is rosin paper. There are so many drawbacks though. It gets dirty, it tears, it’s time consuming to put down and worst of all, it really doesn’t protect the floors all that well.

Back when I actually had a crafts room in my house, I bought some interlocking rubber tiles at Lowes to protect my hardwood floors. I’ve since gotten rid of the work room (It’s now just a junk room that dreams of one day becoming a dining room.) so I took up those tiles and brought them to the house that’s under renovation.

Sure, the initial investment costs way more than some paper but if the renovation is going on long enough that you have to keep changing the paper or if you’re doing multiple renovations, I say it’s worth it.

The tiles can be washed or mopped so you don’t have to live with the dust. They are water proof apart from the seams. They’ll last forever and they’re totally reusable. No need to install them around the whole house. Just pick them up and take them from room to room as needed.

I purchased Flexco (shown above) because I wanted it to look good in my house but there are less expensive tiles out there if design doesn’t matter.

Before and After Windows

Before and After Windows published on

window4

Remember when I was bitching about how time consuming the finishing work is? Well, tada! The windows are finally done!

Can’t find the real “before” shots. Those would be initially clam shell molding with wood paneling. Then there was no molding with new sheetrock. Ok, so fast forward to dirty, uncaulked windows with 1 coat o’ paint molding. That would be the photo above.

window1

And this would be the “after”. Shush, I know there’s still touch up to do on that uneven line, but I swear I’m impressed with my cutting in skills. Never use tape. My hand is steady, Freddy.

window2

So, when it’s not so steady (see mark on wall, left side of window) nothing a little touch up can’t fix.

Rebuilding Gutted Rooms

Rebuilding Gutted Rooms published on

mud1

It’s been six months since renovations started on the Rockaway house. Yeah, I thought I’d be finished within three. Although most of the big, nasty damage was dealt with immediately, I ignored the worst problem until recently.

The rear deck was built into the house without thought of water infiltration. One stair stringer was supported by the house with vinyl siding cut around it and caulking to fill gaps. Gutters on the second floor were not properly cut and pulled away from the siding. Both the first and second floor rear mudrooms had mold and wood rot.

It’s not that the problem was ignored so much as put off. The two rooms were gutted and the deck was repaired to a point months ago. The tough thing was figuring out what to do with those stairs that were part of the house. Just patch it up the way it was?

Nah. Here’s where I needed an experienced company to come in. This wasn’t a DIY or jack of all trades handyman job. After a few phone calls, I went with Topline who does windows, siding and doors. We agreed that the best thing to do would be to take the stairs out completely and redo the entire back wall of siding and gutters, then rebuild self-supported stairs.

skylight

(Funny story. I left the room for 10 minutes and my husband created a “skylight”. Totally rotted ceiling/side replaced.)

But this isn’t about the vinyl siding or deck stairs. This is about the two mud rooms that can finally be dealt with because there are no longer leaks.

The entire house was not gutted. Probably should have been, but there were things I wanted to salvage, such as the floors. Anyway, whatever WAS gutted, we took great pains to repair properly.

What does that mean? It means replacing rotted wood. It means adding extra support where there wasn’t any before, including wall studs and flooring joists. It means new insulation.

It’s almost easier to rip everything out and start from scratch but if I did that, I would have to call this blog “Newly Renovated Home” rather than “Reclaimed Home”, now wouldn’t I?

Construction Exchange

Construction Exchange published on

IMG_0022

Contractors can eat away at a renovation budget until there’s hardly anything left for materials. Wouldn’t it be a great idea to have a barter system? The idea itself isn’t new to me. I’ve often said “I wish I can find a decent contractor who needs a place to live while working on my house.”

Decent being the operative word. I’ve seen Craigslist barter ads from hacks who probably couldn’t get real work anyway.

Enter Ben Erickson. I received an email from the furniture designer/builder saying he will be looking for a new place to live and work within the next year. He currently has a five year lease at one of the most gorgeous mansions in Bed Stuy and with a year left to go, he’s planning ahead.

IMG_7658

247 Hancock

Ben’s current situation is as follows: “Four years ago, as some of you know, I gutted and renovated the top floor of this very unique freestanding brownstone at 247 Hancock St. in exchange for reduced fixed rent on a 5 year lease. I invested approx $60,000 upfront and we divided that over the 60 months of my lease. The landlord and I assessed the current market value of the apt at $2250 and simply subtracted the $1000/mo. making my rent $1250. “

So, what makes Ben different from these Craigslist guys? Um, he’s got mad skills. Check out his website.

This time around Ben would like to work on a raw loft space. He seems really into Bed Stuy but perhaps he would consider other neighborhoods if it’s the right project.

Know of anything?

IMG_0138

DIY: Installing Kitchen Cabinets

DIY: Installing Kitchen Cabinets published on

cabinets

Materials:

Level
Pencil
Screw Gun
Tape Measure
Stud Finder
Clamps
3½” long cabinet screws for cabinet to wall
2¼” trim head screw for cabinet to cabinet

cabinet1

*The cabinet is level but the wall isn’t.

1. Measure. Start from the bottom up. A standard base cabinet including the counter is about 36″ high. You want at least an 18″-20″ backsplash. So we’re talking setting the bottom of the wall cabinet at 56″.

2. Mark it and level. In an ideal world with perfectly level floors, I’d tell ya to measure left, right and center for that 56″ and draw your mark with the level. It’s good to do that anyway, but the level overrides the measurement. For instance, my floor had 1/2″ settlement on the right side so we had to shim up the base cabinets. Unfortunately, because the ceiling isn’t level either and the cabinets are, that slopey ceiling is pretty noticeable, but whatcha gonna do?

3. Find the studs. Maybe the guys helping you are studs, but I mean the ones in the wall. You can buy an electronic stud finder but they don’t always work 100%. If the walls are sheetrock, it’s sometimes possible to see screws and tape if there isn’t tons of paint. Also look for the outlets as they are usually screwed into a stud at the side. If all else fails, knock on the wall. Studs should be 16″ apart so if you find one, there is a good chance you can measure 16″ for the next one. Our crazy house was 24″ so we had to add extra support.

4. *Adding support* You need to take this step if your studs are too far apart. What we did was take two strips of plywood cut about 2″ wide and screw them into the length of the wall. Make sure they are fully secured to the studs. Now these strips will take the weight of the cabinets along with the studs.

5. Hang the cabinets. There are two ways to go about this. First way is to screw in a temporary ledger board just under the level line so you can rest the cabinets on it as you’re about to screw them in. Take the first two cabinets and screw them together. You’ll want to clamp the front of them together and make sure they are plumb and level. The second way only works if you have more than two people. Forget the board and hang one cabinet at a time, leveling and plumbing them up as you hang them. I say three people because it will take one to screw the cabinet and two to hold it up and check the level.

A few tips. It’s a good idea to pre-drill holes. Make sure to secure the cabinets at the thickest point. I hope you’re not trying to do this with the doors still on. I also hope you know that you should do the wall cabinets before the base.

6. Base cabinets. Well, this is a breeze since you don’t have to hold them up over your head. As mentioned earlier, not all floors are level so let’s assume yours is not. Start from the highest point to make your level mark and then you can always shim up. You’re pretty much going to follow the same directions as the upper cabinets. Just keep in mind that your sink base needs to be aligned with the plumbing and holes should be drilled before you install. (Duh)

Good luck!

It’s Always Something in Rockaway

It’s Always Something in Rockaway published on

536937_10151373619379687_715609234_n

It’s always something. If it’s not one thing, it’s another. Rockaway has been through Sandy and the ongoing aftermath. Now the streets are being ripped up to install what I assume is new sewer lines. Totally not complaining about upgrades! If they are needed, then of course we should all be grateful.

It’s just sort of bad timing, is all.

Take yesterday for instance. I had a guy coming to reglaze a clawfoot tub in the morning, then I was going to buy a bunch of molding and studs for the house.

Guy starts stripping tub and sez he worries it won’t be warm enough to paint. I try to turn the heat up but wait…what happened to the heat? So, I borrow an electric heater from the neighbor so tub guy can get started and I begin the quest for firing up that boiler.

Batteries in thermostat are ok. I go outside to ask the crew digging up the street if they shut gas lines. No. Go back in to see if I have hot water. No water at all. Go back out to ask if they turned off water. No. “But your pipes may be frozen.” Let me say here that they were very helpful! Came in and told me they would put a torch on my lines to heat them up. I said I can do it with the heat paint stripper. So, Miss Wit and I sat there like schmucks in the freezing basement for nearly an hour heating the pipes. Nothing.

Here’s where I have the problem. Just like the plumbers who installed my boiler and couldn’t admit there was a gas leak (even though they actually fixed it), these guys would never acknowledge that they made a boo-boo. “Oh, it’s doubtful it’s on our side. We insulated the pipes as soon as we dug up the trench.” Finally, they knock on the door and tell me to keep my water running because they are starting to heat the main line coming into the house. Viola! Five minutes later I have water. And heat.

So, day wasted running around trying to get heat. Finally got to pick up some molding. Had to park in the middle of the torn up street up the block and run it into the house. Thankfully, Miss Wit was there to help.

Although this renovation definitely has more hiccups than any of my others, the whole episode yesterday was kind of just another day in the life of renovations. Unfortunately.

And yet. I live for this stuff.

Closing Up Windows

Closing Up Windows published on

Lukewindow

Light is one of the most desirable things a home can offer. You may ask why someone would want to close up a window. I believe I can answer that now since we actually got rid of not one, but two windows this weekend.

First of all, both windows had a view of the neighbor’s vinyl siding two feet away. It’s my guess that the neighboring house was built after our 1920 2 story. But we didn’t close up the windows because we were appalled by the view of ugly siding.

One window was in the kitchen. At first, there were thoughts of extending the counter and putting in a smaller window. That could have worked. Then we were like “Wait. Why not get rid of the window completely?” We opted for more cabinets instead of a bit of light, making this tiny kitchen that much more practical.

sheetrock

*Don’t look at my bad taping job. It will be covered by cabinets!*

The second window was in the bathroom. A small window looking out, again, on to the neighbor’s siding. There is a normal sized window right next to it with an unobstructed view of the bay. The sheetrock was already finished but this small window looked totally weird butted up against the wall built around the pipes and sewer line. When we took said sheetrock down to let the plumbers get at the gas lines they were replacing, we thought that was our window of opportunity (You like how I did that there?) to make this area look less…what’s the word I’m looking for?….stupid.

The window in question sits behind the bathtub. I was thinking about some built in shelves which still would have looked uneven. Then hubby was like “Eh, what if we get rid of this one too?” Fine.

So, what’s the process of taking away a window? Skipping over the DOB legalities and heading right over to the how-to: It’s not as bad as I thought. Of course, it was Hubby doing all the work. And I should let you know that you shouldn’t try this if you don’t consider yourself a handy person. Bottom line is that you need to know what you’re doing enough to keep the moisture out of your house or you’re opening up a world of problems.

1. Take out rotted wood (in our case) and re-frame. Oh yeah, take out window first. Duh.
2. Build studs.
3. Plywood exterior side.
4. We have vinyl siding on this house so in this instance it’s plywood, tar paper, rigid insulation and siding. If you have brick or brownstone, it’s more skilled. Eh, chances are you’re in an attached house anyway and don’t have to worry about it.
5. Interior. Insulate between studs.
6. Sheetrock.
7. You know the rest. Tape, paint, done.

Primary Sidebar