Skip to content

Repainting Kitchen Cabinets

Repainting Kitchen Cabinets published on 1 Comment on Repainting Kitchen Cabinets

0708-table-illustration

We get a lot of calls asking if we repaint kitchen cabinets.  Although our specialty is to apply fun designs and finishes, pretty much everybody just wants a solid color.  Yeah, we do that too.  As DIY people, we’ve done this on homes we’re renovating and it’s worked out great.  As “contractors” who charge for this service, we have to be waaaayyy more meticulous about the job.

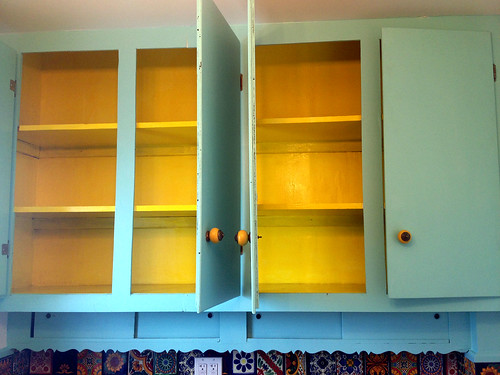
Let’s be honest here. Painting cabinets the correct way is a pain in the arse. The right way means taking off that gloss completely and furthermore,  it’s best to sand it right down to bare wood.  Going from a dark to light color, any raised panels and holes need to be caulked or they’ll show up against the new bright color.

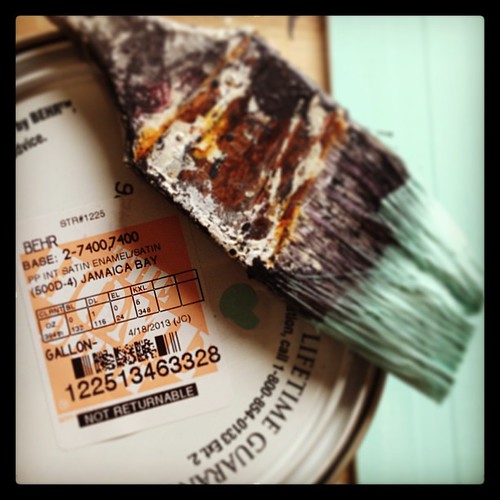
Although we often work with water based finishes and then polyurethane over them,  oil based paints are really the way to go for solid colors.  So dry time is overnight, which also means that the painting/drying area needs to be completely dust free.  That is, after you create dust by sanding between each coat.

Is it a DIY job that you can do for a couple of hundred bucks?  Can it be done quickly and easily?  Sure!  If you’re up for it, put aside a room where you can set up saw horses for a week. Cheater way….Use deglosser and/or sand it enough so that there’s no shine. Go with water based paint and shellac primer. Don’t bother sanding between coats. Will it look professional and last?  It will look good enough for the dough you’re saving and last a few years.

There’s a Rustoleum refinishing kit that gets mixed reviews from commenters over at Retro Renovation.

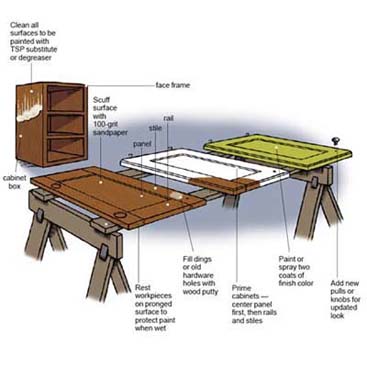
As with any project, if you’re bothering to hire someone, make sure they are doing it right.  Otherwise just do it yourself. Here’s a step by step guide from This Old House.

Reclaimed Kitchen Islands

Reclaimed Kitchen Islands published on

4078ca8b7d7afa0b63c0bc94b47a8176

Sometimes a kitchen island is the working hub of the cook’s room, including stove and sink, but sometimes it’s just a bit of extra counter space. Islands are a great option for kitchens that aren’t quite big enough to be eat-in. Stick some stools under that counter and call it a day!

I pulled some pretty pictures for y’all. Ok, for me. I’m thinking of putting in an island. To dish out my restaurant deliveries.

1db39d610f69451a9a300e17c61a516f

Build it from scratch with some reclaimed lumber.

645fe7c3073b48fabe0d2830685ce099

Looks as if the wood counter legs can be tucked away and perhaps counter can swivel on top of other?

4b054a80d27a67dfbfafa09790840d1f

Awesome and way too easy. Of course, it need not be an island.

haynes-roberts-8 copy

Yes, those are antique iceboxes being used as the base. Yes, that kitchen is massive.

4a5d2cd15807588a7a77afe8e316f17d

Lookit. ANYBODY can do this. You don’t need skills. M’kay? And it’s a friggin’ fantastic idea.

Shatter Proof Wine Glasses

Shatter Proof Wine Glasses published on 1 Comment on Shatter Proof Wine Glasses

glasses

This household does not have a good history of retaining wine glasses. In fact, we go through them as if they are disposable. Luckily, a six pack of Ikea wine glasses cost only a bit more than a grande latte, so it hasn’t put us in the poor house just yet.

But let’s face it, breaking glass is not only annoying, but going through so many glasses is not eco-friendly. So, I’m thinking of foregoing the Ikea and investing in proper unbreakable glasses. When I say proper, I don’t mean plastic. And when I say plastic, I don’t mean party glasses you get by the package at Costco. They do make high end shatter proof wine glasses out of plastic that look gorgeous online, but I just can’t.

So, glass. Not many options, but I did come across a couple.

Hercuglass claims to be five times more shatter resistant than regular glass. Notice that nobody is saying “unbreakable”. The glass making process is related to that used to strengthen aircraft windshields and iPhone covers. Prices are not bad at all. Well under ten bucks per glass. I can live with that. Plus, many of the styles are made in the USA.

The Korin Ion Strong wine glasses are manufactured in Japan and meet European standards. There is only one distributor in the US which is probably why a set of six will set you back $150. Still, if they last a good many years and offer prevention of slitting your big toe on a piece of broken glass, perhaps it’s worth the splurge.

Priced right down the middle is the Schott Zwiesel series of wine glasses. This Tritan lead free “crystal” design uses titanium in the strengthening process. This is a German based brand and let’s face it, those Germans know how to make a good product. Priced at $60 for a set of 6 online, they also sell for slightly more dough at retail outlets such as William Sonoma and Pottery Barn. The wine tumblers are under $50 and they will probably last twice for those clumsy folks who knock over the stemware.

Check out this Dr. Vino article for some more options and reviews.

Cabinet Interiors

Cabinet Interiors published on

intcab

The kitchen cabinets that remained in place during the entire renovation got a fresh coat of paint on the outside. But ah, the interiors were still nasty. They were skimcoated and primed but that still wasn’t doing the trick.

Why yellow gloss? I had it in the house. It looks soooo much for fabulous than boring ole’ white. And it totally goes with my Mexican theme.

Oddly enough, I came home last night after painting and prepared fajitas for dinner.

Mexican Tiles

Mexican Tiles published on 2 Comments on Mexican Tiles

kitchen3

The Mexican kitchen in apartment #2 is coming together! Backsplash by eBay. $60 including shipping.

I decided to go Mexican when I found fake terracotta (ceramic) floor tiles at a Habitat for Humanity. FYI, 25 bucks. But then I ran out of them. Oops. Anyway, that set the theme for the entire kitchen.

The eBay tiles are mismatched, as you can see. Included in the box of 100, there were about 3-4 design repeats. Some are meant to be patterns that make up a single design but that design can’t be completed. Because they are handmade, none of them are the same size, which makes for uneven grout lines.

If consistency and perfection is your thang, these tiles ain’t for you. If you likey, just punch in a “Mexican tile” search on eBay and you’ll have a nice selection to choose from.

There are also these Mexican tile resources from an earlier post.

kitchen1

Jamaica Bay Turquoise

Jamaica Bay Turquoise published on 2 Comments on Jamaica Bay Turquoise

Jamaica Bay turquoise for a kitchen overlooking Jamaica Bay.

The upstairs apartment kitchen in Rockaway House has a Mexican theme going on. I wanted to paint the existing cabinets turquoise. Knew I found the right color when I came across “Jamaica Bay”. The window looks out onto the bay.

Perfect.

Yeah, I know this is a lame post. I’m obsessing about the Boston marathon bombing manhunt just like you. Who cares about paint??

DIY Concrete Countertop

DIY Concrete Countertop published on 6 Comments on DIY Concrete Countertop

final

Back in December I did a post about DIY concrete countertops. The method doesn’t involve any complicated pouring of concrete so I decided to give it a shot. Whaddya think? Not bad.

The photo above was taken before the sealer was dry so any dark areas you’re seeing are actually still wet. Also, pay no attention to the dirty sink that had been sitting in the backyard since the hurricane.

Would I recommend the Ardex Feather Finish that my husband said was basically thin set? Yes. For 30 bucks including shipping, I got myself a new counter and backsplash. The 10 pound bag wasn’t quite enough to smooth it out completely so I’d suggest getting more. I left the backsplash decidedly rough (I decided that I couldn’t be bothered) and the counter wasn’t completely flawless. This material can be sanded but again, because I didn’t have extra on hand, I didn’t want to go crazy sanding it.

I applied three coats of Ardex and three coats of Aqua Mix sealer, letting them dry thoroughly each time. Does this take any less time than pouring? No, but if you don’t feel like building the form, this is easier.

surface

Started with plywood and hardibacker.

1coat

First coat. Thought this would never disappear but it was gone once dry.

countersplash

Pre-sanded second coat. The counter is much smoother now but I left the lines and patches in the backsplash. Even thought it would be a cool idea to add fossils! But I didn’t have any on hand. Next time.

DIY: Installing Kitchen Cabinets

DIY: Installing Kitchen Cabinets published on

cabinets

Materials:

Level
Pencil
Screw Gun
Tape Measure
Stud Finder
Clamps
3½” long cabinet screws for cabinet to wall
2¼” trim head screw for cabinet to cabinet

cabinet1

*The cabinet is level but the wall isn’t.

1. Measure. Start from the bottom up. A standard base cabinet including the counter is about 36″ high. You want at least an 18″-20″ backsplash. So we’re talking setting the bottom of the wall cabinet at 56″.

2. Mark it and level. In an ideal world with perfectly level floors, I’d tell ya to measure left, right and center for that 56″ and draw your mark with the level. It’s good to do that anyway, but the level overrides the measurement. For instance, my floor had 1/2″ settlement on the right side so we had to shim up the base cabinets. Unfortunately, because the ceiling isn’t level either and the cabinets are, that slopey ceiling is pretty noticeable, but whatcha gonna do?

3. Find the studs. Maybe the guys helping you are studs, but I mean the ones in the wall. You can buy an electronic stud finder but they don’t always work 100%. If the walls are sheetrock, it’s sometimes possible to see screws and tape if there isn’t tons of paint. Also look for the outlets as they are usually screwed into a stud at the side. If all else fails, knock on the wall. Studs should be 16″ apart so if you find one, there is a good chance you can measure 16″ for the next one. Our crazy house was 24″ so we had to add extra support.

4. *Adding support* You need to take this step if your studs are too far apart. What we did was take two strips of plywood cut about 2″ wide and screw them into the length of the wall. Make sure they are fully secured to the studs. Now these strips will take the weight of the cabinets along with the studs.

5. Hang the cabinets. There are two ways to go about this. First way is to screw in a temporary ledger board just under the level line so you can rest the cabinets on it as you’re about to screw them in. Take the first two cabinets and screw them together. You’ll want to clamp the front of them together and make sure they are plumb and level. The second way only works if you have more than two people. Forget the board and hang one cabinet at a time, leveling and plumbing them up as you hang them. I say three people because it will take one to screw the cabinet and two to hold it up and check the level.

A few tips. It’s a good idea to pre-drill holes. Make sure to secure the cabinets at the thickest point. I hope you’re not trying to do this with the doors still on. I also hope you know that you should do the wall cabinets before the base.

6. Base cabinets. Well, this is a breeze since you don’t have to hold them up over your head. As mentioned earlier, not all floors are level so let’s assume yours is not. Start from the highest point to make your level mark and then you can always shim up. You’re pretty much going to follow the same directions as the upper cabinets. Just keep in mind that your sink base needs to be aligned with the plumbing and holes should be drilled before you install. (Duh)

Good luck!

Tiny Kitchens

Tiny Kitchens published on

No space? No problem! There are some awesome design for tiny kitchens. The lime green tiny kitchen above was designed by Miles Redd right here in New York! It’s both functional and wayyyy cool.

This circular kitchen by Compact-Concepts sort of looks like a public restroom when the doors are closed. (Note to self: Public restroom in home would be kind of suh-weet.) The German company doesn’t seem to have a dealer here in the US.

Under the stairs. Of course, there are no cabinets so you would probably be ordering lots of take out. Fine by me! Via Pinterest.

Via Apartment Therapy.  I don’t care if it’s functional or not. It’s turquoise.

The Appliances Are Here!

The Appliances Are Here! published on

stove

The Rockaway house is a two family, so one of my biggest budget concerns has been the purchase of appliances times two. AJ Madison has been my appliance source for a few years now. There are always running good deals and they will deliver and haul away the old.

I got away with one kitchen of all stainless for under $2000. That includes the fridge, stove, dishwasher and over-the-stove microwave exhaust combo. The microwave makes sense when you consider it’s not that much more than just a fan. I figured we would save ourselves some money on take out during renovations. No, we won’t be using the stove. Let’s not go nuts.

refrig

My only disappointment was with the shorty refrigerator. Purchasing online, one has to remember to look at the dimensions. I looked at the width and assumed I was buying a standard size fridge, but it’s actually shorter than me. And I’m short! At the end of the day, who the hell needs a huge refrigerator for a one bedroom apartment? Plus, the smaller, the more efficient. Right?

dish

Well, those were the brand new Energy Star appliances for the downstairs kitchen. While at Build it Green one day last week, I did spot this second hand dishwasher which I purchased for upstairs for a mere 25 bucks. It’s returnable if it doesn’t work but I’m ready to accept the loss as it’s not worth $25 to schlep it back to Astoria. Fingers crossed!

Antique Kitchen Cabinets

Antique Kitchen Cabinets published on 11 Comments on Antique Kitchen Cabinets

There’s no need to spend $3000 on cheapo Home Depot cabinets or $20000 for nicer ones that still look like dreck. Get yourself to an antiques shop or flea market and buy some mismatched pieces of history for your kitchen!

Can’t you see an entire red-cabinet kitchen to match the single painted piece above? Or how about multiple colors? You can have similar styles co-exist with just a few coats of paint and some matching hardware. Tip: Make sure it’s a durable paint or seal it with poly as this is for everyday kitchen use.

Ok, so this one isn’t dirt cheap flea market price, but it’s not easy to find a Hoosier with matching side cupboards. It retails for $3975 at an online antiques shop.

There’s a whole story behind this old hutch. You can read about how it was saved from certain death at Bearfort Lodge.

Need some spice storage? This antique Chinese apothecary doesn’t come cheap at $4500 but it will surely be the centerpiece of you kitchen. A less expensive and almost-as-cool alternative for spices might be a library card catalog that can be picked up for a few hundred bucks.

Keep in mind that vintage mid century cabinetry is pretty awesome and you can pick up entire sets, but this post is about ANTIQUE, not vintage. Just so you know.

Kitchen Cabinet Kings

Kitchen Cabinet Kings published on

First a disclosure. Kitchen Cabinet Kings is a paid advertiser.

Ok, now we can talk.

Kitchen Cabinet Kings is based in NYC although they are strictly online. No showroom means low overhead which mean lower prices.

The website is easy to navigate, but what I like best about it is that the pricing AND estimated shipping charges are right there for all to see. Ah, how I remember buying my first new kitchen cabinets years ago. I thought it would be a few hundred bucks. How naive. After sitting down with the designer at the first of many showrooms I visited, I nearly had a heart attack. The cabinets I wanted would cost $20k! Needless to say, I didnít go with those. But the point of my story is that this sticker shock is probably something that happens to every first time kitchen renovator. Cabinets or your kidís college fund?

So, Kitchen Cabinet Kings is affordable. Nice. Now, how about their designs? All of their cabinets are plywood construction, no nasty MDF or particle board. Iím kind of fond of ìThe Tribecaî style pictured above with ìMocha Shakerî coming in a close second. The door styles are listed on the site with prices. The company also partners with Kraftmade which cannot be bought online. Oddly enough, Kraftmade was my affordable cabinet of choice all those years ago for that less than $20k kitchen I mentioned. It came in at under $3000.

So, peruse the website my friends. Support someone who supports this blog! Check out the design center and the Kitchen Cabinet Kings Blog that gives tips right on down to choosing your dinnerware.

Oh, PS: They do bathrooms too.

Design-A-Kitchen

Design-A-Kitchen published on 2 Comments on Design-A-Kitchen

New advertiser alert! Show Cliq Studios some love and visit their awesome page for tips and how-to’s. Then buy some kitchen cabinets from them.

Seriously, it’s not a simple task to plan out an entire kitchen. As much as I love to use recycled materials, if you want a specific layout and design consistency, it’s best to go with brand new cabinetry.

The Cliq website has a remodeling guide for first timers. It starts out with design principles and covers layout, budget and everything up to installation. There are designers available to chat if you get confused.

Personally, I’m liking the painted cabinets. In particular, that black and the sage are pleasing to my eye.

A black kitchen. Dude, that’s so goth.

Primary Sidebar