Skip to content

Weekend Fixes

Weekend Fixes published on 1 Comment on Weekend Fixes

IMG_0132

So? How was your Thanksgiving weekend? Did you sit around and eat or catch up on some much needed work around the house? We got to check off some lil bits of renovation here at Casa Reclaimed Home.

Over a year ago, our cats tried to kill us by starting a fire. It was behind an old kitchenette counter from our pied a terre days that we were going to remove anyway. The burnt wall sat that way for, oh, a year. Then we finally took the outlet out and re-sheetrocked.

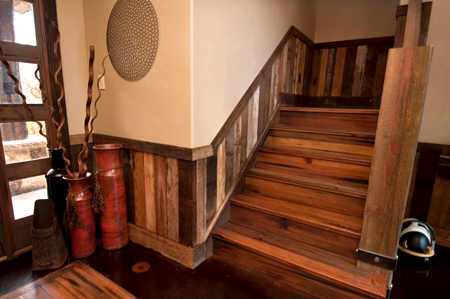
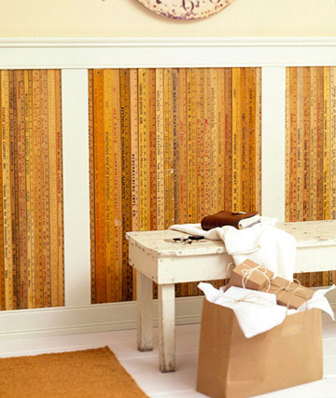
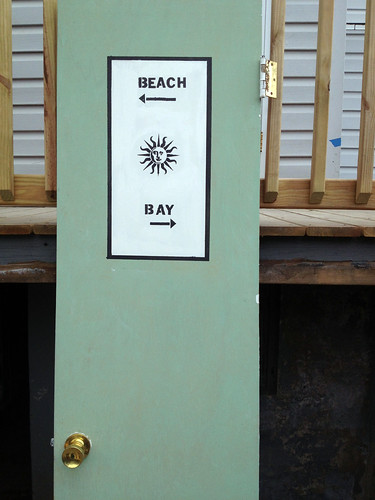
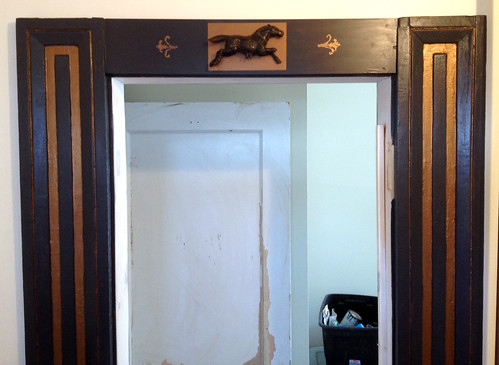
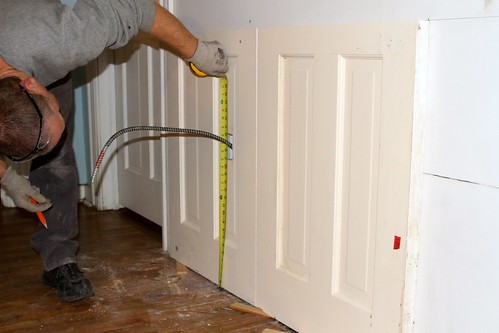
This weekend we got around to matching the wainscoting in the rest of the room. Ok, so it doesn’t match but we made something much cooler.

photo

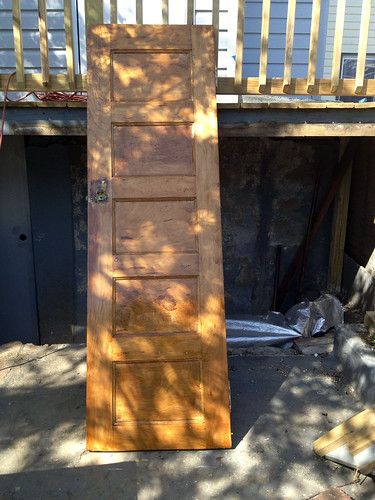
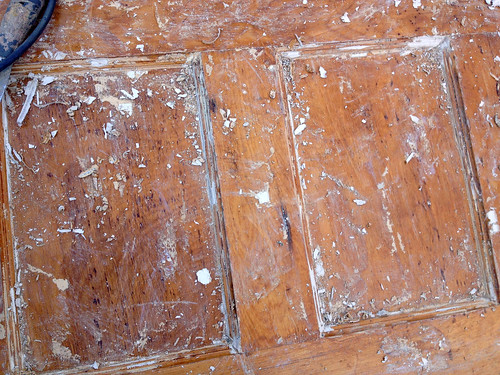
We used a couple of old doors for the wainscoting. A DIY tutorial will be posted once the molding is finished and all is patched and painted, but you get the idea. Basically, cut the doors in half and line them up. Bam! There’s your tutorial.

photo 1

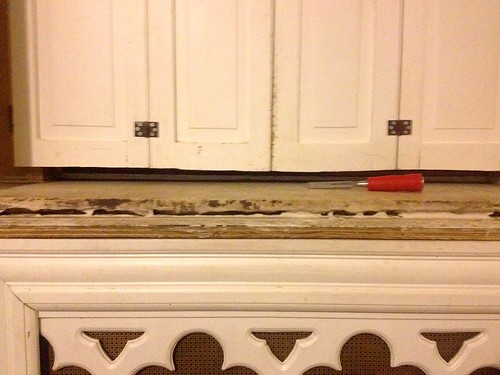
Our marble window sill was left half finished exactly two years ago. All that was left to do was to add a piece of molding to the front. Cutting, nailing and gluing the trim took all of 10 minutes after two years of contemplation.

photo 3

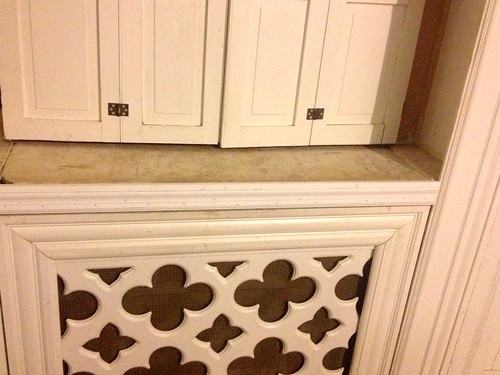
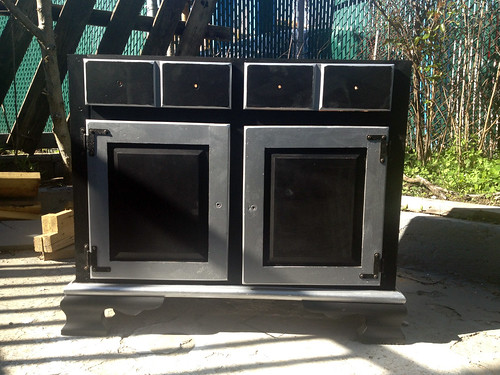
BTW, here ya go, in case you missed the tutorial on the window radiator enclosure.

It will probably take another 2 years to fill nail holes and touch up.

Not Rubbish!

Not Rubbish! published on 2 Comments on Not Rubbish!

photo

Ugh. An entire dumpster full of solid wood school doors went into the landfill on Saturday morning. I passed by with my dogs, snapped this shot, texted a salvage buddy to alert him of it, but 20 minutes later, the dumpster was being taken away and not one door was saved.

They may not have been the nicest doors for home usage, but they weren’t garbage. They would have made decent coffee tables. Or even office doors. Why just throw them away?

This happens everyday, everywhere. Next time I’ll be prepared.

Reclaimed Kitchen Islands

Reclaimed Kitchen Islands published on

4078ca8b7d7afa0b63c0bc94b47a8176

Sometimes a kitchen island is the working hub of the cook’s room, including stove and sink, but sometimes it’s just a bit of extra counter space. Islands are a great option for kitchens that aren’t quite big enough to be eat-in. Stick some stools under that counter and call it a day!

I pulled some pretty pictures for y’all. Ok, for me. I’m thinking of putting in an island. To dish out my restaurant deliveries.

1db39d610f69451a9a300e17c61a516f

Build it from scratch with some reclaimed lumber.

645fe7c3073b48fabe0d2830685ce099

Looks as if the wood counter legs can be tucked away and perhaps counter can swivel on top of other?

4b054a80d27a67dfbfafa09790840d1f

Awesome and way too easy. Of course, it need not be an island.

haynes-roberts-8 copy

Yes, those are antique iceboxes being used as the base. Yes, that kitchen is massive.

4a5d2cd15807588a7a77afe8e316f17d

Lookit. ANYBODY can do this. You don’t need skills. M’kay? And it’s a friggin’ fantastic idea.

Reclaimed Wainscoting Ideas

Reclaimed Wainscoting Ideas published on 2 Comments on Reclaimed Wainscoting Ideas

DSC_0526_1

Wainscoting breaks up a room and adds dimension to otherwise flat walls. Who says you have to buy wainscoting at your local big box shop or even use “wainscot” at all? There are plenty of materials that can be used to liven up those walls.

Good ole’ reclaimed boards will do the trick. Sure, tongue and groove would be more solid but you gotta work with what you’ve got. If what you’ve got are a bunch of old boards, go for it!

CTH621331.jpg.rendition.largest

Probably a tedious job, but the end result pays off. These vintage yard sticks are pretty ingenious.

a433db450ca69fa5039f72d69234cd06

Corrugated metal is THE way to go for an industrial look. Perfect for damp basements where one worries about mold. Rust isn’t as deadly. 😉

0df9212721395a48688bd60ff9b90292

Ok, so this wainscoting idea is made from new materials but you get the picture. Let’s say those iron scrolly objects can be any found material. They don’t have to be the same object either. What if each frame included a unique three dimensional object? What if it wasn’t three dimensional at all? Just frame different images or paint techniques? Maps? Collage? The possibilities are endless.

Real World Upcycling

Real World Upcycling published on

wine

It’s become quite common to see upcycled projects on Pinterest and various blogs, but how often do we get to see creative recycling solutions in real homes? These are just a few of the phone snappies I shot on the Crown Heights North house tour on Saturday.

The old wine box backsplash is a great idea! This one was behind a counter that was not located near the sink, but since wood and water don’t mix, it would be advisable to seal wood with a good marine varnish if it is near a faucet. Heck, seal it anyway if you’re working with food.

shelves

This homeowner picked up some reclaimed wood at a salvage supplier and bought the piping at Home Depot. Cost of materials and skill level not that high. I’ve seen similar on Etsy going for $1800. My friends, THAT is why you need to DIY!

bottles

Can’t decide what to do with those old wine bottles? Very cool looking garden trim that wouldn’t last 5 minutes with my dogs, but if you have a pet free, child free home…awesome!

Habitat ReStore NYC!

Habitat ReStore NYC! published on 4 Comments on Habitat ReStore NYC!

restore

For all of you second hand building material diehards in the boroughs, patience has paid off! Habitat for Humanity expects to open their first NYC ReStore by March 2014. They will start researching locations in November but wherever it is, it will be a helluva lot easier to get to than any of the other ReStores at the moment.

As soon as we know more details, you’ll know.

Shutter Fence

Shutter Fence published on

shutter1

A shutter fence is as easy to build as any stockade fence once the posts and cross rails are installed. The only drawback is that your shutter wood is most likely made for interior use as opposed to pressure treated fence lumber. Do make sure that you prime and paint your shutters with a good few coats of exterior paint so they will last. That is my advice, although I was so eager to get my own shutter fence up that…guess what? I installed it as is. The paint will be peeling in no time. Yay, me! But it’s ok, because it will look even more “reclaimed”.

Shutter doors were purchased for 5 bucks per piece at Eddie Hibbert’s salvage garage. Total came to $20 for the line. They were going to be used as an interior wall initially but I just went with all sheetrock in the end.

shutter

I Meant To Do That?

I Meant To Do That? published on

door1

Here’s an example of that whole making lemonade out of lemons thing. A mistake that turned out to be a blessing, if you will. Unless you think the door looks like crap. Which it might. I can’t decide. Maybe I’m just trying to tell myself it looks cool.

Anyway, I had some help at the house over the holiday weekend when I was away. They painted the stripped door without sanding first. If you’ve ever stripped a pine door, you’ll know that the wood is very soft and gets “shredded”, so it looked nasty. I started sanding away the lumps and bumps and thought “Ah, this could work. It’s shabby chic!”

So now I have a distressed door. Sweet.

door

Works in Progress

Works in Progress published on 3 Comments on Works in Progress

wood

Just some pics of the renovation process. Although the downstairs apartment is ready to show, I’ve decided to wait until upstairs is finished before inviting the public over to have a look. Now I’m pushing the date back to AFTER Memorial Day weekend. And no, I will not be working that 3 day weekend.

whtdoor

The door to the bathroom (above) was under $40 (maybe even $20?) and came with multiple layers of paint. I should have realized because of the weight of the thing that it was a decent wood, but I was delighted to find whatever-species-this-is when I stripped it down.

stripdoor

Please refer to the paint stripping post for DIY tips!

marble

Antique marble was originally used for the baseboard in the upstairs bathroom. It didn’t really match the new tiles that were installed so I cut this piece down to use as a saddle for the downstairs bathroom.

frosted

Same downstairs bathroom. After months of keeping roisin paper on the window, I finally discovered frosted window film. What a concept!

befvanity

Picked this up at a vintage shop in Newburgh for 25 bucks. Forgot the name of the place, but it’s owned by Barbara of Caffe Macchiato on Liberty Street.

vanitypaint

The piece is currently undergoing transformation to make it into a sink vanity for the pink bathroom upstairs. This is 2 coats of paint. Will need one more at least.

countersand

This chunky old wood will be the countertop for the “Mexican” kitchen upstairs. That’s a before and after sanding shot, in case you haven’t guessed. Love the grain!

And that’s it. Can’t wait to show the finished pictures! All in good time, my friends. All in good time.

Stenciled Door

Stenciled Door published on 2 Comments on Stenciled Door

door

With a tight budget and desire to recycle building materials, I actually wanted to keep the hollow Home Depot doors that came with the house. Only a handful of them are still in good enough shape, but I thought it would be nice to think of them as blank canvases and make each one into a work of art (or some kind of crafty process).

The closet door above was the first one to get all gussied up. The chipping paint revealed some beautiful turquoise that must have been there since the 40’s or 50’s. That was a keeper. What to do with that? I thought of those signs I found in the bathroom floor during demolition and decided to recreate that.

scrape

The paint was chipping off in big chunks, so scraping was a breeze.

tape

DIY is pretty simple. Just get some tape and stencils. Oh, and paint.

As someone without patience, I didn’t use a straight edge or pencil lines. It’s recommended though. I also hand-held the stencil letters and went along to the next one without waiting for them to dry. Yeah, it smears. Don’t take DIY tips from me.

closebeach

Didn’t have arrow stencil so the arrows were brought to you by the letter “I” and some tape for the point.

Funny story. This particular door faces East/West and the bay and beach are North/South, but I didn’t want to do up and down arrows.

Creative Door Trim

Creative Door Trim published on

horsehor

After having spent a couple of thou on molding for the entire house, my favorite trim was a result of righting a mistake and the cost was only 20 bucks.

This is the downstairs bathroom. Long story short, I had intended to do wainscoting on the lower wall and when I couldn’t find reclaimed I decided to do a faux effect instead (photo below). I don’t love it but that’s beside the point. Anyway, for some reason I was too lazy to continue the design all the way to the door, figuring that molding would cover it up.

Well, I don’t know what I was thinking. Your basic molding isn’t a foot wide. So, I’d either have to match the swirly design or get some wide ass molding.

I went with the wide ass molding. Found these side panels at Build it Green. Now the problem would be finding a top piece. After weeks of searching to no avail (You wonder why this reno is taking so long?), I had to put a piece of 2×6 in there and figure out how to make it look nice.

The horse was left over from my crafting days. The black horse didn’t pop on the dark colored molding so I added the copper “frame”. Still looked boring, so I added the stenciling on each side. Now the sides looked lost. Shit, I just want to finish this renovation but I’m a sucker for the details! Soooo, I had to embellish the panels with some copper too.

This door is currently my favorite part of the house. Probably because it’s the only thing I’ve actually finished (and not even…I still have to caulk).

horsevert

Code Pink Curb Alert

Code Pink Curb Alert published on 2 Comments on Code Pink Curb Alert

Photo-Apr-18-9-40-30-AM

Attention! Checklist Home Services has posted a curb alert for a pink bathroom. Check out that fabulous double sink vanity including two pink sinks. But wait, that’s not all! If you act now, they will throw in that awesome pink toilet.

Alls ya need to do is comment as to why you want the pieces on the Checklist blog and it can be yours for free. And yes, you can even use their services to install.

Located in Ft. Greene, Brooklyn. Good luck!

Photo-Apr-18-9-42-57-AM

Connecticut Salvage

Connecticut Salvage published on 1 Comment on Connecticut Salvage

carousel

On the road again. Looking to pick up the last of the building materials this week as Passover week is going to be a non-stop work fest bringing us closer to Renovation’s End.

Have ye ever been to United House Wrecking? If not, you shouldn’t be waiting. This is the kind of place that makes me so sad that I live in a silly little brownstone and not a mansion or huge loft. I mean, check out the carousel above. Who wouldn’t want a carousel in their living room?

UHW has some top of the line architectural salvage. Stained glass, mantels, newell posts, doors. They have been sifted through and all are in good shape. This is where you go when you don’t feel like spending hours restoring the inexpensive stuff. That’s not to say the prices are outrageous here. They are not shocking at all. I saw some decent sized stained glass windows for $150 and a really nice antique chandelier on sale for $500.

shuffleboard

United House Wrecking isn’t just salvage. They do antique and reproduction furniture and design as well. Everything is staged so perfectly. A card table with a poker game already laid out, a bar, a child’s room, a mid-century living room that’s to die for. It’s kind of like ABC Carpet but without the cray-cray prices.

stereo

The Housatonic Habitat ReStore (Danbury) is 20 miles or so north of UHW. As with all restores, it’s hit or miss on what is needed that day. Yesterday I was in search of tiles because I remembered them having a bunch of awesome Waterworks ceramic. They did have the Waterworks and it was a lovely blue, except I need pink as I’m determined to keep the pink bathroom in the house as it was originally (well, when I bought it, anyway).

While I was there, an estate of some great Chinese furniture was coming in. Some real antique pieces mixed in with a few modern day made in China.

I loved this credenza that houses a stereo system. The side with closed door has room for a bar or record collection. The price was around $150 until the engineer comes around to get that system working and then it goes up.

Today I hit New Joisey.

Primary Sidebar