Skip to content

Tear Down? Think Again.

Tear Down? Think Again. published on

246-Liberty-St.-Before.-01.-street-view.-copy

This is an impressive resurrection of a Calvert Vaux Beaux Arts home as reported by Newburgh Restoration. Work was completed by architect Drew Kartiganer back in 2002.

246-Liberty-St.-before.-14.-Interior.-2nd-flr-window-room-copy

Are you ready for the after shot?

246-Liberty-St.-AFter.-03.-detail.-liberty-st-image-copy

Unfortunately, the interior is not all that impressive, but one can’t complain when the house was brought back to life. Check out the work shots and interiors at Newburgh Restoration.

Habitat ReStore NYC!

Habitat ReStore NYC! published on 4 Comments on Habitat ReStore NYC!

restore

For all of you second hand building material diehards in the boroughs, patience has paid off! Habitat for Humanity expects to open their first NYC ReStore by March 2014. They will start researching locations in November but wherever it is, it will be a helluva lot easier to get to than any of the other ReStores at the moment.

As soon as we know more details, you’ll know.

Transformations

Transformations published on 1 Comment on Transformations

lr

What good is a renovation blog without before and after pictures?

The living room and bedrooms were mostly cosmetic but bathrooms and kitchens were gutted due to wood rot from leaky pipes and drains. I don’t think any of the original plumbing still exists in the house now.

kitchen

upstairs

pinkbath

A closet was taken down on the right side to add more width. A partition wall separating the toilet from the tub was also removed, letting the window light hit the rest of the bathroom.

downkitch

We totally flipped the first floor kitchen around. You’re not even looking at the same area, so technically it’s not really a before and after.

Works in Progress

Works in Progress published on 3 Comments on Works in Progress

wood

Just some pics of the renovation process. Although the downstairs apartment is ready to show, I’ve decided to wait until upstairs is finished before inviting the public over to have a look. Now I’m pushing the date back to AFTER Memorial Day weekend. And no, I will not be working that 3 day weekend.

whtdoor

The door to the bathroom (above) was under $40 (maybe even $20?) and came with multiple layers of paint. I should have realized because of the weight of the thing that it was a decent wood, but I was delighted to find whatever-species-this-is when I stripped it down.

stripdoor

Please refer to the paint stripping post for DIY tips!

marble

Antique marble was originally used for the baseboard in the upstairs bathroom. It didn’t really match the new tiles that were installed so I cut this piece down to use as a saddle for the downstairs bathroom.

frosted

Same downstairs bathroom. After months of keeping roisin paper on the window, I finally discovered frosted window film. What a concept!

befvanity

Picked this up at a vintage shop in Newburgh for 25 bucks. Forgot the name of the place, but it’s owned by Barbara of Caffe Macchiato on Liberty Street.

vanitypaint

The piece is currently undergoing transformation to make it into a sink vanity for the pink bathroom upstairs. This is 2 coats of paint. Will need one more at least.

countersand

This chunky old wood will be the countertop for the “Mexican” kitchen upstairs. That’s a before and after sanding shot, in case you haven’t guessed. Love the grain!

And that’s it. Can’t wait to show the finished pictures! All in good time, my friends. All in good time.

Apartment One

Apartment One published on 5 Comments on Apartment One

living1

Open living/dining/kitchen area.

One half of the two family Rockaway house will be liveable by June 1st! As in liveable for normal people, not someone like me who no longer notices lack of switchplates and doorknobs. The self imposed deadline was set for this weekend to take some pictures and start spreading the word. Although it’s ready for it’s close-up, it’s a few days from being ready to show. Show by next weekend? Yeah, probably!!

The entire house will be for sale or rent by the end of this month. I call it a two story bungalow. It’s a cozy (that means small in realtor speak) 2 BR over 1BR, just under 1000 square feet for the whole house. Gotta do some comps and math to come up with prices. The website will get started (but not finished) today.

I’m on a roll baby and it feels good!

arch

kitchen2

Yeah, that toe kick needs to be painted and stove needs backsplash.

sinkdoor

The old singer sewing machine base trick. A favorite of mine.

bedroom

Long, narrow bedroom in the back of the house. I want to work a little magic on those plain, white doors if I get the time.

IMG_8617

Kitchen area before.

IMG_8788

Living room during demo.

All The Small Things

All The Small Things published on

window

So, your floors are finished, sheetrock is up, you’ve painted and the molding is installed. Think you’re done? Think again. The finish work is one of the most tedious and time consuming parts of the job. It doesn’t really take much skill but it does take patience.

The above photo is my before caulking window casing shot. I don’t have an after because I didn’t finish. Spent the morning vacuuming and wet-wiping dust. Caulked some, filled nail holes. Didn’t get to paint it.

Unfortunately, I had to save those old vinyl windows because it wasn’t in my budget to replace them. After cleaning them up (I forget whether this is the before or after clean shot) it looks like I’ll have to paint them. That’s the thing about adding even one new element to a room. Then everything else looks horrendous next to it.

Anyhoo, a few rooms in the house are so close to being finished. So close and yet so far.

Cabinet Pulls Etc

Cabinet Pulls Etc published on 1 Comment on Cabinet Pulls Etc

pulls

Van Dyke’s Restorers is one of those go-to places when you can’t find original hardware. As with most restoration catalogs, they can get pricey. But here’s a tip. They always have great sales.

Case in point are the cabinet pulls above. The current sale is 80% off, bringing the price down to $4.99 for a set of six. The black and gold is the actual pull but while taking them apart to cut the screws which are too long for my cabinets, I discovered that I preferred the back side and they match the cabinets better too. So I reversed them. The “flower” you are seeing on the reverse is the area that wasn’t painted and glazed. I sealed it up so it should be fine. Hey, if not, I can always switch it to the correct side.

214631

I also purchased the yellow ones for the upstairs kitchen which will be a bright Mexican theme.

For more antique reproduction hardware sources, check out the post from the year this blog was born.

Better than Faux

Better than Faux published on

wall2

It takes skills or money to hire people with said skills to create a faux aged plaster effect on the walls. But lookey what I uncovered the other day. Yes, it’s the real deal well preserved under wallpaper and skimcoat.

Is it taking just as long to painstakingly scrap down the wall? Yes. But hear me out, man. Cost: Time. Materials: Just a clear polyurethane to seal up that toxic lead paint I’m releasing into the air.

This is just a single, small wall at the top of the stairs. Nobody will ever notice it but I’m taking great pleasure in the process anyway.

Bathtub Reglazing

Bathtub Reglazing published on 2 Comments on Bathtub Reglazing

aftertub

Here’s how I know recycled building materials are more popular now than ever before. For the first time in my 19 years of renovations, I couldn’t find a free clawfoot tub. Our very first house, my husband got one from a work buddy who was renovating and another of his buddies, a firefighter, helped carry it in. That helpful firefighter later lost his life in 9/11. On other houses, we ended up with yet another friend’s tub after their renovation and a Craigslist free posting.

Fast forward to 2012 and the only free tub I could come up with was up three flights in a Victorian attic. I’m cheap but not that cheap. Those things are heavy!

I paid Brooklyn salvage king Eddie Hibbert $100 including delivery to Rockaway. When he took the tub out of the van, it was not the same one I chose at his shop but I didn’t have the heart to make him haul it back. Not after all the discounts he’s been giving me over the years.

So, it needed reglazing.

I’ve actually had someone reglaze a tub for me before and it didn’t work out so well. These were the days before social media. The internet existed but there was nowhere to complain about guys like this. The tub started peeling within a month and my only recourse was BBB which didn’t get me too far.

This time I went with Al and Dave whom have been in the business for 40 years and come highly recommended. Five hundred bucks including stripping and tax makes this the priciest tub I’ve ever bought. It looks good. Not perfect because the tub was in bad shape, but I don’t need perfection in an antique. The only thing that makes me nervous is that I do see drips, which makes me think it’s going to start peeling. I hear that these things never really last but I can’t imagine throwing away a cast iron tub because it’s impossible to restore.

The process took a bit over three hours to strip and paint. It was dry to the touch a few hours later but cannot be used for about three days. The painting room (bathroom) should be warm, well ventilated and dust free.

Fingers crossed it will last. If not, at least these guys can be held accountable unlike the first hack.

Before shot:

beforetub

Paint Stripping Deja Vu

Paint Stripping Deja Vu published on 2 Comments on Paint Stripping Deja Vu

tub

Sadly, my Silent Paint Remover ended up under water during the flood. It’s possible that it survived but I’m scared to try it, so I’m waiting for The Husband to fiddle around with it. I’ll stand by to drive him to the emergency room if necessary because I’m a good wife.

Until he takes it apart, I’m stuck using chemical paint strippers. It’s bringing back some bad memories of stripping 5 marble fireplaces and a house full of wood molding with Rock Miracle. Don’t get me wrong, Rock Miracle is a great paint stripper, but since I discovered the SPR, I only use chemicals to smooth out the final (or rather, first) layer of paint instead of sanding.

The clawfoot tub I bought for $100 DELIVERED has at least eight coats of paint. It’s so thick that someone plastered in a patch where the paint had peeled. First I tried Peel Away for 36 hours. I spent half the day yesterday going through layer by layer with the Rock Miracle until I finally said “WTF am I doing? This is the side that’s going to be hidden against the wall.”

Is it nuts that I’m “doing the right thing” where nobody is gonna see it?

Anyway, if you don’t learn anything else from my DIY blog posts, listen to me now and hear me later. The Silent Paint Remover/Infrared Paint Stripper is the most friggin awesomest thing ever invented. It’s like 400 bucks, which is why I’m willing to send Hubby to the hospital rather than buy a new one, but it’s totally worth it! Multiple layers in a 12″x5″ area in one go. Saves tons of time and money spent on bullshit chemicals and make paint stripping a pleasure!

No, I’m not getting paid to say this. But then again, if the company wants to send me a new one, I would not turn it down.

I love you, Silent Paint Remover. And I miss you with all my heart.

Reclaimed Pine Flooring

Reclaimed Pine Flooring published on 7 Comments on Reclaimed Pine Flooring

IMG_1914

They all doubted me. The pine sub floor covered in paint, paper and tar could never be a finished floor, said they. Well, I had faith in Desmond the Floor Guy. Called him to look at it. “Sure, no problem.” said he. The day his guys came over and saw the work ahead of them, they screamed that I needed a new floor. Well, the distressed look may not be everyone’s taste and areas had to be patched but behold the beauty of my new/old floors!

Desmond Harmon has been installing and refinishing wood floors for over a quarter of a century. He’s been doing my floors for 18 of those years now. So long, that I still have a pager number for him. His cell is 917-642-2752.

IMG_1917

Where unfinished floor meets finished

IMG_1908

Before

IMG_1916

After

IMG_1909

Again? Before.

IMG_1912

And after.

Desmond

Desmond

Twice as Much

Twice as Much published on

IMG_8800

Original deck was taken down.

There’s an old warning about home renovation that goes “Expect to pay twice as much and for it to take three times as long.” I’ve always found this to be true except this time I was prepared for the worst.

Case in point is the back deck. It’s not even so much a deck as steps with a landing. Whomever built this thing must have been on some hard drugs at the time. The stairs are cutting into the house and one landing leans on a roof without any other support. It’s a nightmare.

This is the final “big project” to tackle on the house. I left it for last because I knew it wouldn’t be simple. I’ll survive because my hubby is a structural engineer who has a penchant for removing rotting wood to add support. But I just want to warn others out there that this is what it’s all about. Opening up a can of worms. You remove a wall or a floor or a deck and chances are, what you see behind that won’t be pleasant.

As it’s been said on this blog a million times before, previous homeowners (in my experience anyway) tend to cover things up rather than correct them. The deck is over the basement. We are not only replacing the deck but the damage has spread to the side structures of the house and the basement.

I can’t imagine how much this would cost someone if they were paying a real contractor to do it. Then you have to consider that the contractor is doing the right thing because they sometimes like to cover things up also.

My point? I don’t know if I have one. Oh yeah, maybe it’s this: Expect to pay twice as much and for it to take three times as long.

At the end of the day, I’m gonna have me a nice new deck that will stand longer than the house itself.

photo2

Some rotted wood that was removed

photo3

Roof that supported the landing

photo1

Side of house once vinyl was taken off

Reclaimed in Miami

Reclaimed in Miami published on 2 Comments on Reclaimed in Miami

What do you think of when you think of Florida? Me? I think of those senior developments as seen on Seinfeld because that’s where my mother is. Or some other horrible developments. Or McMansions. But at least one woman in Miami has devoted herself to saving an old house.

Sally purchased a 1924 Spanish Colonial Revival in Coconut Grove that had been derelict for years. Her blog, “This Old Coconut Grove” has some incredible before and after shots. Love to see inspiration coming from this neck of the woods beach!

Check out some of the “afters” and then shoot on over to her blog to find out where she obtained her salvaged pieces.

A Visit to Tin Can Trading Post

A Visit to Tin Can Trading Post published on 1 Comment on A Visit to Tin Can Trading Post

IMG_8809

I met Sal a few years ago as a fellow Brooklyn Flea vendor. We stayed in touch via the Interwebs and I kept meaning to visit his shop in Callicoon, NY. Sal is now in the process of moving Tin Can Trading Post to a multi-dealer store up the road. What finally got me up there to see the store was his massive moving sale.

IMG_8810

IMG_8816

IMG_8814

Because I was focused on house materials, I only made out with three lights (four if you count the pair of sconces as two). But oh, how I wished I was there shopping for myself! Scary dolls and clown paintings, old wicker subway seats, a dessert cart from Grossingers. Grossingers!! It would make a fabulous kitchen island.

IMG_8831

Sal closed up his shop for a bit to give us a tour of his home that’s on the market for $189k in nearby Cochecton. What a treat for an old home lover! The restoration reveals layers of history. Original wallpaper was cleaned with wonder bread. Did you know about that technique? I did not. The plaster in some areas was left unpainted. You know how much people pay to faux this look? Here, it’s the real deal.

Worth the trip up to Sullivan County. Check out the shop. Buy the house. Turn it into a B&B so I can stay there in the future.

IMG_8827

IMG_8826

IMG_8824

Crimes of Homeowners Past

Crimes of Homeowners Past published on 2 Comments on Crimes of Homeowners Past

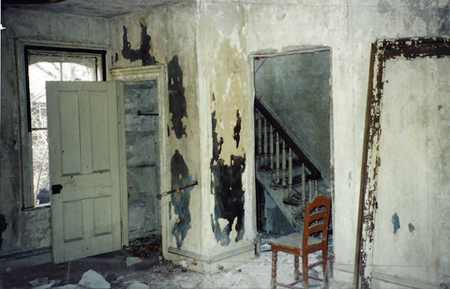
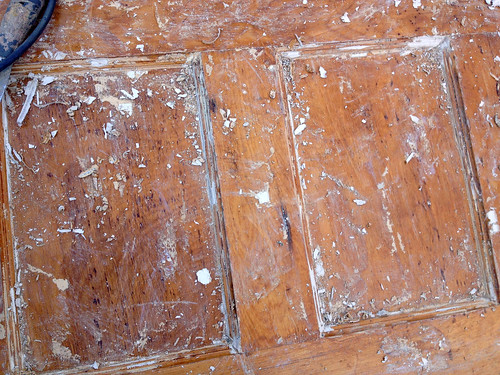
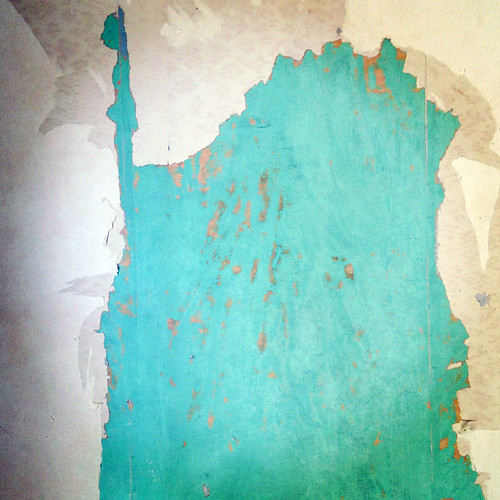
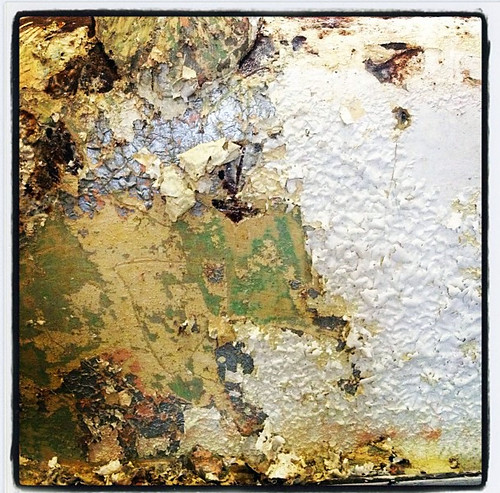
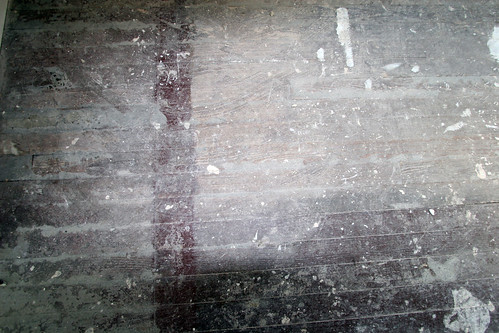
This is what happens when you don’t prime first.

This is my fifth major renovation and I’ve seen it EVERY. TIME. Why do people just cover up what needs to be repaired? Money issues? I don’t get that. Those band-aids aren’t cheap. Instead of fixing some holes in the plaster, is it really less expensive to drop the entire ceiling?

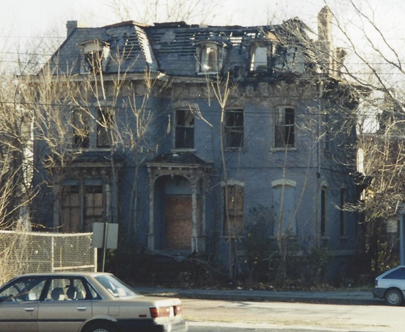
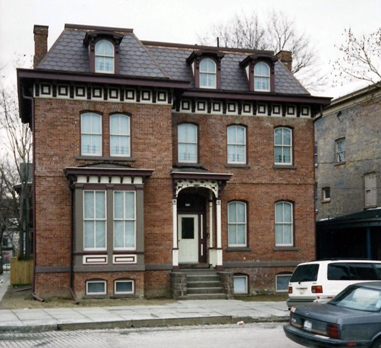
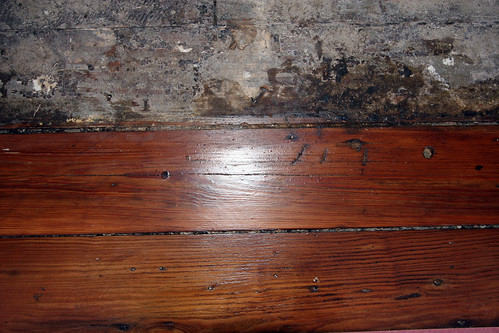
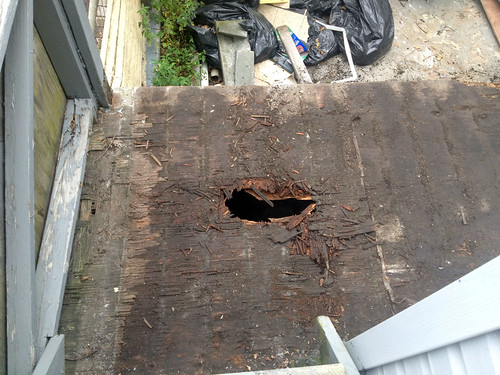
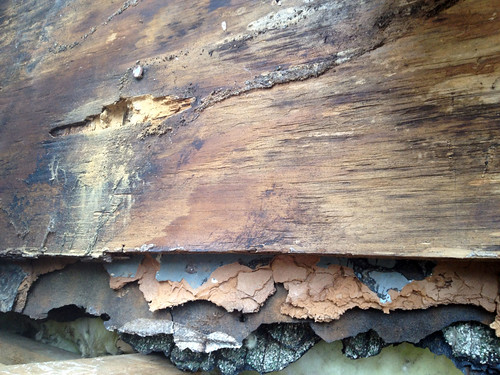
I found a piece of cardboard used to patch a hole in the wall the other day. Like, cut out from a box. That was nothing. I can fix that. What bothers me about this house is that there is a new roof and vinyl siding. Although that’s not bothersome in itself (well, the vinyl is), it worries me that there were no repairs made to the wood rotting beneath the new protection.

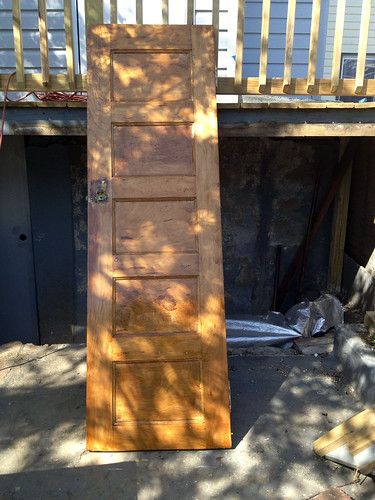
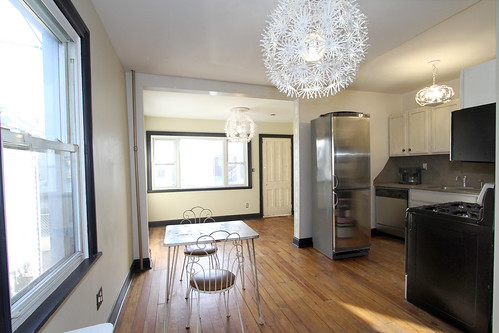
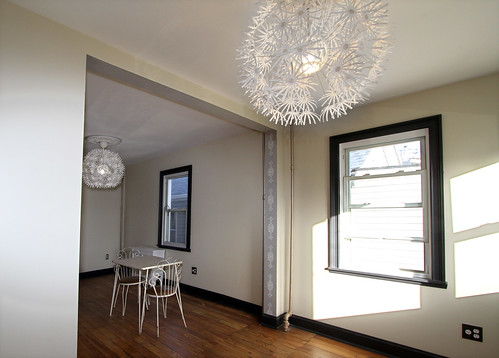
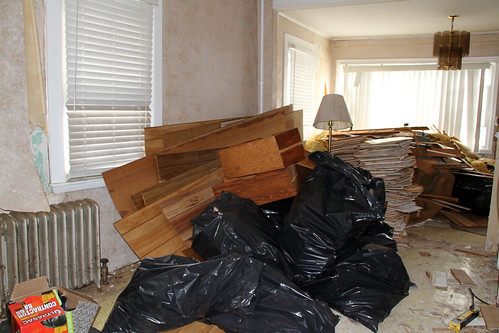
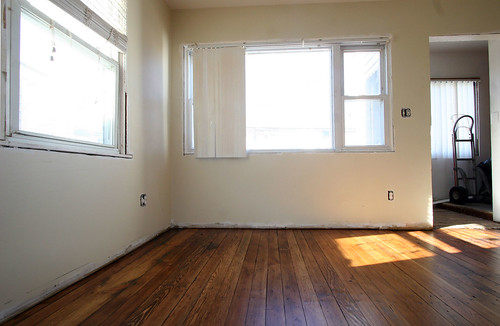
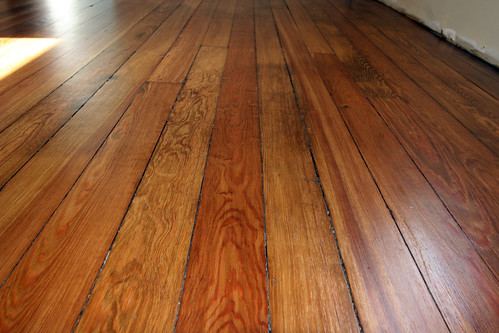
I was a bit torn. As an environmentally aware salvage freak, I wanted to keep materials out of the landfills. As someone on a tight a budget, I couldn’t afford to gut the entire house down to the studs. So, I fixed what I saw but I know that there are things I missed behind those walls I didn’t remove. And I kept and re-covered the holey ceiling plaster myself after removing the drop ceiling.

I’m not completely concerned because, as I stated in a previous post, most of the rot seemed to be under each window and I did take those areas down to the studs.

But what about crazy plumbing fixes….or just letting pipes leak? So much damage from leaky pipes! And gas leaks? And electrical issues? Is it better to save a few bucks and risk your life and the life of the house?

Here’s the deal. You don’t have enough money for repairs? Fine. Nobody can fault you for that. But how’s about you learn some DIY skills and fix this stuff yourself? Seriously, if you would cover the gaping floor hole from your leaky toilet with sheetrock rather than just fix the damn toilet, you shouldn’t own a house. Apartment buildings with supers are wonderful things. I know. That’s the way I grew up. Call this a rebellion against my parents.

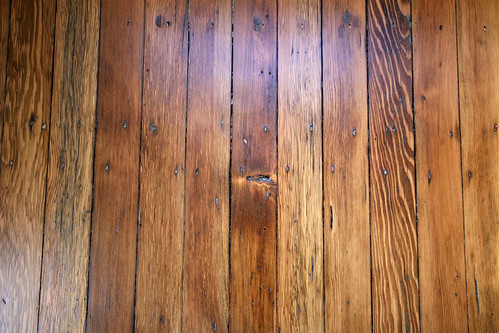
It’s not going to repair itself on it’s own, whether you cover it up or not.

Just do the right thing. For you. For the house. For the next owner.

Primary Sidebar