Skip to content

7 Vintage Design Elements to Embrace (Not Replace!) in Your Older Home

7 Vintage Design Elements to Embrace (Not Replace!) in Your Older Home published on 2 Comments on 7 Vintage Design Elements to Embrace (Not Replace!) in Your Older Home

vintagefarmhouse

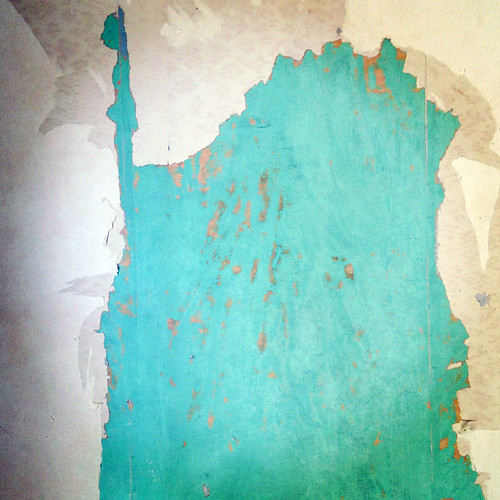
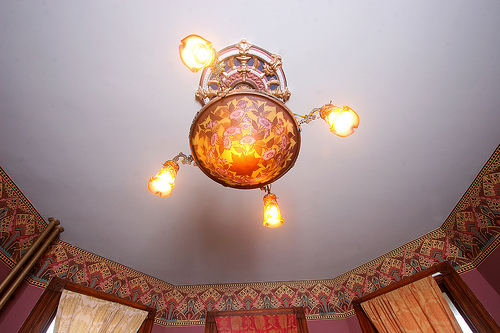
Courtesy of wickerfurniture, source

* Guest Author: Leslie Mason is a homemaker and garden expert. Leslie enjoys writing, gardening, do-it-yourself projects, and fixing up the house. She is currently renovating her home on her own and her garage with the help of Door Surgeon.
_________________________________________________________________________________________________________
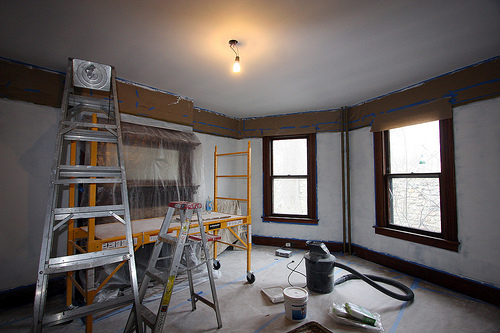
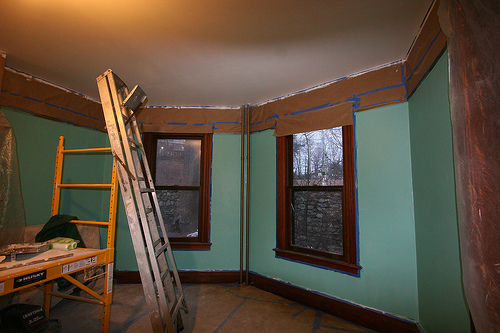
It can be difficult to look past the rusted plumbing and creaky floors of your antique home, but chances are it has unique design elements that most people would pay money to replicate. Instead of counting down the days until you can rip everything out and start anew, embrace the quirky details that give your older home personality. After a quick touch up, those less-than favorable details can become downright swoon-worthy.

Exposed Brick Walls

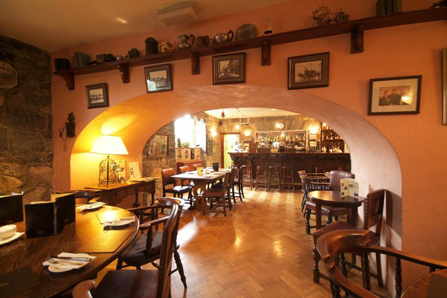
Exposed, or “face brick” walls add a sense of maturity and industrialism that many new homeowners often spend large amounts of money to achieve. (Have you noticed the faux-brick wall coverings available in hardware stores?) I walked into a model home recently and was completely stunned by the beautiful brick accent wall complete with a fireplace. Not many new homebuilders have that as an option, but they certainly should!

The only downside to a brick wall is that it darkens the room. But instead of covering up all that antique charm, paint the walls around it a crisp white or a light shade of beige. Hang a large golden mirror over a brick fireplace to reflect light and make the room appear brighter. Another option is to white wash the brick with watered down paint. White washing will brighten the room and still show off the beautiful details in the brick.

exposedbrick

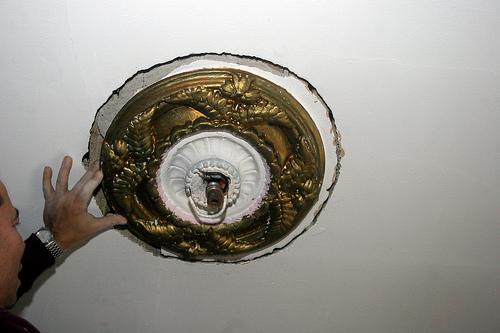
Courtesy of Reconstructionist, source
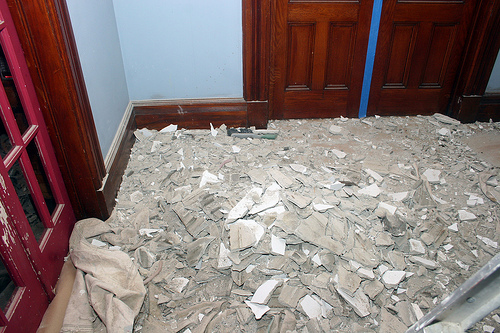
Wood Flooring

Wood floors make the heart sing, don’t they? Antique wood floors may be uneven in parts, but they show more about your home’s personality than any other element. Before men from the hardware store could come and install wood floors in a day, skilled workers used to spend weeks building sturdy floors that lasted.

Instead of replacing your wood floors, touch them up with an inexpensive wood treatment or wood stain to make the floors look as good as new. However, if you see any signs of mold or decay, however, get them professionally looked at and consider replacing them!
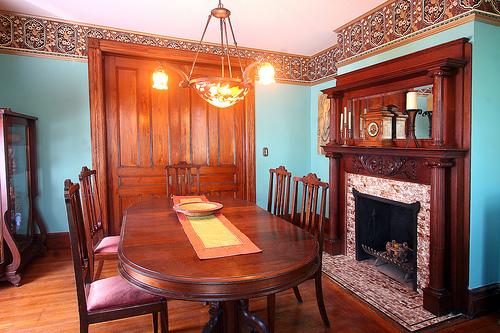
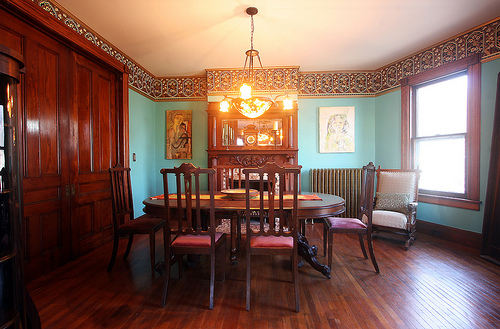
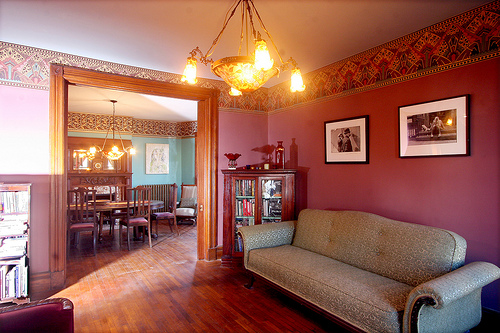
The Floor Plan

While the floor plan in your antique home may have some oddly shaped rooms, it’s likely that the overall layout is relaxed and comfortable. In the 70’s, homebuilders began to experiment by taking out dining rooms and other “extra” rooms. Today, however, large dining rooms are a luxurious and sought-after commodity. Anything pre-1970’s, then, is often similar to the layouts that new homeowners pay big bucks for minus a few quirks, but consider those quaint little sun porches and round-shaped rooms conversation pieces.

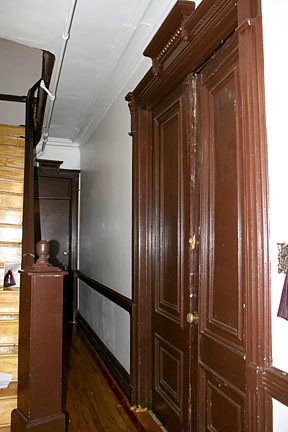
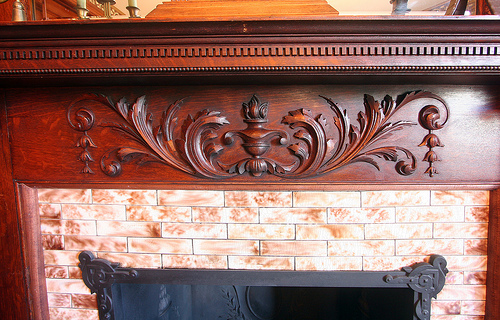
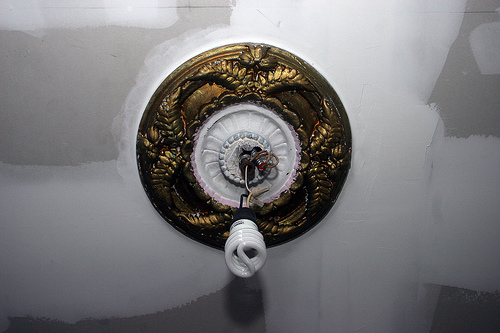
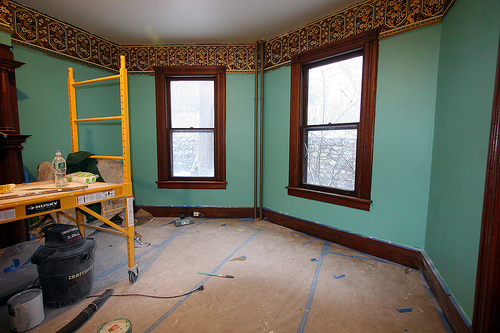
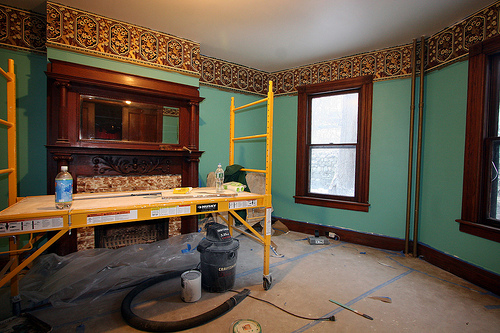
Moulding and Woodwork

Homebuilders in the late 1800’s and early 1900’s made moulding and woodwork a priority. The interior details that went into homes were often as important as the construction itself. Houses were not complete without crown moulding lining the tops of the walls and framing the doors. Homebuilders today are more about mass production and usually only include moulding for a hefty price. Revive the moulding in your home with a good scrubbing and a new coat of paint, or if it is bare wood, a finishing-stain.
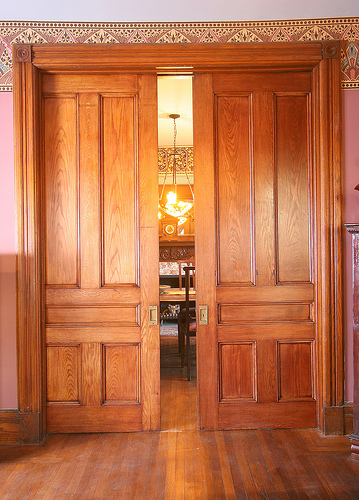
Wood Doors

Even though they do not always fit perfectly in the doorframe, antique doors have charm unlike any other. Those little details like tiny key locks, textured windows, and wooden panels set old-fashioned doors apart from the standard four-panel door. Embrace your old-fashioned door by painting it in a bright color. If you decide to purchase new doors, turn the old ones into a headboard or décor piece, or use freecycle.org.  I have freecycled a pair of old doors in Edmonton and I recommend it.

Antiquedoor

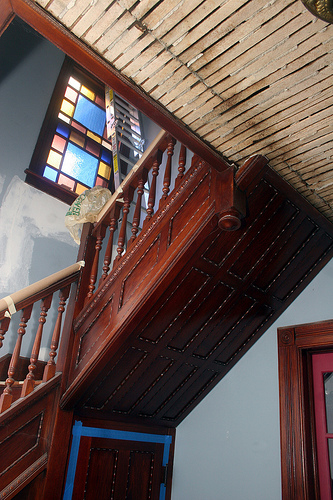
courtesy of ekkiPics,  source
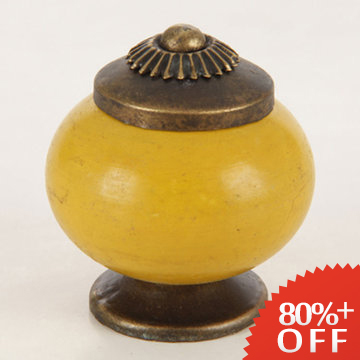
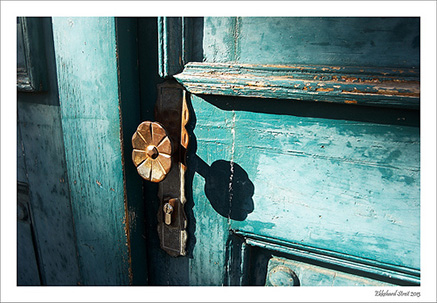
Hardware

The beauty in an old doorknob or cabinet fixture is often hidden under layers of grime and brassiness. Make your vintage hardware stand out by soaking them in a solution with a vinegar and water base. To get rid of a dull brass finish, add baking soda. For copper knobs, add lemon to the vinegar and water.
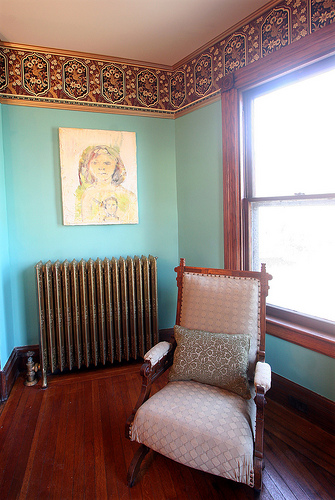
Windows

Nothing says “farmhouse in the country” like a white house with black framed windowpanes. The unique window sizes and shapes make both the inside and outside of a home eye-catching, but years of dirt can leave them looking poorly. Spray windows down with a hose to loosen the dirt, then scrub each window down with cleaning solution.

With these tips, giving your home a makeover is easy and affordable. Your home will be sparkling and new in no time! What do you love about your antique home? Share below!


Glenlo Abbey, Galway

Glenlo Abbey, Galway published on 2 Comments on Glenlo Abbey, Galway

2

Firstly, I’d like to let it be known that I do not travel in style. A cheap motel is sufficient for me as it’s an upgrade from my backpacking days of staying in crowded hostels.

8

Common areas of the hotel above and below.

9

Last night we stayed at Glenlo Abbey in Galway, thanks to a discounted package deal. The 5 star hotel is a step up from County Meath’s Dunboyne “Castle” of our first night…and not because it’s got that one extra star but because it’s actually a historic property.

3

The view from our room (overlooking the parking lot) is the amazing grounds with the River Corrib in the distance. If golfing is your thang, this is a great place to be. Since we don’t golf, a muddy walk down to the river and a run back before the next rain was sufficient.

12

The biggest bummer was that the Pullman Restaurant is currently closed for the season. The antique train car restaurant doesn’t have heat or air conditioning so it only opens when the weather is perfect…which is never in Ireland. I so wanted to eat here!

41

We went for a pre-dinner drink in the bar downstairs that looked like a dungeon. I mean “dungeon” in the best possible sense. I would live in a dungeon if I could!

61

Dinner was in the abbey instead of the usual restaurant because of a private event. We thought this would be way cooler than dining in just the restaurant, but the wait staff must have been concentrating on the event and we ended up with the gardener or bell hop as our waiter. Whatever he was, he wasn’t a waiter and this vegetarian ended up tasting some liver dish. Ugh! Smooth out the consistency and slap some fancy name on it, but this old Jew can still recognize chopped liver after 27 years. Anyhoo, this fella was nice enough and the food was ok once they got the dishes right.

So, this hotel gets a thumbs up from me. Decor kind of reminds me of Mohonk Mountain House. Very helpful staff too!

Old Storefronts

Old Storefronts published on 1 Comment on Old Storefronts

knick-6-100813

Image via Brownstoner

Steven Soderbergh and his talented crew have transported a Bed Stuy corner back in time for the filming of a show called “The Knick”. They’ve been there for awhile now but this morning as I passed I thought it would be great if they could just leave the signage up forever. Walking through there makes me want to live in the past, man!

New York has been transformed over the years and change is good, blah, blah, blah, but I do miss some of those vintage shop fronts. Here are some that lasted longer than the rest.

Storefront+Vesuvio+Bakery

Starting with a fairly obvious one, Vesuvio in Soho. Image from News Gallery.

62-zigzag-aveu_-23

Zig Zag Records closed it’s doors about two years ago, but will always be remembered by alt-rock Brooklynites growing up in the 80’s as the place that sold NME and rare UK records. Photo via Forgotten NY.

39843_412435950221_5801829_n

The Meat Market in Bed Stuy is now a vintage clothing shop, ironically called The Meat Market. Good for them. Vintage shop. Vintage signage.

yonahschimmel-012110

Yonah Shimmel has been around forever. Forever! Did you know that back in the 80’s they had a shop on the Upper East Side? I used to go in there every morning to pick up my breakfast. Not a knish. A poppy seed mohn. Photo via Forward.

800px-DiFara1

Bless DiFara Pizza. Honestly, I never considered this Midwood pizza shop to be anything special when I was growing up in the neighborhood, but look at them now…one of the highest rated pizzas in NYC. Same signage though.

Walters Hardware Co.

Unfortunately, Walters Hardware closed a few years ago. Not sure what has happened to the storefront as I haven’t been out to Astoria lately.

Cabinet Pulls Etc

Cabinet Pulls Etc published on 1 Comment on Cabinet Pulls Etc

pulls

Van Dyke’s Restorers is one of those go-to places when you can’t find original hardware. As with most restoration catalogs, they can get pricey. But here’s a tip. They always have great sales.

Case in point are the cabinet pulls above. The current sale is 80% off, bringing the price down to $4.99 for a set of six. The black and gold is the actual pull but while taking them apart to cut the screws which are too long for my cabinets, I discovered that I preferred the back side and they match the cabinets better too. So I reversed them. The “flower” you are seeing on the reverse is the area that wasn’t painted and glazed. I sealed it up so it should be fine. Hey, if not, I can always switch it to the correct side.

214631

I also purchased the yellow ones for the upstairs kitchen which will be a bright Mexican theme.

For more antique reproduction hardware sources, check out the post from the year this blog was born.

Better than Faux

Better than Faux published on

wall2

It takes skills or money to hire people with said skills to create a faux aged plaster effect on the walls. But lookey what I uncovered the other day. Yes, it’s the real deal well preserved under wallpaper and skimcoat.

Is it taking just as long to painstakingly scrap down the wall? Yes. But hear me out, man. Cost: Time. Materials: Just a clear polyurethane to seal up that toxic lead paint I’m releasing into the air.

This is just a single, small wall at the top of the stairs. Nobody will ever notice it but I’m taking great pleasure in the process anyway.

A Visit to Tin Can Trading Post

A Visit to Tin Can Trading Post published on 1 Comment on A Visit to Tin Can Trading Post

IMG_8809

I met Sal a few years ago as a fellow Brooklyn Flea vendor. We stayed in touch via the Interwebs and I kept meaning to visit his shop in Callicoon, NY. Sal is now in the process of moving Tin Can Trading Post to a multi-dealer store up the road. What finally got me up there to see the store was his massive moving sale.

IMG_8810

IMG_8816

IMG_8814

Because I was focused on house materials, I only made out with three lights (four if you count the pair of sconces as two). But oh, how I wished I was there shopping for myself! Scary dolls and clown paintings, old wicker subway seats, a dessert cart from Grossingers. Grossingers!! It would make a fabulous kitchen island.

IMG_8831

Sal closed up his shop for a bit to give us a tour of his home that’s on the market for $189k in nearby Cochecton. What a treat for an old home lover! The restoration reveals layers of history. Original wallpaper was cleaned with wonder bread. Did you know about that technique? I did not. The plaster in some areas was left unpainted. You know how much people pay to faux this look? Here, it’s the real deal.

Worth the trip up to Sullivan County. Check out the shop. Buy the house. Turn it into a B&B so I can stay there in the future.

IMG_8827

IMG_8826

IMG_8824

Grand Entrance

Grand Entrance published on

Before: hallway

I was just looking back on some old Flickr photos of my Bed Stuy renovation and realized that I never blogged about my fabulous parlor floor hallway. (Nor various other little projects)

That’s the before shot you see above. The previous owners “renovated” the house. Oh please, don’t get me started. Everything in the hallway was painted a glossy shit brown…the bannister, the newel post, the doors and the molding.

After: Hallway

We took the double doors down and stripped and repaired them. They were in pretty bad shape and needed some fill in material. The back door with that badly home made transom was switched out for an antique door that actually fit into the frame.

Ah, but my pride and joy is that newel post! The one that was there when we bought the house consisted of four pieces of plywood boxed together with a Home Depot doodad on top. We found a gorgeous salvaged newel post that would have been original to a brownstone of this era and replaced it with that. The post was stripped and stained to match everything else.

The Victorian light fixture and ornate radiator were also salvaged finds.

This stuff doesn’t really take much design skill. It’s kind of just like putting back what was taken out.

Gorgeous Government Buildings

Gorgeous Government Buildings published on

Having grown up in NYC, I take many things for granted. Architecture is one of them. 45 years of seeing the same buildings. Why would I stop and look now?

Well, over the weekend I visited the Museum of the American Indian for the first time in the downtown location. Walked into the building and was blown away by the interior. Seriously, blown away.

The Alexander Hamilton U.S. Custom House, listed on the National Register of Historic Places, is one of the finest examples of Beaux Arts buildings in the city. The winding staircase! The rotunda with the huge skylight (it was leaking)! The marble everywhere! I’d be beyond thrilled to have a living room as nice as the ladies room.

Go visit. The museum is free because it’s a government building. Good museum too!

And look at all these other beautiful government buildings. I just pass them all the time. Maybe now I’ll stop and say hello.

Dining Room Done

Dining Room Done published on 7 Comments on Dining Room Done

4440914011_8eac1cf2c0.jpg

The dining room renovation was finished about two weeks ago, but I just grabbed some snappies of it yesterday. Last you checked in, the restoration looked something like this. And before that, even worse.

4440917131_c837d38fc2.jpg

4440916163_0b9440ed8b.jpg

4440915839_8a81c32c2c.jpg

It’s kind of a non-event since we didn’t change anything drastically. It just needed a lot of repairs. The plaster. The wood. Even the light fixture needed to be rewired. We lived with all that for five years and only finished it for someone else.

The adjoining living room has been finished for quite some time, but the wood still needs sprucing up.

There is still something to do in every single room, but we’re getting there! We finally have more help. This weekend there will be 7 different people working on our house. Woo-hoo!

4440914361_a4b5638967.jpg

4441690974_f3205b84b6.jpg

4441689474_13ff550b8d.jpg

Saving the Medallion

Saving the Medallion published on 3 Comments on Saving the Medallion

4387414716_48b7c6f783.jpg

Our hallway ceiling was beyond repair. It was sagging with too many cracks for a skimcoat and the plaster is so dry that it just crumbles. So we needed to take down the ceiling and put up sheetrock.

Why not simply laminate you ask? Well, we have the original wood molding near the staircase, so the sheetrock had to fit underneath that.

Anyway, we’re talking medallions. So, we have this medallion, see? Obviously needed to save that baby! It could be a diy job, but I wouldn’t trust myself  or my husband to do it. I just had visions of that medallion crashing down on the floor. So, Dimas the contractor to the rescue.

Here’s what he did:

1. First thing is, he secured it with more screws, making sure it stays with the remaining ceiling. The screw holes can be patched up later.

2. Cut around it. Crap, I forgot to see what tool he used! I’m sure the hubby would’ve gone in there with a Sawzall , but he either did it manually with a utility knife or maybe used a Jigsaw.

3. With the medallion secured and separated from the rest of the plaster, it was time for the ceiling to come down.

4387415172_211e3823a5.jpg

4387415418_c5302ea342.jpg

4387414974_9730ce0dd7.jpg

4. Sheetrock hole was cut as close as possible and plastered all around.

4386653743_35b7655743.jpg

5. This is as far as he got, but you get the picture now. Maybe another coat of joint compound, sand, prime and paint.

Dining Room Painted: Check

Dining Room Painted: Check published on 3 Comments on Dining Room Painted: Check

 4327122583_82b382d9c6.jpg

Our dining room plaster repair proved a bit problematic as we needed to work around our wallpaper border. We actually laminated the ceiling and repaired cracks in the walls. We’ll need to use a thin crown molding to hide the gap between wall and sheetrocked ceiling, covering up some of the border.

Although I liked the original color, I wanted to brighten it up some. I’m not loving this turquoise, it’s too greeny. It looks more beach cottage than Victorian, but it looked really good on the paint chip! I think my biggest problem with it is that it’s not completely flat. When Home Depot tells you they have a flat enamel that’s washable, don’t believe them! It’s not flat, it’s more eggshell!

4327123021_9e0e50d587.jpg

4327855542_694cbf796d.jpg

4327123765_f41a3aa8ff.jpg

Primary Sidebar