Skip to content

DIY Repurposing Tips This Weekend!

DIY Repurposing Tips This Weekend! published on

websaleflyerWe’ve been schlepping stuff up from the basement for our big clean-out sale this weekend and we’re kind of bummed that we haven’t had the time to work on all of these wonderful pieces. The sale is on “as-is” inventory. We know that lots of our blog readers are accomplished makers, but if you would like to dive in, perhaps this is your chance. We’ll both be around on Friday to offer suggestions and tips on how to rehab and repurpose these rough diamonds. Swing by! The sale is going on all weekend.

IMG_3249

Friday: 10am-5pm
Saturday: 11am-6pm
Sunday: 11am-6pm

IMG_3243

Prices will be LOW! We do not want to schlep this stuff back downstairs. On the other hand, we didn’t really leave room to negotiate so please be nice. ALSO!! Lots of store merchandise will be marked down as well. #MAKEROOMFORNEWSTUFF!

Here’s an idea of pricing…

*Chairs that need seats. $25+
*Light fixtures that need to be rewired. $30+
*Table bases and legs. $15-$65
*Table tops that don’t really match said bases and legs $20
*Ugly end tables that need some updating. $15+
*Tschotskes from the shop that we’re getting tired of looking at: $5-10
*Tacky Artwork $10-$15

IMG_3251

Check out our Flickr album for more images. Here’s the Facebook event page.

Workshop: Mixed Media Collage and Image Transfer

Workshop: Mixed Media Collage and Image Transfer published on

mixedmedia

We are pleased as punch to announce our first workshop! Mixed Media Collage and Image Transfer will be run by Emilia DeVitis on Thursday, March 26th.

We’re testing the waters with a 90 minute single workshop instead of ongoing classes. Let’s see how this goes and then we’ll start offering more in depth training.

Here’s what’s in store…

The event starts at 6:30 pm with some wine and schmoozing. Class will begin at 7 pm and probably end around 8ish.

Materials will be supplied but you’re encouraged to bring your own inkjet prints for transfers and/or any kind of thin image for collage. **Please keep in mind that transfers will be mirror image, so you must print any writing backwards!**  We’ll supply your “blank canvas” in the form of recycled wood and tiles, but if you have something in mind, please bring it along. Also, bring an apron or wear your messy clothes.

Hope to see you there! Our space is small, so this workshop is limited to about 10 people. Book now! Only 45 bucks.

Recycled Drawer Shelves

Recycled Drawer Shelves published on


IMG_9986

A couple of months ago we purchased a gorgeous early 19th century dresser that was unfortunately a bit too far gone for restoration. The drawers were in good condition, but the frame was falling apart. Furthermore, we thought that the interior wood in the drawers was too beautiful to be hidden. We sat with those drawers for awhile until we decided that they’d best work as shelves.

Since there is no such thing as a new creation, all we had to do was pinterest (Can that be a verb like to “google”?) some ideas and figure out if we wanted them staggered or straight, yada, yada. Due to our lack of patience and not wanting to run to the hardware store for brackets or support, we followed DIY videos that showed folks popping screws directing into the drawer backs to secure them to the walls. (*Tip: Use anchors in the wall!)

IMG_9987

We’re not crazy about this technique. First, you’re adding holes to the most conspicuous area. Second, objects will be sitting on the top and bottom, so you’re relying on that drawer being held together properly. That being said, a bracket on the bottom would be viewable also, so what to do? We added some extra nails and glue to the drawers that we didn’t wait for to dry (in other words, useless) before installation.

For a finished look, the screw holes should be filled. Did we do that? What do you think? It’s a friggin store display!

But it looks nice anyway, right?

IMG_9991

10 Fix-it Supplies To Keep In House

10 Fix-it Supplies To Keep In House published on

1711473_400x400


It doesn’t matter whether you’re renting an apartment or you own a mansion. There’s always gonna be maintenance and touch up. So, if you want to keep your dwelling looking fresh (unlike mine), you gotta pay attention to some small fixes every now and then. Here’s what to keep on hand. Refer to the ole “10 Tools” post for those implements.

1. Liquid Nails for gluing those broken thangs.

2. Quick Drying Spackle. Nail holes ‘n stuff.

3. Paint colors for touch up.

4. Wood Putty for when your cat scratches the shit out of molding.

5. Wood stain. Various colors to touch up molding and furniture.

6. Clamps. See number 1. How do you expect to keep these things together while drying?

7. Plumbers Snake. Because Drano is bad for the environment and pipes, even though it’s easier.

8. Screen Patch.

9. Variety of Screws and Nails.

10. Duct Tape. For everything else.

Categories

5 Crafty Tips We Learned The Hard Way

5 Crafty Tips We Learned The Hard Way published on

14681598774_46e8314f70_z

 Our first attempt at chalk paint = Major Fail!

The internets is a wonderful thing, but it’s always best to do the research before making the mistakes. We sometimes forget that. If you’re a crafty person working on some fun projects of your own, here are some tips that took us awhile to figure out.

1. Chalk Paint kind of sucks. All of these distressed paint enthusiasts swear by it. Supposedly, no priming or sanding is necessary and you can paint on any surface. Bullshit! You need to prime and sand glossy surfaces or it will peel right off. You want to try chalk paint? Do it on a porous wood surface. You can distress with a wet cloth or sand, but this stuff MUST be sealed as well! Use wax or water based poly.

2. Mod Podge is God. Seal any collage with Pod Podge before using another sealer on top. We knew this already, so that’s a free tip we didn’t learn by mistake.

3. Not all resin is created equal. There are better brands and cheapo brands. But the most important thing we learned is to use a heat gun to remove bubbles!

4. Wood glue sucks. Useless. Liquid Nails rules!

5. You can’t seal patina effects. Well, you can, but it darkens it. The patina is meant to be exposed to air so it can continue to do it’s thing. We’ve tested it with water and it kind of washes away, so we end up sealing it when it’s going to be used for outdoors or as counter or backsplash.

Good luck and have fun crafting!

Repainting Kitchen Cabinets

Repainting Kitchen Cabinets published on 1 Comment on Repainting Kitchen Cabinets

0708-table-illustration

We get a lot of calls asking if we repaint kitchen cabinets.  Although our specialty is to apply fun designs and finishes, pretty much everybody just wants a solid color.  Yeah, we do that too.  As DIY people, we’ve done this on homes we’re renovating and it’s worked out great.  As “contractors” who charge for this service, we have to be waaaayyy more meticulous about the job.

Let’s be honest here. Painting cabinets the correct way is a pain in the arse. The right way means taking off that gloss completely and furthermore,  it’s best to sand it right down to bare wood.  Going from a dark to light color, any raised panels and holes need to be caulked or they’ll show up against the new bright color.

Although we often work with water based finishes and then polyurethane over them,  oil based paints are really the way to go for solid colors.  So dry time is overnight, which also means that the painting/drying area needs to be completely dust free.  That is, after you create dust by sanding between each coat.

Is it a DIY job that you can do for a couple of hundred bucks?  Can it be done quickly and easily?  Sure!  If you’re up for it, put aside a room where you can set up saw horses for a week. Cheater way….Use deglosser and/or sand it enough so that there’s no shine. Go with water based paint and shellac primer. Don’t bother sanding between coats. Will it look professional and last?  It will look good enough for the dough you’re saving and last a few years.

There’s a Rustoleum refinishing kit that gets mixed reviews from commenters over at Retro Renovation.

As with any project, if you’re bothering to hire someone, make sure they are doing it right.  Otherwise just do it yourself. Here’s a step by step guide from This Old House.

Refurbishing Steam Trunks

Refurbishing Steam Trunks published on

trunk1

We’ve been going through some steam trunks here lately and we never do receive them in good shape, but it’s not terribly difficult to restore them.  The thing is, they are rustic antiques, so you don’t want to want them to look too “new”. At least that’s what we tell ourselves.

Take the trunk above for instance. Below is the before shot.  We’ve come across quite a few trunks with ancient paper stuck to them. Here’s what you need for the job….

1. Vinegar
2. Scraper
3. Sand paper
4. Stain
5. Poly

trunk2

To remove the paper, we like to use a solution of vinegar and warm water.  You can either spray it on or take a rag and wet the paper. Leave it sit for a few minutes, then it will scrape right off.  Vinegar doesn’t harm the wood and it kills mold.

Once the paper is removed, you’ll notice that the wood needs sanding. Make sure to clean the dust and you’ll probably want to wipe it down with mineral spirits.  You can also use more vinegar but make sure it’s dry before applying a stain.

We’ve been using oil based stains on our trunks. Sometimes it only needs one coat but it usually needs two. Depending on what your particular stain suggests, you may have to let it dry overnight.

You can polyurethane over the stain or just wax if you prefer that look.

For the interior….well that depends on the state of it.  If you find mold, use vinegar, bleach or a commercial mold solution. You can take it down to the wood or just cover anything nasty with fabric or paper collage, either which you can apply with Mod Podge.

And that’s it!  But if it’s too much work, that one at the top can be purchased here for $195.

DIY Wood Restoration. Unedited Video

DIY Wood Restoration. Unedited Video published on

So much for trying to shoot a DIY video.  Surely every shoot has it’s share of outtakes.  The difference is that other people know how to edit.  Here’s our first attempt at a how-to video on wood restoration.  Near the end, we had to cut and paste some clips, but….well, you’ll see.

If you didn’t catch it, here’s a list of items mentioned.

1. Sandpaper 120 grit-400. The higher the number the finer.
2. Rags. To be disposed of after job is done.
3. Fine steel wool.
4. Stain brush or foam brushes.
5. Safety mask with chemical/gas filters.
6. Latex gloves.
7. Howard Restor-A-Finish
8. Recommended stain: Mohawk
9. Recommended varnish: Epifanes Rubbed Effect

Are You Ready for the Summer?

Are You Ready for the Summer? published on

pool

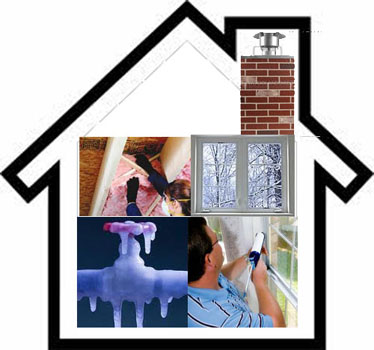
The winter months require preparation for the home in the form of not letting the heat escape but how does one prepare their home for the summer? If you answered “Keep that heat out!”, bingo, you’ve got it! Here’s a list of things you can do to keep your home safe, cool and dry during those dog days of summer.

1.  Drapes.  Shades.  Shutters.  Yes, you like to let in the light, but that sun isn’t doing you any favors on those 90 degree days.  Keep it out!

2.  Attic ventilation.  Do you have an attic?  Got an attic fan?  As you learned in elementary school, heat rises.  This means the attic is the hottest part of your house and you don’t want the heat to get trapped up there.  If you don’t have a fan and it’s not in the plans to install one, at least make sure you have a vent.  Ok, opening windows will do.  Don’t forget the screens!  And beware the rain if you’re going the window route.

3.  Rain…Ugh!  If you have leaks anywhere around your home, you may have discovered them during the freakish downpours we’ve been having as of late.  Good news for you!  You know exactly what to fix.  For us, sadly, we may need a new roof.  It’s always a good idea during any season to check your rain gutters and make sure they are clear of leaves.  Also, go around your home, even if it means climbing on ladders or hanging out your window, and check the caulking, flashing or whatever other rain barrier you have.

4.  Light bulbs.  Since you’re a reader of this green blog, you must have already switched to compact fluorescent bulbs years ago, right?  Perhaps there are certain antique light fixtures that don’t look good with those squiggly bulbs (guilty).  But you know how much heat an incandescent bulb gives off, so you know that switching to CFL will keep it cooler, right?

5.  Clean your air conditioner filters.  Whether you use window units or a whole house system, clean those damn filters!

6.  Bathroom exhaust fan.  Not sure why I’m seeing this pop up on other “summer prep” lists as you should ALWAYS run your exhaust fan during a shower, not just in warm weather.  Moisture in the air will cause paint to peel in any season.

7.  Insulation.  Well, you should have done this in winter to keep the cold out.  If you didn’t, then take care of it now to keep the heat out.  Insulate, weather strip.  Close it up, baby!

8.  Check your screens.  Those little mozzie bastards (or bitches) can get through the tiniest hole.  Buy yourself a screen repair patch.  No need to go all out, just fix those holes!

9.  Speaking of insects.  Those tiny ants always seem to show up out of nowhere in the summer when one crumb is left on the floor.  Gotta keep clean, people!

10.  The pool.  Got one?  When can we come over?
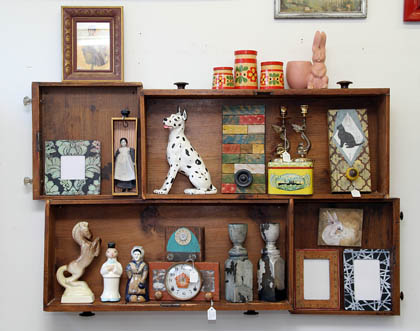
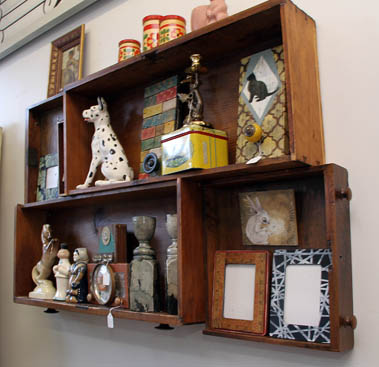
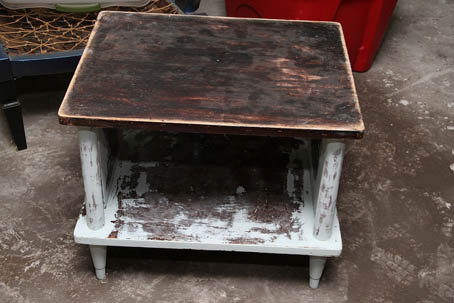
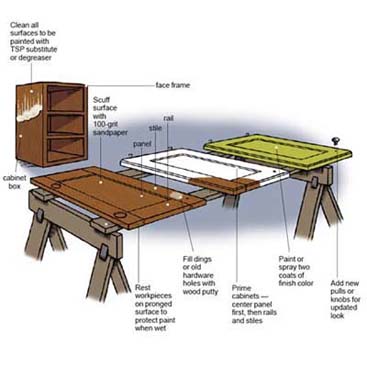
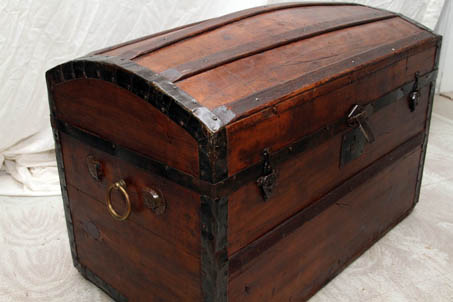
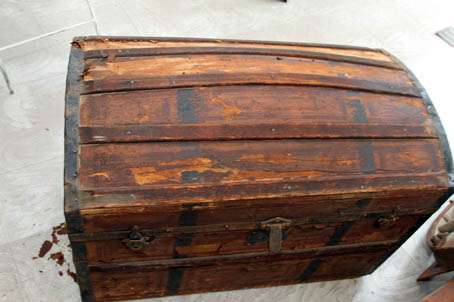
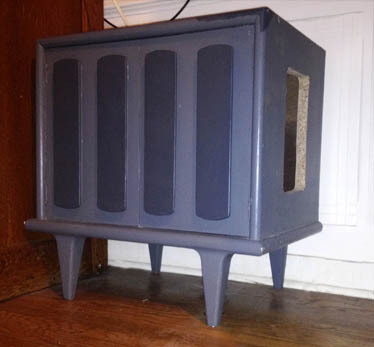
Cleaning Marble with Polyurethane?

Cleaning Marble with Polyurethane? published on 1 Comment on Cleaning Marble with Polyurethane?

photo

*Disclaimer: Don’t try this at home. It was not a scientific experiment, but rather a happy accident.

We were using a beautiful marble top dresser as our desk for a wee bit. Probably not the wisest idea as it’s one of the better pieces in the shop, but marble is easy to clean. Oh yeah, the “desk” is also the dining table and sometimes work bench.

The freakout occurred the morning we discovered a spill on the marble top. Twas either glue or poly. It was clear and peeled off rather easily, like peeling Elmer’s from your skin. So, here’s the thing. When it came off, so did the dirt and stains underneath. The marble was sparkling white!

We did a test with some more water based poly and lo and behold, great results!

It would be irresponsible of us to tell you to spill water based poly all over your marble, but just sayin’, that stuff makes a great cleaner! Oh, if you’re gonna do it, make sure you don’t scratch the shit out of your marble when scraping off.

Categories

Litter Box Furniture DIY

Litter Box Furniture DIY published on 2 Comments on Litter Box Furniture DIY

photo 5

Raise your hand if you have cats. Raise both hands if you have dogs and cats. Now, be honest. How many of you have dogs who help themselves to treats from the litter box? Yeah, you know what I’m talking about! You need to get yourself a dog-proof litter box.

First, my apologies for the terrible iPhone pics. I’m lazy. Secondly, I’m also too lazy to actually finish this project so what you’re looking at is merely a piece of furniture with a hole cut into it. Ideally, the interior would be protected against accidents, because as Elvis says “Accidents will happen”.

We bought the piece at a local yard sale already painted. This is a simple DIY but for those of you even lazier than myself or not skilled with power tools, we will definitely be selling litter box furniture once the shop opens this Spring.

photo 1

First choose the entry way. Make sure it’s high enough so the litter box inside doesn’t block it.

Cut 4 starter holes. They definitely don’t have to be as large as the ones in the photo. We did that to get rounded edges.

photo 3 The tool of choice is a jigsaw. We found it difficult to keep a straight line so we switched off between the jigsaw and another tool.

photo 2The Makita multi-tool is a must have for any DIY geek (or even a real contractor). It’s just fun. Trust me.

photo 4

This particular piece has 2 doors in the front so the litterbox can be placed and removed easily. Notice how our dog is already looking for some goodies. The cats can enter through the side hole but the dog can’t. Ha!

Again, inside and hole should be painted and/or sealed. Don’t be like us. Take it that extra step.

New Year’s Day Catch Up

New Year’s Day Catch Up published on 1 Comment on New Year’s Day Catch Up

Happy New Year, everyone! And we have a new mayor! Yay!

Sometimes I take New Year’s Day off to do something fun, like jump in the Atlantic. Last year we crashed the car. That wasn’t fun. This year the hubby and I just stayed in to work on some home repairs.

We finally got a step closer to finishing the recycled door wainscoting and wall in the kitty fire corner. Still needs some caulking and baseboard. Notice I didn’t see that we “finished it”.

It wasn’t our intention to match the original wainscoting on the right exactly. Had we wanted to do that, we would have searched for that specific style in the local salvage shops. If all else failed, we could have reproduced the lines as was done when we repaired some panels. But I wanted to use those doors! So, it doesn’t match, but I love the idea that we got to recycle those doors that we had no use for.

The blue wall above the wainscot was painted over four years ago. Luckily, the paint was still in the house. Unluckily, it was not from the gallon that went on the walls originally. Oh, I’m sure it would have been fine four years ago, but the fresh coat of touch up doesn’t match the darkened and dirty old paint. Rather than redo the whole room, I’ll just try to match the color better. I’m not even crazy about doing that little bit of extra work.

Hubby took down a crumbling plaster wall in the front foyer, insulated, sheetrocked and added a light and bell while I was painting the wrong color. I guess he wins this round. But guess who has to do the taping (in a few years)? Yeah, I’m the finishing gal.

Categories

Install A Washing Machine

Install A Washing Machine published on 1 Comment on Install A Washing Machine

Washing Machine Installation

This isn’t so much a DIY as a “You can do it” post. Reason being, replacing an existing washing machine with a new one is as easy as assembling Ikea furniture.

I installed my first washing machine yesterday. Thought I’d have to wait for hubby because I don’t deal with plumbing or electric. “Nothing dangerous” is my motto. Had it been a dryer, I would not have trusted myself with the gas connections, but what’s the worst that can happen with water? A flood?

Assuming your laundry area is already set up for a washer, it’s easy. If you’re going about this from scratch, it will require installing water supply and drainage, both beyond my expertise.

Ok, so you’re just replacing, right? A brand new washer will come with directions, some tools and hoses. Save the hoses from your old one if you’re installing second hand. Of course, you can always purchase new ones if need be.

1. The first thing you want to do on a brand new install is remove the shipping bolts. This part takes longer than the rest of it, but it’s very important.

2. The water line hoses on my LG were marked red and blue for hot and cold. Hook those into the hot and cold intakes on the machine. Connect the other ends to the faucet. Hand tighten as much as you can, then use the wrench. Don’t over tighten, but you don’t want a leak either.

3. Drain hose comes connected to machine. There’s a support that’s easy enough to attach to the other end. Stick that end in drain or slop sink (mine is a sink).

4. Plug it in and run a test to check for leaks. If all is good, move it into it’s permanent position.

5. Level the machine with the adjustments on bottom. Personally, I didn’t use a level….just stopped it from wobbling.

6. Do the laundry.

The wrench they provided didn’t work on everything so I’d say it’s handy to have an adjustable wrench. Maybe a screwdriver would come in handy too.

Yeah, that’s it. Not so bad, huh?

Weekend Fixes

Weekend Fixes published on 1 Comment on Weekend Fixes

IMG_0132

So? How was your Thanksgiving weekend? Did you sit around and eat or catch up on some much needed work around the house? We got to check off some lil bits of renovation here at Casa Reclaimed Home.

Over a year ago, our cats tried to kill us by starting a fire. It was behind an old kitchenette counter from our pied a terre days that we were going to remove anyway. The burnt wall sat that way for, oh, a year. Then we finally took the outlet out and re-sheetrocked.

This weekend we got around to matching the wainscoting in the rest of the room. Ok, so it doesn’t match but we made something much cooler.

photo

We used a couple of old doors for the wainscoting. A DIY tutorial will be posted once the molding is finished and all is patched and painted, but you get the idea. Basically, cut the doors in half and line them up. Bam! There’s your tutorial.

photo 1

Our marble window sill was left half finished exactly two years ago. All that was left to do was to add a piece of molding to the front. Cutting, nailing and gluing the trim took all of 10 minutes after two years of contemplation.

photo 3

BTW, here ya go, in case you missed the tutorial on the window radiator enclosure.

It will probably take another 2 years to fill nail holes and touch up.

Winterize!

Winterize! published on 1 Comment on Winterize!

Get ready for cold weather - winterize your home

Ok, so it’s probably safe to say that summer is over. The days are getting shorter and the temps are dropping into winter range at night. Time to get ready whether you’re a renter or homeowner.

Let’s start with the energy saving tips.

1. Air conditioners out of windows.
2. Align and insulate around windows so there are no drafts.
3. Install exterior door insulation strips or throw a towel down if too lazy to do that.
4. This one is a bigger job but it should be done at some point….Insulate attic crawl spaces and basement ceilings.
5. Take out your winter clothes, fuzzy pj’s and big blankies. If you walk around the house in a tank top and shorts and turn the heat up so you can be comfortable, you are an energy sucking vampire.
6. Program thermostat to chill out while at work and sleep.
7. Insulate any exposed pipes and ductwork. If it’s in the walls, whomever installed them, should have done this if they’re near exterior walls.

Safety.

1. Turn off exterior water supply such as hose. They will freeze and your pipes will burst. You don’t want that.
2. Got snow shovel and salt? Don’t wait until the big storm when there’s a rush on them. Be prepared.
3. Clean gutters so they don’t turn into ice dams. Yeah, you gotta climb on the roof.
4. How old is your boiler? Have you been maintaining it? Filters clean? Do you need to drain water?
5. Forced air systems have air ducts that trap all sorts of yucky dust and debris, especially if you have pets. You can get them professionally cleaned every few years but make sure to vacuum the floor vents regularly.

Primary Sidebar