Skip to content

Reclaimed Kitchen Islands

Reclaimed Kitchen Islands published on

4078ca8b7d7afa0b63c0bc94b47a8176

Sometimes a kitchen island is the working hub of the cook’s room, including stove and sink, but sometimes it’s just a bit of extra counter space. Islands are a great option for kitchens that aren’t quite big enough to be eat-in. Stick some stools under that counter and call it a day!

I pulled some pretty pictures for y’all. Ok, for me. I’m thinking of putting in an island. To dish out my restaurant deliveries.

1db39d610f69451a9a300e17c61a516f

Build it from scratch with some reclaimed lumber.

645fe7c3073b48fabe0d2830685ce099

Looks as if the wood counter legs can be tucked away and perhaps counter can swivel on top of other?

4b054a80d27a67dfbfafa09790840d1f

Awesome and way too easy. Of course, it need not be an island.

haynes-roberts-8 copy

Yes, those are antique iceboxes being used as the base. Yes, that kitchen is massive.

4a5d2cd15807588a7a77afe8e316f17d

Lookit. ANYBODY can do this. You don’t need skills. M’kay? And it’s a friggin’ fantastic idea.

Recycled Sheetrock Scraps

Recycled Sheetrock Scraps published on

photo

Don’t throw away those drywall scraps. If you keep what you cut you can reuse it in an art project. Shown here are very levelheaded colors for an office building. There are so many options with this. Go bold! Do photo transfers! Use textures! Caulk the seams!

It’s easy enough to do. Just glue the pieces to a board. You can even paint them before laying them out if you suck at painting.

PS: Of course you can do it with your wood scraps too.

Concrete Wood

Concrete Wood published on

woodcrete

Wood is the esthetic building material of choice when it comes to fencing, floors and decking. The problem with wood is that it starts to wear down after time. Longer lasting options would be Trex, laminate or PVC fencing to name a few. It just feels wrong to replace a natural material with plastic. *It should be noted that Trex is mostly made up of recycled materials.*

We don’t always think of concrete as an alternative to wood, but it’s stronger and lasts a lot longer all while looking more tasteful than other synthetic options. Think of polished concrete countertops and floors.

Unpolished concrete is easier to DIY for the less skilled laborer and can end up looking just as fabulous. As with any concrete job, the form would have to be built, concrete poured and form removed when dry. The “wooden fence” above was created by such a technique. The bad news is that it’s the double the amount of work as installing a wood fence. You basically have to construct two fences and pour the concrete in the middle. If only one side is to be seen, you can cheat with a sheet of plywood on the hidden side. When the wood is removed, voilà, you have a “wooden fence” made out of a material that will last a lifetime.

Concrete can be tinted and let’s not forgot that it’s a fairly inexpensive material. Although controversial for the sake of nostalgia, many wooden boardwalks are now being replaced by concrete.

How to Save Time and Money When You Move

How to Save Time and Money When You Move published on

95389_Cat-Stuck-in-Moving-Box_620

Guest Author: Caroline Casetti of The Humble Haven

I’ve always been a transient person, and I’ve always enjoyed the feeling of going someplace new.  However, as a life-long hoarder, I know first-hand how high the impounding costs of moving can really be.  That’s why I’ve created this concise list to help you make a few money-conscious decisions that will ease your move and help alleviate the inevitable stress you’re more than likely to put on your bank account.

Step 1:

First off, the most important—and possibly most overlooked—thing to do before you move is to plan ahead. Plan what you want to take with you, how you’ll be transporting everything, and figure out what will and will not fit in your new pad.

Start by going through your belongings and deciding what you want to take with you and what you can live without.  For the more sentimentally-inclined, this may be a difficult process, so I’ve designed a full-proof way to help you decide what’s worth keeping: If it’s dusty, if you forgot you owned it, or if you haven’t seen it in years, chances are you won’t miss it.

Also included in the first of a three-step process is to make a list of all your larger furniture.  Depending on where you’re moving, you may not have enough room for some of your larger items, so it’s important to take note of these little details before the situation arises, so you can nip this potential problem in the bud before you ever have to worry about it.

Step 2:

Once you’ve gone through and made a list of all the things you do and don’t need, your next step is to decide how to get rid of them.  You can either donate your old things or sell them to make a profit.  You’d be surprised to find how many obscure buyers are actually out there, and if you’re willing to put in the extra effort, the fruits of your labor will certainly pay off.

However, if you don’t have room to take a few of your more cherished belongings and don’t want to have to part with them, a third option is finding self-storage.  Storage is great at giving you peace of mind, and is another wonderful way to help ease your move.   Look for units that are within a few mile radius of your new home, and be sure to find one that has both 24-hour surveillance and climate control.

Step 3:

Now that the whole organizing debacle is out of the way, the next step is to start packing.  Though it may be easier to simply hire movers to do all the hard work for you, a great way to save money is to simply do it all yourself.

There are a few very simple guidelines you should follow when you’re packing on a budget:

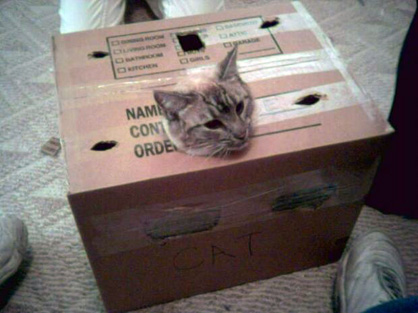
•    Never buy boxes.  Cardboard boxes are a dime a dozen, and there are plenty of stores that are willing to simply give them away.  A few great places to check are local grocery stores, local coffee shops (I get almost all of mine from Starbucks) and food service stores.
•    Be sure to pack everything nice and tight, and put as much newspaper as you can in there to make sure everything’s secure.  If your box is packed and you can still hear its contents moving around inside, you need to add more paper.  Remember to properly label your boxes too, as it’s easy to confuse a fragile box for a durable one.
•    Try shipping a few of your things that simply won’t fit into your aforementioned boxes.  Depending on where you live, there may even be incentives for shipping in bulk.
Take it from me, proper planning and accurate execution is the way to go. To save yourself a lot of time and money, be sure you’ve planned every detail of your move.   Keeping tabs on all your belongings will help make your move a breeze.

Museum Admission Tags

Museum Admission Tags published on

IMG_3750

The Metropolitan Museum is giving up on their iconic admission tags. When I worked at The Met for whole three years of my life, I saved all of my buttons if I didn’t give them away to visitors as a form of recycling. Admission to The Met is now, as it has always been, “suggested” so you can give a penny and get in. Lots of people don’t realize and pay the full amount. Not that there’s anything wrong with that, it’s a great institution that should be supported if the money is there to give. I just happen to believe that art should be available to everyone and I wish that every museum would have a sliding scale. Hear that MOMA?

So, the tags. This post was meant to be about all the lovely museum admission button art created by folks over the years. Surely if I was making earrings and bracelets out of them (it was the 80’s), everyone else is doing the same. Not so much.

I only found a handful of creations online. Very disappointing. WTF, people?

dt424_529

thinker-by-rodin

museum-earrings

Transformations

Transformations published on 1 Comment on Transformations

lr

What good is a renovation blog without before and after pictures?

The living room and bedrooms were mostly cosmetic but bathrooms and kitchens were gutted due to wood rot from leaky pipes and drains. I don’t think any of the original plumbing still exists in the house now.

kitchen

upstairs

pinkbath

A closet was taken down on the right side to add more width. A partition wall separating the toilet from the tub was also removed, letting the window light hit the rest of the bathroom.

downkitch

We totally flipped the first floor kitchen around. You’re not even looking at the same area, so technically it’s not really a before and after.

Cabinet Interiors

Cabinet Interiors published on

intcab

The kitchen cabinets that remained in place during the entire renovation got a fresh coat of paint on the outside. But ah, the interiors were still nasty. They were skimcoated and primed but that still wasn’t doing the trick.

Why yellow gloss? I had it in the house. It looks soooo much for fabulous than boring ole’ white. And it totally goes with my Mexican theme.

Oddly enough, I came home last night after painting and prepared fajitas for dinner.

When Rewiring is a Bitch

When Rewiring is a Bitch published on

8936169736_a9b868d320_o

Antique light fixtures to me are like shoes to other women. I collect them. It’s easy enough because they don’t take up much space. I have my practical fixtures and my dressy ones. Ya know.

Ninety percent of the time they need to be rewired. And eighty percent of that time, it’s ok. But sometimes a fixture becomes a pain in the arse and it’s always the one I realllllly want to use in a certain spot.

Case in hand is this chandelier I just HAD TO put in the kitchen. It had old cloth wire that I cut and tried to pull out when I spray painted. Didn’t come out. My husband managed to get a few strands out but the new wire just wasn’t going through.

What to do?

Well, I’d love to know what a real lighting person would have done but this scrappy DIY crew (Hubby and Moi) drilled holes close enough to the socket and ran wire on the outside of the arms. The wires were painted the same black and voila (!)…you can’t see them. FYI, the photo below was taken during the process, not after we painted. Just making sure you know that.

Anyone got an easier way?

rewire

DIY Industrial Curtain Rod

DIY Industrial Curtain Rod published on

curtain

Here’s a simple and inexpensive way to hang your curtains.

First, a little history as to how I ended up buying my curtain rods at a plumbing supply place.

After rebuilding the rotted window frames, there wasn’t much space inside the molding to hang blinds. There was no way I wanted to cover the window trim.  Having spent a fortune on it, I wanted to show it off.  So, it had to be inside the molding and the I only had about a 1/2 inch to work with. The other thing was that this is a long window, measuring 88″ across, so most of the non-custom rods were too short.

First choice was the Ikea window panels. Love them! But alas, they would have been too pricey for this project.

I did find some cute curtains at Dee and Dee for like six bucks. Now to hang them.

Rope? I like to use rope to hang shower curtains. I figured why not curtains? Well, because there is still no bar. The rope would just sag in the middle. Tension rod would have been another solution, but I didn’t try that.

When I saw an extra piece of copper pipe in the basement, the light bulb went off. I went to the plumbing supply place to see if they had narrow flanges I can use to hang it, much like a closet rod flange. They did not, so I said “Screw it. Let’s use that punchy hole thing that is used to secure pipes.” Then I saw the price of the copper and decided on electrical conduit instead.

And so here we are. For under twenty bucks, I have some curtains and the rod. It took about 10 minutes to install, including the time it took to cut the rod down to size. If you don’t like the way it looks, rest assured, it’s mostly covered by the fabric anyway. Plus, there’s always spray paint.

rod

Apartment Two

Apartment Two published on 3 Comments on Apartment Two

tub

The Rockaway upstairs apartment is now ready for it’s (not so) close up! The original goal was to start showing by the end of May. (The original original goal was to have the house sold by the end of 2012, but we all know how that worked out.) Ok, so this new deadline was somewhat delayed due to the fact that I mistakenly decided to have a life and go away for Memorial Day weekend. But whatev. I’m back up to speed.

I wish every room could be as interesting as doing a bathroom or kitchen. Remember my original pink bathroom that I was determined to keep? Well, it has been resurrected! Still on the to do list: vanity pulls, scrape paint off door glass, lock set, stain saddle and a few other things that don’t show up in the photo.

kitchen

The decision to do a Mexican kitchen was born when I found the ceramic “terracotta” tiles at a Habitat Restore. The upper cabinets were there when I bought the house. Because of my not-so-great planning skills, the fridge, which was originally for the downstairs kitchen, was moved up here because it was too wide. It was meant to go on the opposite wall but proved too big for that also. I ended up tearing down some more cabinets to fit it in that corner. It works so much better there, but now I have to move an outlet. To do list: Move outlet, cabinet pulls, replace broken stove knob, switch plates.

livingroom

This is the living room. I stuck the chair in the photo because it looked so empty, but now it looks even more sad. To do list: Hang crystals from light fixture, re-coat window trim and inner white, switch plates.

frontroom

This is actually the small front room, but it looks bigger than the living room in this photo. It can be a second junior bedroom, an office or child’s room.

bedroom

The main bedroom is Manhattan sized also, but it has a room off of it with a closet that can act as a dressing room. Nothing at all interesting about this corner photo. I just wanted to show off yet another vintage light fixture.

Related: Apartment One

Here are some “before” shots…

IMG_8621

Front Room

IMG_8623

Living Room

IMG_8625

Kitchen

IMG_8629

Pink Bathroom

Works in Progress

Works in Progress published on 3 Comments on Works in Progress

wood

Just some pics of the renovation process. Although the downstairs apartment is ready to show, I’ve decided to wait until upstairs is finished before inviting the public over to have a look. Now I’m pushing the date back to AFTER Memorial Day weekend. And no, I will not be working that 3 day weekend.

whtdoor

The door to the bathroom (above) was under $40 (maybe even $20?) and came with multiple layers of paint. I should have realized because of the weight of the thing that it was a decent wood, but I was delighted to find whatever-species-this-is when I stripped it down.

stripdoor

Please refer to the paint stripping post for DIY tips!

marble

Antique marble was originally used for the baseboard in the upstairs bathroom. It didn’t really match the new tiles that were installed so I cut this piece down to use as a saddle for the downstairs bathroom.

frosted

Same downstairs bathroom. After months of keeping roisin paper on the window, I finally discovered frosted window film. What a concept!

befvanity

Picked this up at a vintage shop in Newburgh for 25 bucks. Forgot the name of the place, but it’s owned by Barbara of Caffe Macchiato on Liberty Street.

vanitypaint

The piece is currently undergoing transformation to make it into a sink vanity for the pink bathroom upstairs. This is 2 coats of paint. Will need one more at least.

countersand

This chunky old wood will be the countertop for the “Mexican” kitchen upstairs. That’s a before and after sanding shot, in case you haven’t guessed. Love the grain!

And that’s it. Can’t wait to show the finished pictures! All in good time, my friends. All in good time.

Stenciled Door

Stenciled Door published on 2 Comments on Stenciled Door

door

With a tight budget and desire to recycle building materials, I actually wanted to keep the hollow Home Depot doors that came with the house. Only a handful of them are still in good enough shape, but I thought it would be nice to think of them as blank canvases and make each one into a work of art (or some kind of crafty process).

The closet door above was the first one to get all gussied up. The chipping paint revealed some beautiful turquoise that must have been there since the 40’s or 50’s. That was a keeper. What to do with that? I thought of those signs I found in the bathroom floor during demolition and decided to recreate that.

scrape

The paint was chipping off in big chunks, so scraping was a breeze.

tape

DIY is pretty simple. Just get some tape and stencils. Oh, and paint.

As someone without patience, I didn’t use a straight edge or pencil lines. It’s recommended though. I also hand-held the stencil letters and went along to the next one without waiting for them to dry. Yeah, it smears. Don’t take DIY tips from me.

closebeach

Didn’t have arrow stencil so the arrows were brought to you by the letter “I” and some tape for the point.

Funny story. This particular door faces East/West and the bay and beach are North/South, but I didn’t want to do up and down arrows.

Apartment One

Apartment One published on 5 Comments on Apartment One

living1

Open living/dining/kitchen area.

One half of the two family Rockaway house will be liveable by June 1st! As in liveable for normal people, not someone like me who no longer notices lack of switchplates and doorknobs. The self imposed deadline was set for this weekend to take some pictures and start spreading the word. Although it’s ready for it’s close-up, it’s a few days from being ready to show. Show by next weekend? Yeah, probably!!

The entire house will be for sale or rent by the end of this month. I call it a two story bungalow. It’s a cozy (that means small in realtor speak) 2 BR over 1BR, just under 1000 square feet for the whole house. Gotta do some comps and math to come up with prices. The website will get started (but not finished) today.

I’m on a roll baby and it feels good!

arch

kitchen2

Yeah, that toe kick needs to be painted and stove needs backsplash.

sinkdoor

The old singer sewing machine base trick. A favorite of mine.

bedroom

Long, narrow bedroom in the back of the house. I want to work a little magic on those plain, white doors if I get the time.

IMG_8617

Kitchen area before.

IMG_8788

Living room during demo.

Creative Door Trim

Creative Door Trim published on

horsehor

After having spent a couple of thou on molding for the entire house, my favorite trim was a result of righting a mistake and the cost was only 20 bucks.

This is the downstairs bathroom. Long story short, I had intended to do wainscoting on the lower wall and when I couldn’t find reclaimed I decided to do a faux effect instead (photo below). I don’t love it but that’s beside the point. Anyway, for some reason I was too lazy to continue the design all the way to the door, figuring that molding would cover it up.

Well, I don’t know what I was thinking. Your basic molding isn’t a foot wide. So, I’d either have to match the swirly design or get some wide ass molding.

I went with the wide ass molding. Found these side panels at Build it Green. Now the problem would be finding a top piece. After weeks of searching to no avail (You wonder why this reno is taking so long?), I had to put a piece of 2×6 in there and figure out how to make it look nice.

The horse was left over from my crafting days. The black horse didn’t pop on the dark colored molding so I added the copper “frame”. Still looked boring, so I added the stenciling on each side. Now the sides looked lost. Shit, I just want to finish this renovation but I’m a sucker for the details! Soooo, I had to embellish the panels with some copper too.

This door is currently my favorite part of the house. Probably because it’s the only thing I’ve actually finished (and not even…I still have to caulk).

horsevert

Primary Sidebar