Skip to content

Modernizing Raised Ranch Exteriors

Modernizing Raised Ranch Exteriors published on

The problem with raised ranches is that they look dated. Those 1970’s-1980’s models are about as stylish as that old Flock of Seagulls haircut. The good news is there’s always a way to change the look of any house. The bad news? It’s hard on the pocketbook. The good news? It’s less expensive than buying a new/old dream home.

The house above is actually a renovated raised ranch. I’m no architect, but this completely modern look probably means lifting the roof. Forget the deck thang because it’s not compatible with most split levels. Just picture the upper story with all windows.

Instead of going with contemporary, how about stepping back in time? This raised ranch was built in the 1950’s but that doesn’t mean your 1980’s home can’t rock the mid-century look.

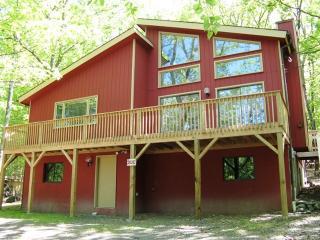
Howdy! How about “barn style”? Paint it red, slap a front deck on it and yee-haw, you’ve got yourself a rustic abode in the burbs.

No, this isn’t a raised ranch but it’s the closest image I could find to a stucco home. Stucco comes in any color, so you can have a pretty pink stucco ranch if your heart so desires.

Fine Homebuilding did an article on how to get rid of that raised ranch overhang. Think about it, without that, the house could take on any look you want. With some recycled brick, it can look like the house below.

I didn’t find any Victorian splanch photos, but with some wood siding, a porch and detailed trim, you got yourself a Painted Lady Victorian!

Click on the images to get more info on each house.

Updating Raised Ranches. Part I

Renovating on a Tight Budget

Renovating on a Tight Budget published on 1 Comment on Renovating on a Tight Budget

If your renovation is costing more than you paid for your house, something is wrong. You shouldn’t have to sell your first born to update a home. Sure, there are certain large ticket items you wouldn’t want to skimp on….roof, windows, facade, boiler, structural. But semi-skilled work? Come on.

As you know, I’m a big advocate for DIY. If you put in the sweat equity, you can be save yourself in the vicinity of $40k. I came up with that estimate by comparing DIY input to that of an unskilled day laborer at $125 per day over the course of a year. My own skills are superior to a guy you pick up at Home Depot, so my own estimate is probably double that. Obviously you wouldn’t quit your $200k per year job to do it, but as a freelancer earning bupkas, I was able to put in the time. My husband who put in a lot less time because he actually has a full time job and does earn something, probably saved us even more while only working on the house on weekends. That’s because he has mad skills.

Before I go into materials, just a few thoughts on other ways to save on labor. Painting and demolition parties, barters, hiring apprentices to high end contractors and of course picking up day laborers.

Materials range from free to high end. Since this has the words “tight budget” in the post title, guess where I’m going with this?

FREE

It would be a fun experiment to try to do an entire renovation free of cost. But nothing is ever free. It would take tons of time and probably cost more in fuel than trying to buy locally. But here goes…..

1. Craigs List. Go directly to the “free” section. You may find anything from sheetrock scraps to clawfoot tubs. People measure wrong, decide to use something else or may want to recycle what they are ripping out.

2. Freecyle.org Sign up for the group to gain access to a nationwide network of recycled goodies. IMO, it sounds a whole lot better than it is. When I signed up, I couldn’t believe the audacity of some people. One of the requests I saw was for a minivan for someone with 8 kids. Hello, maybe you should stop having kids if you can’t afford a van! But I digress. You can post your own needs, search for what’s out there and offer up what you no longer want.

3. Dumpster Diving. Oh yeah! I’m talking dumpsters parked outside of a renovation, obviously. Better still, find the fixer uppers that have just closed, contact contractors and demolition guys to see if they’ll give you the head’s up. No, they won’t be happy, but one or two of them might not think it’s great to stick everything in the landfill. You know, those sensitive contractors.

Almost Free

1. Craigslist. This time search “materials”.

2. ReStores. Located throughout the US and Canada. Run by Habitat for Humanity, these shops take donations from the public and sell the items at a fraction of the cost. They have everything including the kitchen sink. Paints, cabinets, light fixtures, furniture….

3. Build it Green. I saw a coffin in here once. If you live in NYC, this place is just as good as any Restore since the closest ReStore is in Mt. Vernon. BIG is a huuuuge warehouse in Queens. They have new and used studs, wiring, cabinets, doors, windows, appliances and more. Do keep in mind that items like plywood, sheetrock and studs go quickly as these are basic to any renovation.

4. Salvage! There are antique architectural salvage yards all over the planet. Although you might sometimes find a bargain at Olde Good Things or Demolition Depot, they are not for the shallow pocketed. My two local faves: Eddie Hibbert in Clinton Hill and Vaccaro’s in Gowanus. I’m talking antique french doors for 20 bucks and marble mantels for less than $400. *They may need work.

5. Overstock and Closeouts. Every now and then, manufacturers need to get rid of some clutter. There are samples, irregulars and dead stock taking up space. They don’t always post it online, but I’ll give you a for instance. I once found the mother load of concrete tiles, countertops and sinks on Craigslist. Get Real Surfaces in Poughkeepsie was having a sale to get rid of dead inventory. I made out with enormous boxes of tile for $10 per box. They were probably worth about $20 per square foot.

6. Ebay. Did you know that you can buy faucets, toilets and tools on Ebay? Yep, it’s all there!

7. Overstock.com. Sometimes good for faucets, shower and light fixtures, tiles…it kind of depends on what they have that week. Hit or miss.

Upscale. Low Budget

Green Demolitions. Buy what the millionaires got tired of looking at. Top shelf appliances (think Viking, Sub Zero) and cabinets for a ton less than what you would pay new. These aren’t completely inexpensive, but it’s a good deal for what it is!

PS: Side effects may include saving the planet while saving your pocketbook.

Sullivan County Homes Under $30k

Sullivan County Homes Under $30k published on

Think you can’t afford a second home? What if I told you you can grab one for as low as $15k? Yup. I’m not saying it’s the most desirable house in the most desirable area, but you can make it a sweet getaway.

Don’t even THINK of grabbing that house above for $15,000. I want that one. Looks like an old farm house but it was actually built in 1970. This could be a plus, as it sits on 2.31 acres and old farm houses are almost always right on the road. So it’s possible this house is set back a bit. It’s located in Monticello. Last time I was in Monticello, I was about 12. No kidding. It was kind of crappy back then, although it’s a beautiful landscape. Anyway, who cares about any of this? The. house. is. $15k.

This listing doesn’t give much detail. I guess the agent couldn’t be bothered to even take a picture for her commission on the $29,900 list price. Looks good from that angle. It’s a 2594 square foot four bedroom in Hurleyville, NY. I think I have an idea of where that is. Nice hikes and all, but not much going on culturally. In fact, I do believe that if you’re not an orthodox Jew, you may feel a bit out of place. On the other hand, if this is a flip, a 4BR would be a selling point.

Yeah, I know. It looks like a trailer. But hear me out. It’s actually a 1950 ranch on 4.9 acres. divided into 2 parcels. Still with me? Good. Take a look at the interior shots. There’s something to work with here. Can you see your mid century fab getaway? Are you seeing the fifties kitchen? Oh, I didn’t mention that it’s in Neversink and includes lake rights and three outdoor sheds.

**When you’re looking at distressed properties, please keep in mind that you may encounter wildlife living INSIDE of the house. Try not to freak out. Where boots and bring a flashlight (although, if the realtor doesn’t have a flashlight for abandoned homes, they should be fed to the wildlife).

The House as Art

The House as Art published on

A psychic once told me that I was going to become an interior designer. She said I see the way the fabric in a curtain hangs and I look at that as art. I was like “No, you’re nuts. I’m a photographer.” Well, about 25 years later, I realized that she wasn’t so far off.

There are two kinds of people in life. Those who want a completely finished home that just needs furnishing and those who see a fixer upper and get excited over the possibilities.

Up until a few years ago, I thought everyone wanted to have control over their own renovations. Sure, it takes up your entire life for a few years, but you forget all about it once it’s over. I wouldn’t want a nanny raising my (non-existent) baby. Why would I hand my house over to someone else?

Someone recently asked me “Why”? What is it that makes me walk into a chippy paint, crumbling, derelict home and fall in love?

Hmm.

Each home is a history lesson. Much like the Tenement Museum is one of the most fascinating places to me, a home forgotten in time takes me back to that era. These home are over 100 years old. Perhaps it’s my mission in life to preserve the past before some eejit rips everything out and installs sheetrock, engineered flooring and Home Depot molding. (I just puked in my mouth thinking about that.)

It’s a blank canvas. I can’t remember a time when I wasn’t a “creative”. I always see things and want to change them. I still have difficulty comprehending that not everyone is right brained. Is it like being psychic, where you have to develop that skill? If so, I should be working on my left brain capabilities because I’m sorely lacking in those areas.

Anyway, blank canvas. So, I walk into a house and I see the finished product. It’s kind of like being a photographer. I envision the end result and work backwards from there on how to make it happen.

“But HOW? HOW do you just walk in and envision everything finished?”

I don’t think I’m creative genius who comes up with completely original ideas. My memory sucks, but I must retain visuals from homes, museums and magazines that my brain recycles for each potential project. Well, there ya go! That’s something everyone could do. Start visiting house museums, go on house tours, travel, save images (the 2011 version of magazine clippings).

Adding, not taking away. Lookit. Say you buy a place that has been renovated, but it’s not your taste. You choose this place because the house that needs too much work scares you. But now you’re stuck ripping out that pink granite countertop and those hollow Home Depot composite doors. And what are you going to find underneath it all? How do you know the previous owner didn’t cover up rotting wood or leaky pipes? You don’t. And you’re adding NEW materials to the landfills.

With a fixer upper, you can look at the bones of the place. The original lines of the building. The intricate details and plaster curves that are no longer produced. Try to salvage that stuff! Something can’t be saved? Yeah, it goes in the landfill, but it was made 100 years ago, not 10.

Any questions??

Blogs I’ve Just Discovered

Blogs I’ve Just Discovered published on 1 Comment on Blogs I’ve Just Discovered

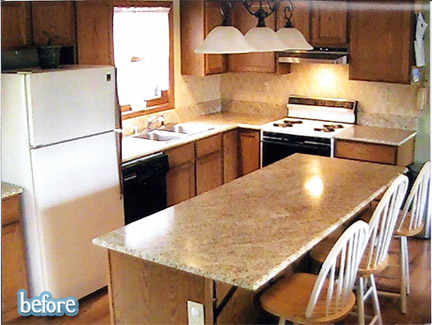
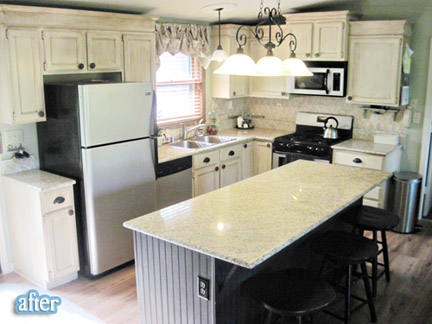
Better After is a blog that asks readers to send their before and after shots of furniture and renovations. There some ab fab pieces on there that make me miss my furniture upcycling days. The room redos are ta die for too! Most are not even full renovations, just some paint and good taste. Love it!

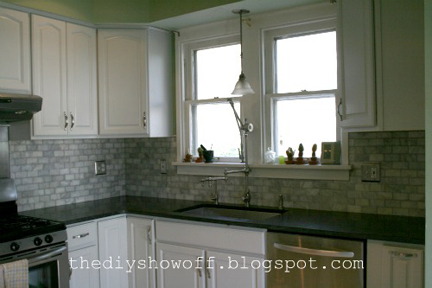
DIY Showoff similarly posts before and after shots sent in from readers. It’s, dare I say, more mainstream, less precious-crafty. Not that there’s anything wrong with that! The site was started by Roeshel who has been restoring her own 1927 farmhouse. She has frigawesome taste. I was salivating at her marble subway tile backsplash.

Shabby Blogs is another blog that relies on reader participation. Actually, it’s more than that. It’s like a prettier version of Houseblogs. No, it’s more than that. You can create your own blog with their design templates. All for free! And they’re quite purdy too.

DIY Insanity asks “Is it nuts to design, permit and build an addition to your house by yourself?”. I saw the header and thought “No biggie” but when I started reading the posts I realized this was a huge job they undertook. Like big cranes and shit. Yikes! I like the “Gardening with a Sawzall” post. Good idea!
Backyard Deck Styles

Backyard Deck Styles published on 2 Comments on Backyard Deck Styles

I believe it’s been about a year since we decided to build a deck off of our parlor floor. The plan was that I design it, my husband does the measuring and drawings and our architect neighbor files the plans.

The problem is, I’m stuck on step one.

At first I wanted something industrial. Because structural engineer hubby is a bridge guy, I though it would be really cool to have it look like a bridge. He told me that fabricating something from scratch would be pricy, but there is a way to make the posts look bridge-like. But that’s just the base. Do I really want the railing to be thick and industrial too? I don’t know. Do I?

Nice Balcony

The other option is fancy wrought iron. I’m picturing a Venetian balcony. When I googled images, I was impressed by the French Quarter balconies of New Orleans. This style would go with the house more than industrial, but I worry that it may look too messy because I think I would prefer to go with salvaged materials and we may not get enough matching pieces to go all the way around. What if it’s hodge podge? Could that possibly look cool too? I don’t know. Maybe.

Why is steel base with wood railing not an option? Because it’s just not. I’m not envisioning it at this moment in time. It’s a Brooklyn brownstone, not a country home overlooking a meadow. Not a Hamptons home on the beach. Yeah, I know most people just do wood because it’s simple (we built our own in our first house) but I’m just not feeling it. We will install FSC Ipe tiles on top of the steel “subway grates”, but that’s it. Ipe, like any other exterior wood, starts to look crappy after a few years. IMHO.

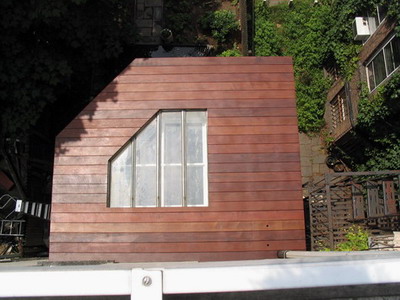
BTW, I do like that window in the deck floor in the first photo, don’t you?

Once we figure out the railing, we have to decide what to do underneath the deck. The goal is to be able to let the pets exit through a dog door when we are not around and keep them and the house safe. This means that under the deck will basically be a cage. We don’t want it to look like a prison though.

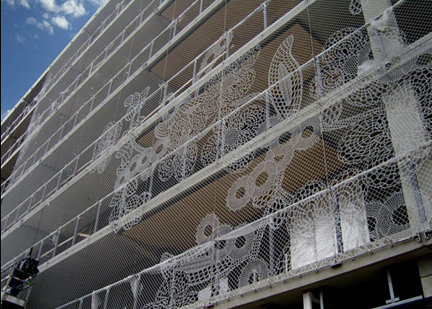
If modern industrial, we could go with some kind of hard mesh or to make it more interesting, a “lace fence” like above. That would probably cost more than the house itself, plus it’s a little too pretty for my taste.

Or…the antique industrial look could rock. It might be a perfect mix of both. The above photo is Kilmainham Jail in Dublin. It’s now a museum that I’ve visited many times and I love the aesthetic. Hmm, maybe I DO want it to look like a prison.

At this point, perhaps I shouldn’t go crazy over the design and just do a functional, inexpensive deck so we can enjoy it this year.

Oh, I don’t know. What do you think?

Let’s Talk Gardens

Let’s Talk Gardens published on 4 Comments on Let’s Talk Gardens

IMG_0511

Let me be clear. I’m a DIY chick, but there are certain areas where I lack skills. I don’t cook. I don’t sew. And I don’t do gardening. This Spring I’m all about planning the parlor floor deck so we can hang out upstairs and watch the pets spread their feces around the yard.
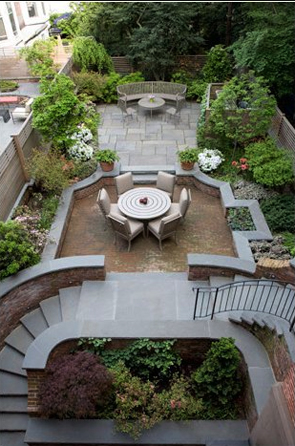
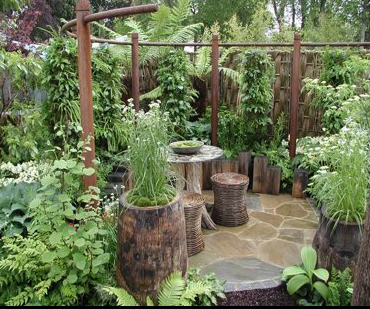
I don’t know if it’s because I realize the deck won’t actually get built until 2020 or if most of the interior renovation is done and I’m getting bored, but I’m jonesing for a nice garden this year. I did get inspired by some photos (below) on Brownstone Brooklyn Garden District‘s Facebook page. Aren’t they gorgeous? Most were done by professionals, but this control freak needs to design it herself and play in the dirt.

When we first bought the house and I saw the lovely astroturf on the fence, I immediately envisioned a 1950’s kitsch back yard with pink flamingos, garden gnomes and string lights. Now that I’m working on this masterpiece deck, I know it’s not gonna match the tacky yard.

I’m thinking something more grown up. I love every single one of these photos. Between the pets and my black thumb, the less maintenance the better. Sooo, what should I do? *Also, if you wanna come over and help, there would be beer and pizza in it for you.

Frigidaire Sucks!

Frigidaire Sucks! published on 6 Comments on Frigidaire Sucks!

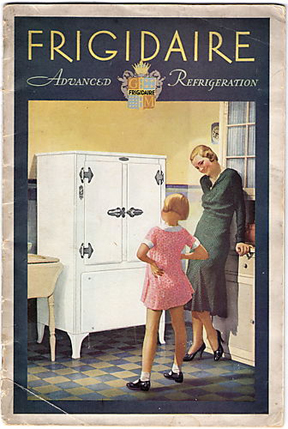
When we bought our house back in late 2005, we did a complete renovation. We purchased all new appliances. They were all Frigidaire because the company manufactured the best looking appliances for the lowest price.

Well, looks aren’t everything. To be fair, we purchased the most affordable Frigidaire models. Perhaps the higher end lines are far better.

Our washing machine had to be repaired after about 3 years. Just after the warranty had expired, of course. A $200 repair. It’s still not 100% but we’ll hang on to it until it dies.

Today we’re getting delivery of a dishwasher and gas dryer. Bosch and LG, thank you very much. It’s shameful that big appliances would only last 5-6 years. WTF?

Were we wrong for expecting more? In this disposable society, you get what you pay for. If I may pass on some advice from my mistakes….don’t buy big ticket items based solely on price and looks. Sometimes it’s worth it to pay a bit more. (Of course, this being said, I hope the Bosch and LG last longer!)

DIY:Plaster Medallion Repair

DIY:Plaster Medallion Repair published on 2 Comments on DIY:Plaster Medallion Repair

IMG_0215

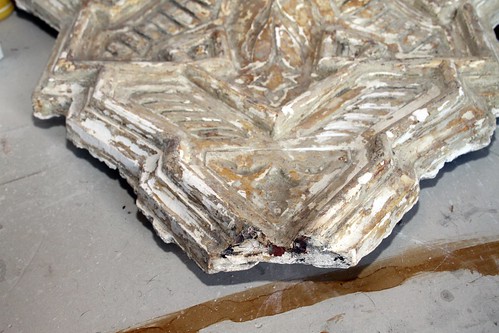
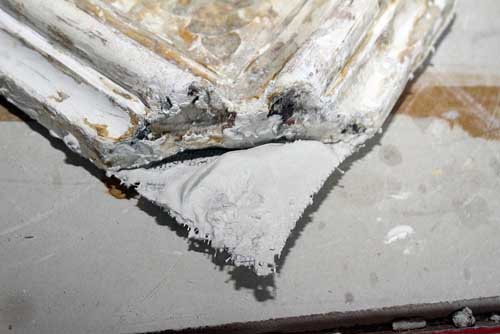
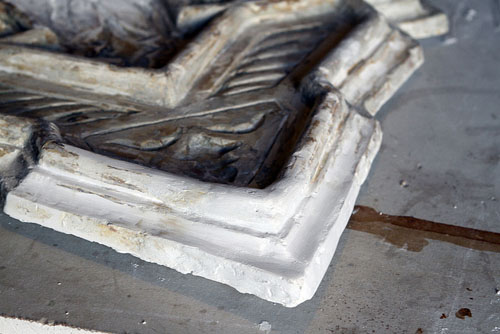
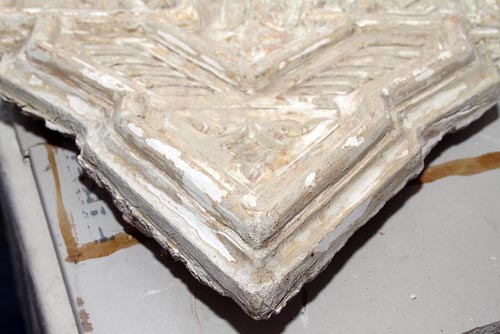
The broken plaster medallion came out of a Park Slope brownstone restoration about four years ago. I purchased a bunch of architectural salvage from these folks who were updating (raping) their historic home.

Fast forward to this past weekend. I finally repaired it.

Now, if you’re thinking I’m going to give you expert advice on how to successfully repair ornamental plaster, think again. A word of caution…this was all trail and error. So, I’ll share with you the mistakes I made so you don’t have to go through it yourself. Deal?

I couldn’t really find any DIY posts on this subject and I found out there was good reason. It’s a job for a skilled professional. The best article I found was from the government historic preservation site.

Ok, so DIY….

Well, my first idea which I thought was so brilliant, was to build a mold. I went to the useless Pratt Art Supply Store where not one of the four employees I asked knew anything about molds. Hello, art supply store? Know your merch! But I digress.

The resin mold might have worked fine if I wasn’t too lazy to build the perfect support to house it. Ah, but I was. I did a half ass job and the liquid mold dripped out. What was left of my mixture in the cup did harden quickly, so I’m thinking it may have work better if I let it set first to a jello-like consistency. But alas, I didn’t and the thin coat that was on the medallion was impossible to get off.

Take two. I’ll sculpt it myself.

I’ve never worked with Plaster of Paris before. Love the pre-mixed stuff too much. It took me a few tries of mixing the plaster to get it right. FYI, that shit hardens immediately! The trick is to a) use ice cold water and b) hit it with a spoonful of vinegar to retard the drying process. You still need to work fast, but at least it’s within the realm of possibility.

The mixture in the photo below was way too thick. It dried completely within like 2 minutes, leaving me no time to work.

IMG_0233

Ok, this is where you might not want to take my word as gospel. Do your own research because I haven’t a clue if this is the right way of doing it. I just know that my medallion hasn’t fallen apart yet.

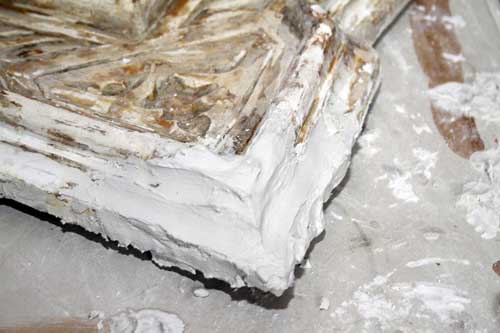
I started from the back. I had to support it somehow. I didn’t have fiberglass mesh in the house and this metal screen was just sitting there staring at me, so I figured WTF? It’s stiffer than mesh. Um, kind of like re-bar, right? I dipped paper joint compound tape into the plaster and used it to “paste” the screen backing. I also built it up on top of the tape. Think plaster cast or paper mache.

The next step was to build it up and start to shape it. Since sculpting is not my forte, I figured there would be some sanding involved.

Here’s the first glob. That took some hand sanding until I realized I could cheat with a Dremel tool. The Dremel worked great! One more application of plaster and some more sanding did a good enough job.

Oh, this is the unbroken side I was trying to replicate. Not bad for my first attempt at this stuff, right? Please be kind if you know I totally did it the wrong way. Just humor me.

Goodbye, Dream Home

Goodbye, Dream Home published on 2 Comments on Goodbye, Dream Home

2233370312_3fdd334b8d_o

In a few hours we’ll be closing on the sale of our Beacon house. Don’t get me wrong, I’m elated that I’ll have one less headache. You know the saying “The more you own, the more it owns you”. We’ll take weekends off instead of working on the house and we’ll buy toys for ourselves because we won’t be paying two mortgages. It’s all good!

I can’t help but feel a bit melancholic though. This was our dream house and it took us a long while to arrive at a place where we were able to afford our perfect house. We thought we would stay forever. We stayed for six years.

So, goodbye huge backyard. Goodbye spectacular antique woodwork. And stained glass. And awesome wrap around porch. So long, pocket doors. Turret.

It’s not you that we’re leaving, House. Don’t feel bad. As of today, you’ll get a fresh blast of love from someone new. If we could transplant you to Brooklyn, we would. But alas, it isn’t to be. We needed to be back in the city at this time.

We are fortunate enough to be living in another architectural dream of ours: The Brownstone.

But between you and I, House, Queen Anne Victorian trumps narrow brownstone living any day of the week.

I’ll miss you! 🙁

PS: I’m keeping the logo.

10 DIY Tools To Be Thankful For

10 DIY Tools To Be Thankful For published on

400

1. That razor blade holder thing for paint removal.
2. Cordless drill. Oh honey, I’ll never take you for granted.
3. Tape measure with marked fractions. Because I don’t know how to read it otherwise. Yup, there, I’ve said it.
4. Duct tape. You know why. When you can’t fix it….
5. Swiss Army Knife. Well, I don’t really use it around the house, but I carry it with me and it does come in handy at work.
6. Center punch. That little thing comes in handy!
7. Staple gun. Almost as versatile as duct tape.
8. Foam paint brushes. So environmentally unfriendly, yet so unbelievably convenient.
9. Metal snips. Because you can use them to trim bushes too.
10. Hammer. Of course, I wouldn’t forget you, my dear old friend.

Reclaimed Handmade Parquet

Reclaimed Handmade Parquet published on

76156_139994666053327_131677283551732_229824_7971104_n.jpg

73968_139994652719995_131677283551732_229823_2097797_n.jpg

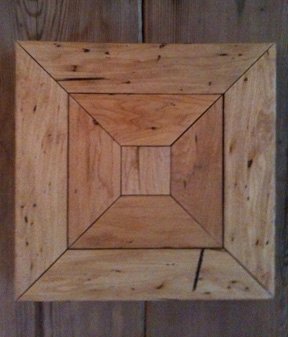
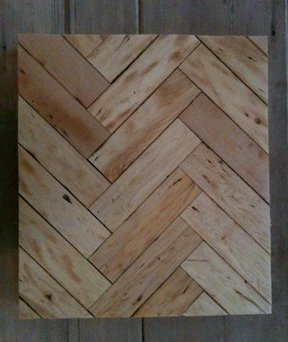
Summit Surfaces has introduced a new parquet flooring line. The recycled 200 year old maple comes from a factory in Tribeca. It looks a little different than that thin crap you can buy at big box stores, no?

Although they do use the word “affordable” on their website, I’m not quite sure it’s affordable to everyone as their clients look pretty high end. At any rate, perhaps I can afford one tile to use as a trivet? They ARE beautiful!

Primary Sidebar