Skip to content

How To Keep Your Basement Dry

How To Keep Your Basement Dry published on 3 Comments on How To Keep Your Basement Dry

flooded-basement.JPG

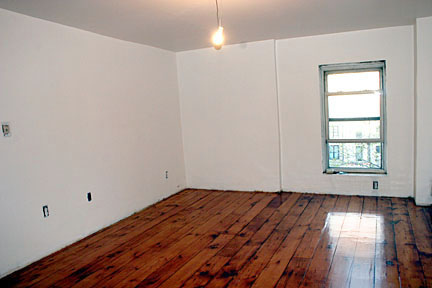
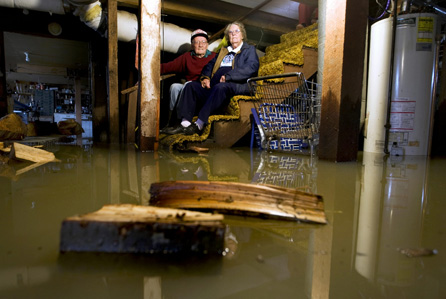
Now that the snow is melting, basements will get flooded. Well, mine anyway. There is no one quick fix. It could be a number of maintenance issues causing the problem. The best way to figure it out is take a good look around when it’s damp. Like right now.

Let’s look at small and easy DIY repairs first.

1. Start outside. Make sure your gutters are all connected and direct water away from the house. It seems so simple, but do you know how many people don’t realize they have lovely waterfalls flowing down their homes?

2. Ok, downstairs. Check your bricks and block work. Do they need repointing? Concrete sealers such as ThoroSeal or Drylok are never a bad idea. In fact, it’s a good idea.

3. Something you might want as a “just-in-case” even if your basement is bone dry is a sump pump. You will need to dig a small hole for the unit. Definitely install one if you’ve given up and let it flood every now and then. It trumps a wet/dry vac, trust me.

4. While we’re still on small stuff, treat yourself to a dehumidifier for the dampness. This one was way obvious, right?

5. Still flooding? Ok, now it’s getting more complicated. Go back outside. Check the slope of your landscape. The water should flow away from the house, not towards it.

6. While your at it playing with the pitch of your landscape, might as well install a french drain. DIY? Maybe with difficulty if it’s all soil. If your house is surrounded by concrete, that’s an even bigger job. Now it’s time to think about calling in the pros.

7. There’s another way if you don’t want to dig around your house, but it ain’t pretty. Professional systems such as B-Dry are installed on the inside. The cost is as much as a brand new inexpensive automobile. On the other hand, we did a DIY alternative in one of our homes and it worked like a charm.

If you have any dampness issues at all, DO NOT store stuff that will get moldy. I lost all of my cherished record albums that way. Every one of them.

Saving the Medallion

Saving the Medallion published on 3 Comments on Saving the Medallion

4387414716_48b7c6f783.jpg

Our hallway ceiling was beyond repair. It was sagging with too many cracks for a skimcoat and the plaster is so dry that it just crumbles. So we needed to take down the ceiling and put up sheetrock.

Why not simply laminate you ask? Well, we have the original wood molding near the staircase, so the sheetrock had to fit underneath that.

Anyway, we’re talking medallions. So, we have this medallion, see? Obviously needed to save that baby! It could be a diy job, but I wouldn’t trust myself  or my husband to do it. I just had visions of that medallion crashing down on the floor. So, Dimas the contractor to the rescue.

Here’s what he did:

1. First thing is, he secured it with more screws, making sure it stays with the remaining ceiling. The screw holes can be patched up later.

2. Cut around it. Crap, I forgot to see what tool he used! I’m sure the hubby would’ve gone in there with a Sawzall , but he either did it manually with a utility knife or maybe used a Jigsaw.

3. With the medallion secured and separated from the rest of the plaster, it was time for the ceiling to come down.

4387415172_211e3823a5.jpg

4387415418_c5302ea342.jpg

4387414974_9730ce0dd7.jpg

4. Sheetrock hole was cut as close as possible and plastered all around.

4386653743_35b7655743.jpg

5. This is as far as he got, but you get the picture now. Maybe another coat of joint compound, sand, prime and paint.

The $10,700 Stoop

The $10,700 Stoop published on 6 Comments on The $10,700 Stoop

3721853878_def6ddb22f.jpg

So, our brownstone stoop was collapsing and we couldn’t put it off any longer. Yes, we are DIY maniacs, but detailed masonry is not our forte. Unfortunately, I didn’t take before shots, but that side detail was a big bulge, “fixed” by the previous owners over the years. The gate was coming away from the frame, making it mighty difficult to open.

There were a bunch of recommendations for Z. Abedin on the Brownstoner forum. That’s the guy we went with. Licensed, responsible (like he actually shows up when he says he will!) and not as pricey as some of the other brownstone guys.

Could we have gotten this for less? Absolutely. The people up the street are getting their facade done. It’s a total mess and the scaffolding looks dangerous. I’ll bet they would’ve done our stoop for less than half the price. But sorry, it looks like they don’t know what they’re doing. I feel bad for my neighbor.

Something I didn’t know….the longer the scratch coat cures before applying the brown coat, the better it will “take”. It should be a minimum of 2 weeks, but Z suggested even months. That’s fine with me, since we’re paying him in installments. The only thing is, we’re going to have a gray stoop for awhile.

More progress updates tomorrow.

Related: Holes and Wet Stoops

Reclaimed Flooring

Reclaimed Flooring published on 5 Comments on Reclaimed Flooring

5 years ago, we paid around $6000 for reclaimed wide plank pine for a 600 square foot room (installed and finished). And that was the best price. Maybe we had more money to throw around back then, but we would never dream of paying that much for a single floor now.

Reclaimed wide plank is still pricey, but many companies run internet specials. There are also smaller local mills that may charge less.

The least expensive option, if it exists in your home, is to carefully pull up the existing subfloor/planks and scrape them down, then reinstall. Tons of work, but saving all that dough…..priceless.

kingstonlr.jpg
$6000 Floor, Marbletown, NY

planks.jpg
Original Planks, Bed Stuy Home

4fl.jpg
Scraped and Installed Ourselves: $0

Companies Offering Internet Specials

Aged Woods

Antique and Vintage Woods

Craftmark

Douglas Fir Floors

Old Wood Workshop

The Woods

Vintage Timber

Whiskey Wood

Primary Sidebar