Skip to content

All Over the Place

All Over the Place published on 4 Comments on All Over the Place

IMG_7873

The $200k house challenge is proving to be quite difficult. And you know what else? Buying a property strictly for investment is way harder than finding a place to live. Never in my life did I care so much about what others thought until this property search, because I’ve gotta think about who’s going to buy it versus what I like.

So what do I like? Ok, as usual, I’m posting pictures without links so I’m not advertising homes I might want for myself.

IMG_7881

I fell love with the Accord farm house above. In love! Three acres on a corner lot for $125k. The catch? The work it needs is not merely cosmetic. That is fine, but this city girl gets intimidated by wells and septic. Don’t know the first thing about them. In this case, there’s a well located INSIDE the house. Anyone know if that’s a big deal? I called the listing agent to tell her that I may be interested but wanted to know what she knew about that well. She didn’t return my call which bought me some more time to look at homes that needed less work.

IMG_7876

This farm house is a case of “If it was for me, I’d grab it.” but a flip? It would probably take the better part of a year for a proper restoration and before I even get in there to do my stuff, the mechanics would need to be worked out.

I’m keeping it in the back of my mind but continuing to look.

Jon, my broker, has done a million successful flips. He keeps telling me that I should be looking for a quick and easy “FLIP” that only needs cosmetics, not a restoration project. I see his point. I do! And I’m trying, but it’s tough to wrap my head around a vinyl sided house….

IMG_7925

This vinyl ranch is actually a possibility according the Flip Gospel of Jon. There’s not much to do on it. I can bring back the 1950’s look from the decade it was built. If I get it for the right price, I can make a profit, but not really if I have to pay the $199k asking price.

IMG_7927

The location is what I love most. Right between High Falls and Rosendale where some of my favorite restaurants are located. Nuts, right? I’m thinking about what I can eat while working on the house! But in my defense, those areas are desirable for folks who would appreciate my kooky style of renovation. In other words, I don’t have to go conservative.

IMG_7928

Just when I thought I had narrowed it down, I ran into a friend on the subway. He mentioned that some of his gay friends have homes in Sullivan County. I’m like “Invest in a gay area? I’m there!” Sooo, I’ll finally be looking at Sullivan County next week after putting it off because I’m just not familiar with the area.

Then this morning another friend forwarded a listing in Brooklyn that might be doable. Brooklyn? That’s where I wanted to do this in the first place. The only reason I’m looking upstate is because I thought I couldn’t afford down here. Yeah, I got into the idea of having a place to go for the summer, but work is work. I can do the 9-5 in Brooklyn and rent a place upstate. Sheeeeet.

I need professional help. Not from a broker and not from a therapist (ok, maybe a therapist). If anyone knows a good psychic, post it in the comments.

Home Siding Options

Home Siding Options published on

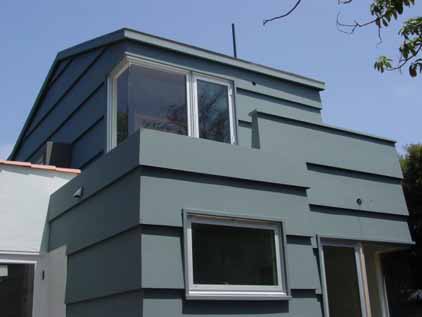
I’ll be looking at a few outdated ranches this week. I suppose you can say that’s more of a challenge than restoring an old farmhouse. In anticipation of this possible project, I’m trying to come up with some fun ideas for the exterior.

Now since money is the main factor, as long as the -ugh- vinyl or aluminum siding is in good shape, the least expensive thing to do would be paint it some funky color. Yes, these surfaces can be painted as long as they are properly prepped. The cute yellow house above has painted aluminum clapboard.

Remember that awesome bungalow in The Rockaways? Corrugated metal seems like a more modern and tasteful approach than your run of the mill siding.

Board and batt can work with any style home, from a church to a barn. If it’s a straight siding job, you can assemble and paint before installation. Sure, there will be touch up, but it should be much easier than painting once it’s attached to the house. You can and should also pre-paint wood clapboard.

This is 4’x10′ sheets of hardipanel ripped down to 24″ and painted. As long as it keeps the water out and isn’t crazy to maintain, there are plenty of materials out there that can be used as alternatives to plain ole’ siding.

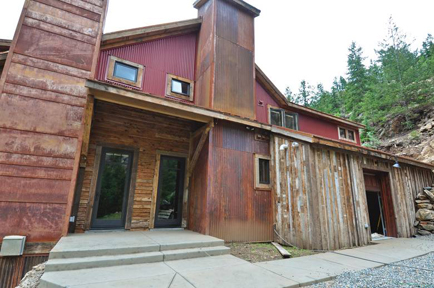
Here’s what they call “Redneck Siding”. What does it say about me that I love it? And it can be made from 100% recycled materials!


Can’t decide? Why not mix it up? Here’s a variety of reclaimed materials that would probably work well on a raised ranch as there varying depths on the exterior.

Bathroom Before and After

Bathroom Before and After published on

4th fl bath

Before

When we moved back to Brooklyn and took over an extra floor of the house, our tenant lost his access to the shared laundry room, so we told him we would give him a washer/dryer upstairs. Somehow he got a whole new bathroom out of us since we were doing the installation in that room (w/d not seen in photo). We paid for materials and he did the work. We collaborated on the design, but it was mostly him. You know I’m not a modern kind of gal. I like it though!

IMG_5511

After

Ok, so these aren’t really the “after” shots of the the bathroom. They are the “almost finished” photos I took back in June. The blue tape is now gone, the vanity has been painted black and there’s a window instead of plastic. The washer/dryer is hidden behind dark glass that matches the shower door.

Oh, here’s a way before shot below, from when we first bought the house. We just kind of updated it for awhile without gutting it. BTW, of course we found wood rot and other damage when we ripped it apart. We also gained about 3 inches of height since there were layers of tile and concrete that needed to come up. Gotta love these homeowners who just put band aids on stuff and leave it for the next guy or gal.

Before:4th fl bath

Way Before

Conversations with a Homeseeker

Conversations with a Homeseeker published on

Pond

Deb has been looking for a house for awhile now. Anything that has a decent renovation goes into a bidding war and as a first time home buyer, she’s reluctant to take on a huge renovation. She tries to wrap her head around fixer uppers and homes that are not her style, but lacks confidence in her “vision”. So, I nudge her along.

I sent Deb before and after shots of the second home we renovated, a weekend place we had up near Stone Ridge from about 2000-2004. I’m posting the conversation along with the photos because it’s Passover/Easter weekend, so you want I should actually write a real post?

Happy Holidays, y’all!

Side view

Ok, so D=Deb and M=me

D: Very cool.  So did you buy all the furnishings? How long did all of that take? Was that a flip or that was your house?

M: No, we never did an actual flip before! That was our Kingston house. We put too much money into it thinking that we would keep it forever (which we’ve done on all 4 houses). We owned it for about 4 years and renovated slowly the entire time. When we decided to sell, we finished the reno. I don’t know how long that was in actual reno time because we stopped and started so many times. It was our weekend project for many years. We went up there to get away from our Park Slope renovation.

D: Considering that you like wild colors and all it seems rather tame for you, no? But in line with what it is.  I likey.

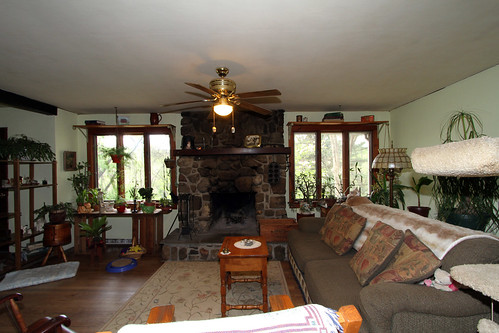
LR/Fireplace

M: I think I did that because everything was so dark when we bought it that I just wanted LIGHT.

D: The dining area, you covered the beams, is that what I’m seeing?

Before: LR/Fireplace

Before. Obviously.

M: Not really. Those “beams” were faux, made out of foam. We ripped them down. The house was modular and came in 2 sections. That beam running down the middle is the joint. It was never bolted together until we did it. Or maybe it had a couple of bolts, but not to Luke’s liking.

D: Gawgeous. Did you and Luke do everything, like you lay the floors yourself etc?

M: Did not do everything. Hmm, I remember laying out the floor but I don’t remember nailing it down. We had a contractor working beside us. Not sure if he installed or we did. I know that he sanded and polyed.

D: Please tell me that wood floor was under the carpet? har har

M: Oh please, girl. That house was carpeted throughout. It had plywood under all the carpets. The day I was up there alone ripping up carpeting, my dogs were running around outside (we had 7 acres) and one of them came back with a deer leg and dropped it right in front of me. They didn’t kill the deer. People were hunting illegally on the property. I chased one of them down one day.

Bath

D: Did you add wainscoting or was that there?

M: The wainscoting in the bathroom was just Home Depot stuff we put up. The living room walls were originally brown wall paneling. We wanted to do that “bat and board” look, so we had a contractor install actual boards piece by piece. Then the previous owner asked why we didn’t just put up plywood and use 1×2’s to create the same look. We were like “Oh yeah. We could have done that.”

D: So, can you do this to the 6th avenue house I like?

M: No I’ll be busy working on my own.

D: This is why I do wish you could sit with me look at a house I like and advise me on how I can make it look a certain way. Darn you!

M: So find a house you’re going to put a serious offer on and I’ll go with you to second showing. But it’s really not as exciting as creating my own mess.

D: Sweet, thanks for sending

Kitchen Cabinet Kings

Kitchen Cabinet Kings published on

First a disclosure. Kitchen Cabinet Kings is a paid advertiser.

Ok, now we can talk.

Kitchen Cabinet Kings is based in NYC although they are strictly online. No showroom means low overhead which mean lower prices.

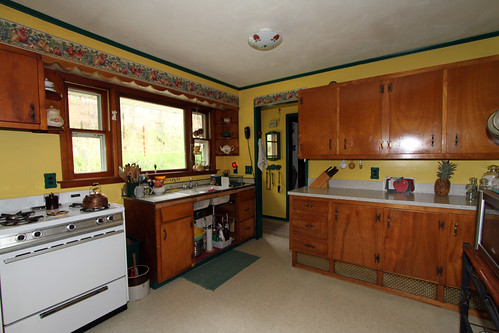
The website is easy to navigate, but what I like best about it is that the pricing AND estimated shipping charges are right there for all to see. Ah, how I remember buying my first new kitchen cabinets years ago. I thought it would be a few hundred bucks. How naive. After sitting down with the designer at the first of many showrooms I visited, I nearly had a heart attack. The cabinets I wanted would cost $20k! Needless to say, I didnít go with those. But the point of my story is that this sticker shock is probably something that happens to every first time kitchen renovator. Cabinets or your kidís college fund?

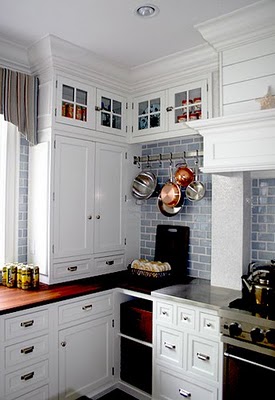
So, Kitchen Cabinet Kings is affordable. Nice. Now, how about their designs? All of their cabinets are plywood construction, no nasty MDF or particle board. Iím kind of fond of ìThe Tribecaî style pictured above with ìMocha Shakerî coming in a close second. The door styles are listed on the site with prices. The company also partners with Kraftmade which cannot be bought online. Oddly enough, Kraftmade was my affordable cabinet of choice all those years ago for that less than $20k kitchen I mentioned. It came in at under $3000.

So, peruse the website my friends. Support someone who supports this blog! Check out the design center and the Kitchen Cabinet Kings Blog that gives tips right on down to choosing your dinnerware.

Oh, PS: They do bathrooms too.

10 Money Saving Renovation Tips

10 Money Saving Renovation Tips published on 1 Comment on 10 Money Saving Renovation Tips

If you’ve been reading this blog everyday since it’s inception, you know all this like the back of your hand. It’s “Reclaimed Renovation 101”. But here’s a list of tips again just in case you’ve missed a few.

1. GC your own job. If you have the time and organizational skills, you can hire sub-contractors and oversee the project yourself.

2. Sweat Equity. Even if you don’t have mad skills, there’s gotta be something you can do to save some bucks. Demolition? Painting? Stripping paint? It’s called “grunt work”.

3. Re-used Materials. Buy second hand cabinets, appliances and building materials at places like Build it Green and Green Demolitions.

4. Architectural Salvage. Need doors? A fireplace mantel? Medallions? Light fixtures? Forget Home Depot! Yuck! Check out the salvage yards in Brooklyn, upstate and Pennsylvania.

5. Recycle your own Materials. Maybe you can re-use that wide plank sub floor. Those kitchen cabinets might not be so bad if you painted them. Many materials in your home may not need to trashed, only re-worked.

6. Craigs List! Check out the “free” and “materials” categories. You may find some company liquidations or overages on other renovations. Tile, flooring, maybe even sheetrock.

7. “Oops” Paint. If you only have a small room to do, look at the opened paint shelves at Home Depot or other paint stores. You can pick up a gallon for five bucks or so. Colors are already mixed though.

8. Day Laborers. Yeah, I know…illegal and risky. I shouldn’t recommend this, but…

9. Liquidation Stores. There’s one on McDonald Avenue in Brooklyn that sells everything from flooring to toilets. There’s also Lumber Liquidators.

10. Friends. Cheaper and more legal than day laborers. Just get them pizza and beer.

Design-A-Kitchen

Design-A-Kitchen published on 2 Comments on Design-A-Kitchen

New advertiser alert! Show Cliq Studios some love and visit their awesome page for tips and how-to’s. Then buy some kitchen cabinets from them.

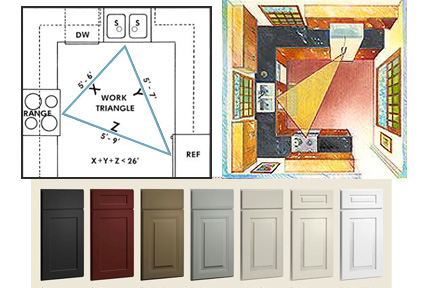
Seriously, it’s not a simple task to plan out an entire kitchen. As much as I love to use recycled materials, if you want a specific layout and design consistency, it’s best to go with brand new cabinetry.

The Cliq website has a remodeling guide for first timers. It starts out with design principles and covers layout, budget and everything up to installation. There are designers available to chat if you get confused.

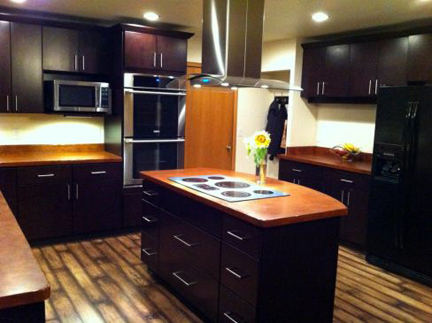
Personally, I’m liking the painted cabinets. In particular, that black and the sage are pleasing to my eye.

A black kitchen. Dude, that’s so goth.

Scary Renovation Mishaps

Scary Renovation Mishaps published on

Ever fall off a ladder? Not me, because I’m so scared of heights that I cling to it for dear life. But here’s an FYI for ya. Always put the ladder on level ground and make sure the support brackets on the side are locked in.

Blue Paint Spill

Paint spill. Probably the most common DIY mishap. At least in my world it is. Something I will never learn….to look where I’m going. Don’t kick the bucket over. And check bottom of shoes BEFORE stepping off of the protective paper or tarp.

The old nail through the pipe routine. Yeah, we had a contractor’s assistant put a screw through our copper pipe while installing subflooring. It wasn’t a massive flood. More like a drip, drip, drip of the tell-tale pipe.

Foot through the floor….or rather, ceiling below. Can’t count the number of times we were working on joists and sub floor that someone’s foot said hello to the downstairs neighbors. My scary moment happened when I fell through the floor and was dangling from the bannister that I was lucky to grab unto. My husband was right next to me and after a few moments he looked up and asked “Do you need help?” Um, ye-ah! Would you mind?

10 Things I Hate About Home Ownership

10 Things I Hate About Home Ownership published on

I’m stealing this idea from my friend Judy’s blog, Bad Advice, flipping it around and running with it. See, Judy thought she should be more positive, so she’s posting 101 things she likes. Screw positive. I’m not motivated enough to come up with 101, so here are 10 things I hate.

1. Contractors who don’t call back, don’t show up or don’t do the job right. I can come up with a list of 101 things I hate about contractors, but this is good enough.

2. The constant upkeep. Just when you think you’ve finished renovations, it’s time to start over again. Appliances breaking down, doors falling off the hinges, blah, blah, blah.

3. Oy, it’s expensive! Yeah, this is part of upkeep, but I have to stretch it out to 10. Things like the facade. Damn, that’s gonna cost like a year’s salary. My husband’s, not my measly two cents.

4. Realtor’s postcards. Go away. Just because I’m listing 10 things doesn’t mean I want to sell my house.

5. Backyard. It’s a lovely idea in theory and there’s nothing like sending my dogs out there when I don’t want to walk them. Actually, wouldn’t live without one. But, do I get to enjoy it? Between the mosquitoes and the dog shit….nah.

6. Tenants. Believe me, it would be nice to live in the whole house. Who could afford that? I wasn’t one of those kids who liked sharing. Plus, walls are thin. Can’t have loud sex.

7. Property taxes. This totally doesn’t apply to NYC where taxes are low, but we felt so ripped off on our upstate taxes. The toughest nut was the school tax and we didn’t even have kids! Or sidewalks or public trash bins. What were we paying for?

8. Space. Again, like the backyard. A great thing, really! Until every acquaintance and distant cousin wants to sleep on your couch.

9. Worries. In the past, we’ve had tenants and petsitters call us while we’re on vacation. Frozen pipes, broken locks, flooded basements. Luckily, that was all one house, which we unloaded years ago. Mmmwwwwaaaahhhhaaaahhhhaaaaaahhhhaaaaa!!!

10. Lack of a life. Every weekend with the working on the house and the Home Depot trips.

Honestly, I had trouble coming up with 2-10. I just felt like kvetching, but it’s not a bad thing to own a home. If I thought so, I wouldn’t be addicted to scoring every few years.


Building Stairs

Building Stairs published on

After six years of procrastination, we finally replaced our dangerous basement steps that were about to collapse.

Pre-cut stair stringers can be purchased in many lumber shops. This video kicks off after hubby measured and cut his own stringers. Project is for an intermediate skill level DIYer. Beginners can do it if they’re good at math. I suck at math, therefore, I would not be able to install stairs.

DIY: Concrete Slab Form

DIY: Concrete Slab Form published on

IMG_6301

This may be boring for you more designy/less handy folks, but it’s what we’re working on at the moment. In this case, we happen to be creating the slab to use as the bottom step of the basement stairs.

Check out this video if you want to learn how to set up the form for a concrete slab pour. If you’re working on an entire floor, you would do something like this on a larger scale. The room can be broken down into smaller slabs and joints can be filled in later.

Tackling the Basement

Tackling the Basement published on 3 Comments on Tackling the Basement

IMG_6281

Ugh. Just when we thought we were near the end of our renovation we realize that the basement will be a bigger project than we had anticipated. Why can’t we just leave it a dusty, crumbling mess? Well first of all, basements are the foundations of homes and the stone walls need to be maintained for both structure and water blockage.

The main reason we want a nicely sealed-and-easy-to-clean unfinished basement is the cats. The plan is to make a cat hangout down there so they stop messing up our garden level.

IMG_6283

On the to do list is….

1. Rebuild the stairs that hubby ripped down over 2 weeks ago. We are currently climbing down the hatch out front.

2. Repoint stone wall and bricks.

3. Pour concrete for solid, level floor. What is down there is about an inch of uneven concrete on top of soil.

4. Move boiler against wall to create more space. Yay, another few thousand for a licensed plumber! Oh, did I mention we’re replacing boiler and water heater while we’re at it?

5. Build wall separating new boiler from cats.

6. Sump pump. We will clean the area by hosing it down.

7. Exhaust fan.

8. Seal walls and epoxy floor.

9. More lights. Deal with holes in ceiling cats can climb into.

That’s about it. A lot of work for an unfinished space that nobody is gonna see.

IMG_6286

Contractor Rant Or Why We DIY

Contractor Rant Or Why We DIY published on 4 Comments on Contractor Rant Or Why We DIY

*UPDATE. Funny story. After writing this bitchfest yesterday morning, I realized that my phone was off. Soooo yeah, my bad. But I still stand by my rant after 17 years of dealing with other contractors!

What is it with contractors? Either they don’t return calls or if they do actually set up an appointment, there’s a 50% chance they’ll show up. I write this as I wait for a contractor who is an hour late and another one who was supposed to call to set up an appointment this morning. Maybe they’ll show. Maybe not. I don’t chase them down because if they can’t manage to drag their asses over for an estimate, they’re not going to do the job in a timely manner. Quit while I’m ahead sort of thing.

All we wanted was to finish some projects quickly. If we do it ourselves, it takes forever. We’re not pros. We work on weekends and evenings. But trying to deal with contractors again has brought back bad memories.

Even when they show up for estimates, half of them don’t actually get back to us with the written quote.

Little do our past contractors know that the only reason we hired them was because they showed up. It wasn’t because we like their personality or we were impressed with their work. It wasn’t even that they had the best price. They had the ONLY price.

Once you get beyond the hiring process, that’s when the fun really starts. They come really late. Or not at all. They don’t bother to call. They try to sneak things passed you. I know what you’re thinking. It sounds like that bad relationship you had. And it IS like a bad relationship.

Seriously, I should get a contractor’s license. All I have to do is show up. I’d have all the jobs in town!

Ok, must stop rant now and figure out how we’re gonna DIY this project.

New Windows Installed!

New Windows Installed! published on 2 Comments on New Windows Installed!

IMG_6054

Interiors still need to be stained.

After months of research, planning and estimates on replacement windows, we finally had them installed in July. Any window that’s worth a damn is not cheap. (*Worth a damn=NOT vinyl replacements!!) At the end of the day we came in just shy of $30k for 14 windows. The front is custom wood as we have some odd shapes going on and the rear is fiberglass with wood veneer interior. They are historic windows even though this area is not yet landmarked.

So, here’s how it went down.

For the front of the house, we wanted brick to brick as opposed to replacement. Meaning…everything comes out so they can insulate behind the frame. That’s often where the drafts come in, not from the windows themselves. There are less air pockets in the rear of the house, so we got away with replacements there.
Continue reading New Windows Installed!

Primary Sidebar