Skip to content

The House as Art

The House as Art published on

A psychic once told me that I was going to become an interior designer. She said I see the way the fabric in a curtain hangs and I look at that as art. I was like “No, you’re nuts. I’m a photographer.” Well, about 25 years later, I realized that she wasn’t so far off.

There are two kinds of people in life. Those who want a completely finished home that just needs furnishing and those who see a fixer upper and get excited over the possibilities.

Up until a few years ago, I thought everyone wanted to have control over their own renovations. Sure, it takes up your entire life for a few years, but you forget all about it once it’s over. I wouldn’t want a nanny raising my (non-existent) baby. Why would I hand my house over to someone else?

Someone recently asked me “Why”? What is it that makes me walk into a chippy paint, crumbling, derelict home and fall in love?

Hmm.

Each home is a history lesson. Much like the Tenement Museum is one of the most fascinating places to me, a home forgotten in time takes me back to that era. These home are over 100 years old. Perhaps it’s my mission in life to preserve the past before some eejit rips everything out and installs sheetrock, engineered flooring and Home Depot molding. (I just puked in my mouth thinking about that.)

It’s a blank canvas. I can’t remember a time when I wasn’t a “creative”. I always see things and want to change them. I still have difficulty comprehending that not everyone is right brained. Is it like being psychic, where you have to develop that skill? If so, I should be working on my left brain capabilities because I’m sorely lacking in those areas.

Anyway, blank canvas. So, I walk into a house and I see the finished product. It’s kind of like being a photographer. I envision the end result and work backwards from there on how to make it happen.

“But HOW? HOW do you just walk in and envision everything finished?”

I don’t think I’m creative genius who comes up with completely original ideas. My memory sucks, but I must retain visuals from homes, museums and magazines that my brain recycles for each potential project. Well, there ya go! That’s something everyone could do. Start visiting house museums, go on house tours, travel, save images (the 2011 version of magazine clippings).

Adding, not taking away. Lookit. Say you buy a place that has been renovated, but it’s not your taste. You choose this place because the house that needs too much work scares you. But now you’re stuck ripping out that pink granite countertop and those hollow Home Depot composite doors. And what are you going to find underneath it all? How do you know the previous owner didn’t cover up rotting wood or leaky pipes? You don’t. And you’re adding NEW materials to the landfills.

With a fixer upper, you can look at the bones of the place. The original lines of the building. The intricate details and plaster curves that are no longer produced. Try to salvage that stuff! Something can’t be saved? Yeah, it goes in the landfill, but it was made 100 years ago, not 10.

Any questions??

Leaky Roof Quick Fix

Leaky Roof Quick Fix published on


The Delta building at JFK had an interesting temporary solution for a leaky roof. Check out the photo above. It’s Delta’s main check in and security area. At first I thought it was decorative until my husband started mumbling something about a major airport in a major city looking like a third world country.

Those waterproof sheets are catching the leaks where the water is directed towards the middle. The tubes allow the water to flow into one area on the ground where there is probably some kind of drain. I didn’t see it as it was behind the desk.

Although it’s an ingenious temporary plan, it’s not wise to let a roof go for too long. Delta could have a major disaster on their hands if the ceiling collapses due to water damage. Let’s not even think about the mold problem this is causing.

WTF, Delta?

Blogs I’ve Just Discovered

Blogs I’ve Just Discovered published on 1 Comment on Blogs I’ve Just Discovered

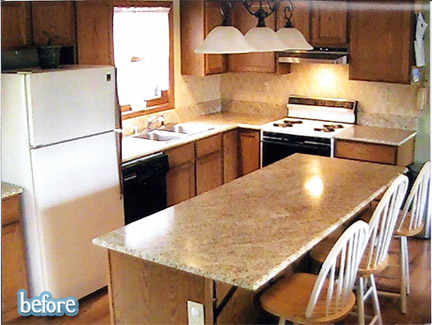
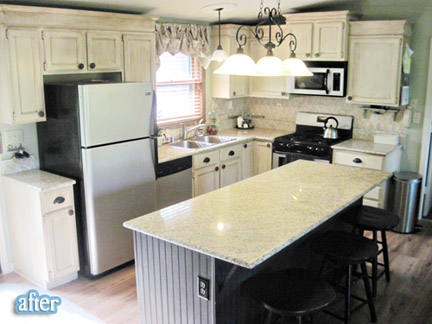
Better After is a blog that asks readers to send their before and after shots of furniture and renovations. There some ab fab pieces on there that make me miss my furniture upcycling days. The room redos are ta die for too! Most are not even full renovations, just some paint and good taste. Love it!

DIY Showoff similarly posts before and after shots sent in from readers. It’s, dare I say, more mainstream, less precious-crafty. Not that there’s anything wrong with that! The site was started by Roeshel who has been restoring her own 1927 farmhouse. She has frigawesome taste. I was salivating at her marble subway tile backsplash.

Shabby Blogs is another blog that relies on reader participation. Actually, it’s more than that. It’s like a prettier version of Houseblogs. No, it’s more than that. You can create your own blog with their design templates. All for free! And they’re quite purdy too.

DIY Insanity asks “Is it nuts to design, permit and build an addition to your house by yourself?”. I saw the header and thought “No biggie” but when I started reading the posts I realized this was a huge job they undertook. Like big cranes and shit. Yikes! I like the “Gardening with a Sawzall” post. Good idea!

DIY Appliance Repair

DIY Appliance Repair published on 7 Comments on DIY Appliance Repair

Hey, all of you weekend warriors, here’s another notch to add to your belt. Appliance repair. Unless you really know what you’re doing, you probably haven’t been messing with that, have you?

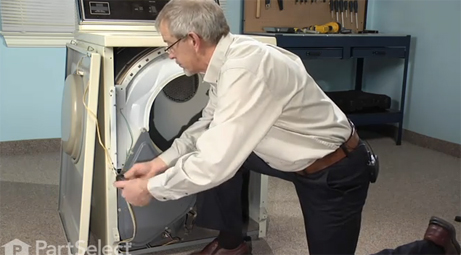
Well, the fine people over at PartSelect have done up their website to make it easy on you. The Virtual Repairman walks you through the entire process. Here’s what you do….Just punch in the model number of your sick appliance and a whole bunch of symptoms will come up. Click on symptom and a-ha! There are the replacement parts listed in order of fix-it-percentage.

Now, your like “So what? I still don’t know how to replace it.” Fear not. PartSelect has an entire YouTube channel with idiot proof instructional videos.

Nothing is built to last anymore in our disposable society and it’s often costlier to have an appliance professionally repaired than to just buy a new one. Instead of throwing those big ticket items into the landfills every few years, give it a shot and see what happens.

You might even impress yourself.

*Disclaimer: This is a sponsored post.

DIY:Plaster Medallion Repair

DIY:Plaster Medallion Repair published on 2 Comments on DIY:Plaster Medallion Repair

IMG_0215

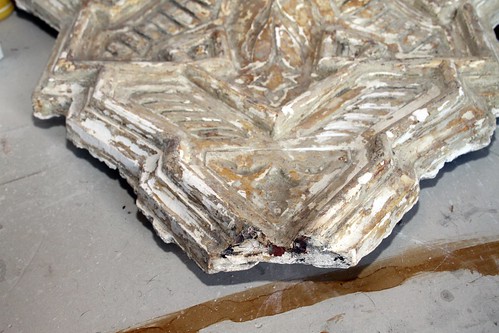
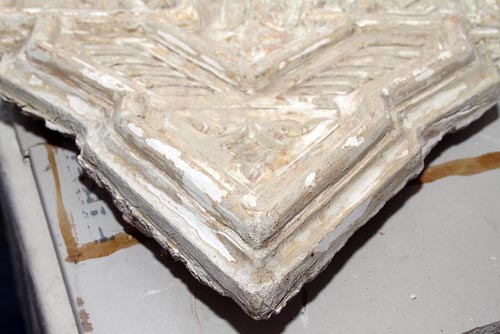
The broken plaster medallion came out of a Park Slope brownstone restoration about four years ago. I purchased a bunch of architectural salvage from these folks who were updating (raping) their historic home.

Fast forward to this past weekend. I finally repaired it.

Now, if you’re thinking I’m going to give you expert advice on how to successfully repair ornamental plaster, think again. A word of caution…this was all trail and error. So, I’ll share with you the mistakes I made so you don’t have to go through it yourself. Deal?

I couldn’t really find any DIY posts on this subject and I found out there was good reason. It’s a job for a skilled professional. The best article I found was from the government historic preservation site.

Ok, so DIY….

Well, my first idea which I thought was so brilliant, was to build a mold. I went to the useless Pratt Art Supply Store where not one of the four employees I asked knew anything about molds. Hello, art supply store? Know your merch! But I digress.

The resin mold might have worked fine if I wasn’t too lazy to build the perfect support to house it. Ah, but I was. I did a half ass job and the liquid mold dripped out. What was left of my mixture in the cup did harden quickly, so I’m thinking it may have work better if I let it set first to a jello-like consistency. But alas, I didn’t and the thin coat that was on the medallion was impossible to get off.

Take two. I’ll sculpt it myself.

I’ve never worked with Plaster of Paris before. Love the pre-mixed stuff too much. It took me a few tries of mixing the plaster to get it right. FYI, that shit hardens immediately! The trick is to a) use ice cold water and b) hit it with a spoonful of vinegar to retard the drying process. You still need to work fast, but at least it’s within the realm of possibility.

The mixture in the photo below was way too thick. It dried completely within like 2 minutes, leaving me no time to work.

IMG_0233

Ok, this is where you might not want to take my word as gospel. Do your own research because I haven’t a clue if this is the right way of doing it. I just know that my medallion hasn’t fallen apart yet.

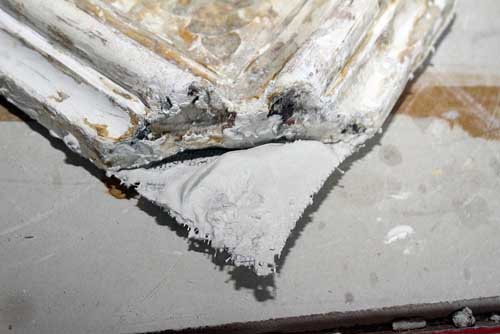
I started from the back. I had to support it somehow. I didn’t have fiberglass mesh in the house and this metal screen was just sitting there staring at me, so I figured WTF? It’s stiffer than mesh. Um, kind of like re-bar, right? I dipped paper joint compound tape into the plaster and used it to “paste” the screen backing. I also built it up on top of the tape. Think plaster cast or paper mache.

The next step was to build it up and start to shape it. Since sculpting is not my forte, I figured there would be some sanding involved.

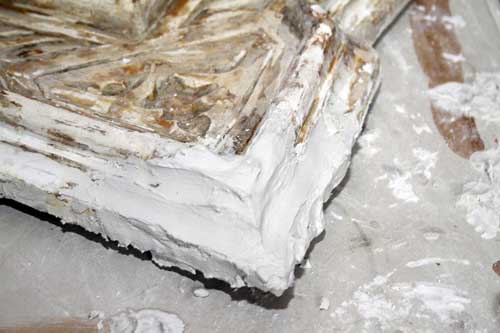
Here’s the first glob. That took some hand sanding until I realized I could cheat with a Dremel tool. The Dremel worked great! One more application of plaster and some more sanding did a good enough job.

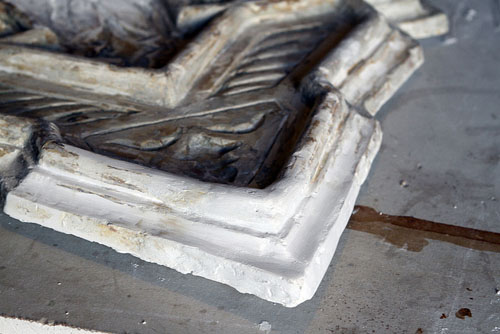
Oh, this is the unbroken side I was trying to replicate. Not bad for my first attempt at this stuff, right? Please be kind if you know I totally did it the wrong way. Just humor me.

DIY Classes at City Tech, Brooklyn

DIY Classes at City Tech, Brooklyn published on 3 Comments on DIY Classes at City Tech, Brooklyn

It’s that time of year again! City Tech is offering up their DIY classes. Learn everything you need to know about home repair so you can correct me when I pretend to know what I’m talking about here.

Hands-on Home Repair Workshops
Everything You Wanted To Know About Your Home (But Were Afraid to Ask)
Wed, 6 – 9 pm, 2/16 – 4/13  $50 per session
25 Chapel Street Room 106

Basic home repairs. How to fix a toilet, patch and plaster a wall, the basics of residential electricity, install a light fixture, install a lock, unclog a trap, spackle a wall and become your own favorite handyperson.

Weatherize – Caulk it up to Savings
February 16
Insulate, caulk, and weatherproof your house to keep the heat in. Low cost ways to save cold cash.

Homeowner ‘s Basic Tool Kit
February 23
Cut a board, level a shelf; install an anchor bolt in a hollow wall. This class will stock your toolkit with the most useful tools and give you hands-on tips for using them. Discover your inner handyperson and save on basic repairs.

Homeowner ‘s Guide to Basic Plumbing
March 2
Basic plumbing: How to fix a toilet, bleed a radiator, unclog a drain. Save on costly repairs that you can do yourself.

Lock Installation
March 9
Having a security complex? Install a deadbolt or mortise lock, update existing locks, and replace door knobs.

Plaster and Sheetrock Repair
March 16
Repair a crack, frame and tape, patch plaster, fill a deep hole or a nail hole. You can do it!

Everyday Electricity You Can Do Yourself
March 23
How to replace a fuse, change an outlet, install a fixture, test for power and splice a wire.

Installing Ceramic Tile for Floors and Walls
March 30
How to create a level surface, select floor tile, lay out a pattern and install like a pro.

Paint Like a Pro
April 6
A great paint job is method, not madness. This course teaches you how to prep the space, select the right tools, and apply paint like a professional. Please wear old clothes.

Blueprint Reading: The Grand Plan
April 13
Blueprints are diagrams that represent an interior space. They are the language that architects and contractors use to design and build. This course teaches you to understand electrical plumbing and construction symbols, read a floor plan, and even draft your own. Please bring a pencil, an eraser and a pad of tracing paper to the class.

10 DIY Tools To Be Thankful For

10 DIY Tools To Be Thankful For published on

400

1. That razor blade holder thing for paint removal.
2. Cordless drill. Oh honey, I’ll never take you for granted.
3. Tape measure with marked fractions. Because I don’t know how to read it otherwise. Yup, there, I’ve said it.
4. Duct tape. You know why. When you can’t fix it….
5. Swiss Army Knife. Well, I don’t really use it around the house, but I carry it with me and it does come in handy at work.
6. Center punch. That little thing comes in handy!
7. Staple gun. Almost as versatile as duct tape.
8. Foam paint brushes. So environmentally unfriendly, yet so unbelievably convenient.
9. Metal snips. Because you can use them to trim bushes too.
10. Hammer. Of course, I wouldn’t forget you, my dear old friend.

Waxing Wood Floors

Waxing Wood Floors published on

wax

Ever look at your hardwood floors and notice how dull and scratched they are? But you really don’t want to deal with a full blown sand and poly? Well, the solution may just be waxing.

We researched alternatives to polyurethane earlier in the year when we were getting ready to put our house on the market. The best option for us was to wax with Johnson’s paste and then buff. We bought an inexpensive hand held orbital buffer at Home Depot and it we are still using it.

Waxing is kind of an idiot proof method of getting your floors to look nice. It doesn’t take long at all and it’s as easy as a good cleaning.

Make sure you vacuum up all the dust and dirt, then mop with hardwood floor cleaner and wait until the floor is thoroughly dry before applying the wax.

Let the wax dry completely before buffing! In other words, have patience. You should see a film start to develop as it dries.

Go over the area a few times with the buffer. You’ll know when it’s right when the floor starts to shine. Not a horrible glossy shine, but it will look sealed and protected.

And that’s it. Just don’t do it if you’re getting your floors sanded soon. This is kind of an in-between solution. For instance, I just waxed the apartment where our tenants lived for 3 years. Just wanted a quick fix before we moved all the furniture in. The floors look great now!

Useful DIY Sites

Useful DIY Sites published on 1 Comment on Useful DIY Sites

fh05apr_fenpla_01.JPG

Since I’ve been so bad about posting my own DIY tips lately, here are some great sites with easy to navigate home improvement posts.

Bob Vila. The King of Home Improvement! Needs no introduction, but if you’re novice, perhaps you don’t realize the awesomeness of Bobby V. His site has step by step videos of each project, so if you’re too lazy to look at instructions, just watch.

Fine Homebuilding. This is a site for pros. You do have to become a member to access much of the site, but it’s worth it. Before The Internets were created I subscribed to the magazine (remember those things made of paper?). I ripped out the more useful articles and still keep them in a binder to this day, even though I never look at them because it’s easier to go online. Not only do they have DIY instruction, but they go over materials as well.

Family Handyman. Ok well, my biggest problem with this site is the name. I typed in “FamilyHandywoman.com” and guess what? They own that too! But it just forwards you to the MAN site. Grrr. One more thing….check out the photo above. That’s from this site. Why is the guy doing all the work while his bitch is just sitting there? Oh, they have photos of females working…on easy garden projects. (As if any of the other sites are better.) Anyway, regardless of their sexism, it’s a good site. Each project is broken up into a summary, tool list and step by step guide. So easy, even a man can do it!

House Renovation Tips. There’s so much information here that I’m not sure if it’s actually someone’s blog or one of those blogs that grabs content from elsewhere. In any case, I’m including it because da bomb. (Yeah, I said that.)

DIY Network. Categories are listed near the header and there’s a search bar waaay up top. The nice thing about this site is that they give you time, cost and difficulty estimates on each project.

Garage Face Lift

Garage Face Lift published on

4940843789_8b6bef8009.jpg

So, the Beacon house has been on the market for nearly four months now and we are freaking out, man! We’ve decided to give it one more month (maybe two) since the summer was sort of a dead zone and then we’ll have to think about renting it out until the market picks up again. That being said, just when we’re about to give up, it looks as if we may have a few interested parties. Fingers crossed!

The plan over the weekend was to go up to Beacon and ready the exterior for winter, should we end up keeping it or should the new owner take over during the cold months. The front of the house was painted when the new porch was put in, but the rest of the house is screaming for a paint job. (BTW, what ever happened to people who think it’s romantic to work on an old home? Are we the only ones left?) No, the two of us didn’t repaint our entire house over the weekend. We did scrape and touch up the worst bits. Now it just looks patchy but maintained, instead of neglected. At least this way, if it doesn’t get painted until next Spring, the clapboard isn’t rotting away.

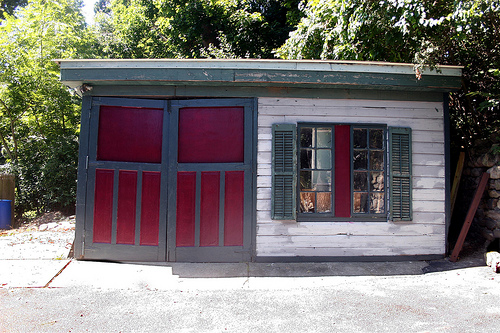
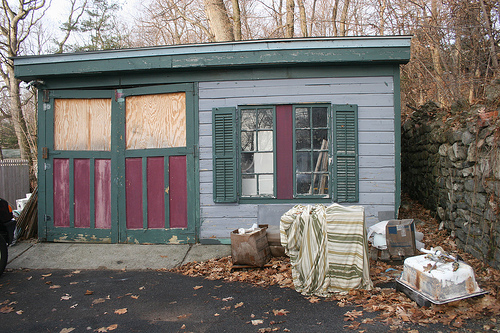
The garage face lift was just that. Like an aged has-been getting her face pulled tight when her neck remains wrinkled and saggy, the garage now looks better at first glance. We’re not trying to fool anyone. The structure needs complete rehabilitation at best or needs to be torn down and rebuilt. The waste of half a day and the leftover paint was decided upon when we realized that this is the first thing people see when they pull into the driveway. So, now at least it looks like a charming dilapidated shed instead of a total eyesore. Smoke and mirrors. Curb appeal. Whatev.

garbef.jpg

101 Uses for Vodka

101 Uses for Vodka published on

vodka1.jpg

Who knew vodka can be used for lots of stuff other than getting sloshed? Well, I didn’t. Vodka is the new vinegar! You heard it here first.

Actually, I heard it from Retro Renovation. Someone wanted to get the smell of cat urine out of a vintage sofa and everyone was recommending vodka.

So, I did a search and sure enough, vodka does it all!

1. Mix with water and spray on stinky clothes, rugs or upholstery.

2. Dab it on poison ivy undiluted.

3. Insect repellent

4. Mix with shampoo for oh-so-shiny hair.

5. Spray on mold as you would bleach.

6. Polish chrome, porcelain, jewelry and cutlery.

Ok, that was just 6, but I bet there are 95 vodka drinks I could come up with if I had the time.

See also: Daily Green’s 12 Uses for Vodka

I Want a Dumbwaiter!

I Want a Dumbwaiter! published on

We’ve taken over 2 apartments in our brownstone but have not yet gotten around to privatizing the hallway. It’s a real hassle running up and down the stairs hoping the neighbors won’t catch us in our skivvies. Neither apartment is fully finished or furnished and we are far from getting our act together.

So, I’m nagging the husband for a dumbwaiter.

Who knew that commercial dumbwaiters were so costly? Over 3000 bucks! Wow, that’s not gonna happen in my house.

But there’s hope for the “We are lazy yet take on impossible tasks, and oh yeah, we are broke.” people yet! The video above shows us how we can build our own dumbwaiter for $300 using a garage door opener. Alls I need to find now is the space.

Also see:

DIY Network: Install a Dumbwaiter

E-How: Build a Dumbwaiter

Primary Sidebar