Skip to content

10 Reasons My Reno is Stalled

10 Reasons My Reno is Stalled published on 4 Comments on 10 Reasons My Reno is Stalled

4463597062_f5842a319e.jpg

1. 24/7 for 3 months now. I’m burnt out, baby!

2. Can’t rip up the kitchen floor with the cats in there.

3. Dimas the Contractor is slow as shit.

4. Mother Nature keeps raining on my porch parade.

5. My husband dropped the radiator on our new wood floor and now we can’t pick it up.

6. Gotta get some crap out of the way before restoring office woodwork. That means packing. That means sorting, organizing, filing….

7. Speaking of my office, did I mention that I found receipts from 1993? Also found my upcoming Specials concert tickets in the recycling bin.

8. Pesky “real job” sometimes gets in the way.

9. Tuesday. Day of rest.

10. Facebook is more fun than plastering.

So You Wanna Be Your Own GC?

So You Wanna Be Your Own GC? published on 3 Comments on So You Wanna Be Your Own GC?

village-people-construction-worker.jpg

My husband and I are Mr. and Mrs. DIY. This is now our fourth huge renovation project and we’re both kind of hoping it’s our last. We usually have skilled subcontractors helping out, but normally it’s my hubby, in the construction management field, acting as project manager.

Well, this time it’s me. With Hubby working down in Brooklyn all week, I’m the one dealing with the Beacon house. I have two guys here doing most of the work while I concentrate on the finishing touches and seeing that things run smoothly.

So, what’s it all about, this being your own general contractor thing? Do YOU have what it takes?

1. Know your stuff. 8 out of 10 times, we end up tweaking our sub-contractors’ work. Are we overly fussy perfectionists? Well, ye-ah! It’s one thing to do it yourself and screw up, it’s another thing for someone to call himself a professional and take big money for a shoddy job. Know what you’re looking at. People complain about contractors finding more work to do when they rip down a wall. We love those contractors! The last thing you want is someone covering up a problem that should be brought to your attention. You don’t want to get ripped off, so do your homework.

2. Planning. Before you start, go through the house and make a list of things that need to be done. If you’re the GC, it’s your job to make sure that the work takes place in the proper time line. For instance, you want to run electric and plumbing while the walls are down, not after. Duh!

3. Budget. I’m not one to talk about budget since I can’t follow one, but I do know my bargains! So let me talk about finding those. Before running out to Home Depot or your local lumber yard for material, try finding overstock and second hand from the internet, salvage yards and ReStores.

4. DIY. A lot of your time will be spent making phone calls, picking up materials and keeping the worker bees happy, but if this is your full time gig for the moment, there will be plenty of time to do your own work. Choose your skill wisely. Are you strong? Demo. Got a steady hand? Paint. Green thumb? There’s always the garden. Come on, you can’t be that much of a loser. There must be something you’re good at! Unskilled day laborers earn about $125-150 per day in New York. If you’re capable of working full days, that’s what you’ll save. Skilled contractors start at around $200-250. Of course, prices vary from low to high end.

5. Keep the work going. This is part of planning, but I’m talking about the day to day stuff. If you have a crew, you have to make sure there’s enough work to keep them busy. Have all of your materials ready in advance. If they are working on an outside project (like my porch), see to it that there’s inside work to do when it rains (I screwed myself a little with that this week. No biggie because there’s plenty to do, but it didn’t feel 100% productive.)

6. Answering to The Man. Does your job require building permits? What is the code? If you don’t know this stuff, you better learn fast or hire an architect. The Man doesn’t mess around. The good news is, if you’re just making your interior look real purdy, you don’t need permits.

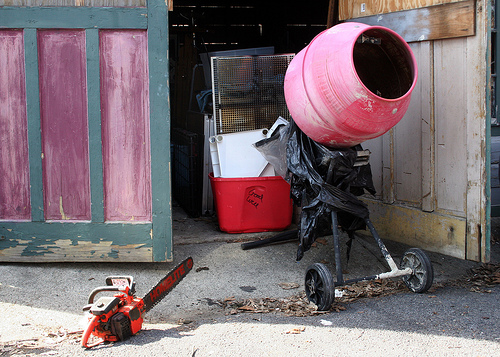
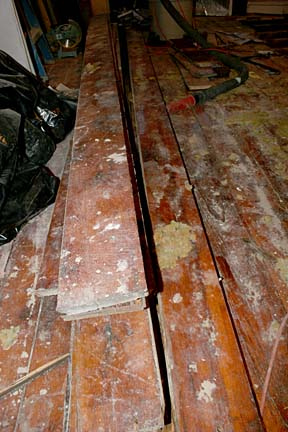
7. Trucks and Tools. It’s not necessary if you have sub-contractors bringing their own stuff, but in my case, I find that I’m using the van and our tools nearly every day. Why, just yesterday I picked up our porch floor (yay!) with the van. Ok, so places deliver, but I’m cheap. If you are doing DIY work, you should have tools. At least a friggin tape measure and drill!

Ok, the list could go on forever, but I have to get to work. The final thing I should mention is this: Keep in mind that you will not have a life while the renovation is going on.

Good luck!

Dining Room Done

Dining Room Done published on 7 Comments on Dining Room Done

4440914011_8eac1cf2c0.jpg

The dining room renovation was finished about two weeks ago, but I just grabbed some snappies of it yesterday. Last you checked in, the restoration looked something like this. And before that, even worse.

4440917131_c837d38fc2.jpg

4440916163_0b9440ed8b.jpg

4440915839_8a81c32c2c.jpg

It’s kind of a non-event since we didn’t change anything drastically. It just needed a lot of repairs. The plaster. The wood. Even the light fixture needed to be rewired. We lived with all that for five years and only finished it for someone else.

The adjoining living room has been finished for quite some time, but the wood still needs sprucing up.

There is still something to do in every single room, but we’re getting there! We finally have more help. This weekend there will be 7 different people working on our house. Woo-hoo!

4440914361_a4b5638967.jpg

4441690974_f3205b84b6.jpg

4441689474_13ff550b8d.jpg

Are You Apt for the Construction Industry?

Are You Apt for the Construction Industry? published on 1 Comment on Are You Apt for the Construction Industry?

2232615113_d6000d67de_o.jpg

It’s a choice that you probably made when you played pretend with your Lego sets all those years ago as a child, but the construction industry is more than a plastic brick world. Once you commit to it, you’re responsible for the safety and security of thousands of people, from your workforce to the people who will ultimately reside and work in the building you’re erecting. So before you jump into this field of work, you need to know if you’re apt for the job. In general, you’d fare better if you’re armed with a degree in engineering or construction management and if you’re the kind who:

· Pays attention to detail: When you become a construction manager, you’re going to become involved in all the projects that your company handles. You’ll generally be responsible for handling details related to the workforce, materials and equipment and also for coordinating schedules and ensuring that materials are delivered on time. A degree in construction management comes in handy when you’re employed at a senior level, but if you’re just starting out, you would be working under a manager and following direct orders from them.

· Doesn’t mind working long hours: When you’re part of the construction management team, you’re the person in charge of the day-to-day operations. And this means you need to be ready to handle any emergencies that may come up at any hour of the day or night. You’ll have to put in long hours at the site and at your desk because paperwork is important too.

· Is passionate about construction: It’s an industry that’s plagued by ups and downs, and with the way the economy is at present, the construction industry which took a really hard hit seems to be recovering very slowly. If you belong to this profession, you need to be able to deal with the way its fortunes swing and take the rough with the smooth.

It’s a fulfilling profession, but one that demands your effort and time. So if you don’t mind working hard and dedicating yourself to your job, perhaps construction management is your cup of tea.

If you’re interested in becoming a construction manager, you will find yourself deeply involved in each project, from concept to ribbon-cutting. You’ll oversee details regarding the workforce, materials, equipment, and safety issues for workers and the surrounding community. This is done by dividing site activities into logical steps during the planning stage, and monitoring each step along the way to ensure the project meets deadline and budget requirements. Your job may involve working directly with the architect or engineer on design specifications. It’s crucial that you understand both the ‘big picture’ and the minute details that go into making it a reality.

** This guest post is contributed by Nicole Adams, she writes on the topic of construction management degree . She welcomes your comments at her email id: nicole.adams83@gmail.com .

How To Keep Your Basement Dry

How To Keep Your Basement Dry published on 3 Comments on How To Keep Your Basement Dry

flooded-basement.JPG

Now that the snow is melting, basements will get flooded. Well, mine anyway. There is no one quick fix. It could be a number of maintenance issues causing the problem. The best way to figure it out is take a good look around when it’s damp. Like right now.

Let’s look at small and easy DIY repairs first.

1. Start outside. Make sure your gutters are all connected and direct water away from the house. It seems so simple, but do you know how many people don’t realize they have lovely waterfalls flowing down their homes?

2. Ok, downstairs. Check your bricks and block work. Do they need repointing? Concrete sealers such as ThoroSeal or Drylok are never a bad idea. In fact, it’s a good idea.

3. Something you might want as a “just-in-case” even if your basement is bone dry is a sump pump. You will need to dig a small hole for the unit. Definitely install one if you’ve given up and let it flood every now and then. It trumps a wet/dry vac, trust me.

4. While we’re still on small stuff, treat yourself to a dehumidifier for the dampness. This one was way obvious, right?

5. Still flooding? Ok, now it’s getting more complicated. Go back outside. Check the slope of your landscape. The water should flow away from the house, not towards it.

6. While your at it playing with the pitch of your landscape, might as well install a french drain. DIY? Maybe with difficulty if it’s all soil. If your house is surrounded by concrete, that’s an even bigger job. Now it’s time to think about calling in the pros.

7. There’s another way if you don’t want to dig around your house, but it ain’t pretty. Professional systems such as B-Dry are installed on the inside. The cost is as much as a brand new inexpensive automobile. On the other hand, we did a DIY alternative in one of our homes and it worked like a charm.

If you have any dampness issues at all, DO NOT store stuff that will get moldy. I lost all of my cherished record albums that way. Every one of them.

Saving the Medallion

Saving the Medallion published on 3 Comments on Saving the Medallion

4387414716_48b7c6f783.jpg

Our hallway ceiling was beyond repair. It was sagging with too many cracks for a skimcoat and the plaster is so dry that it just crumbles. So we needed to take down the ceiling and put up sheetrock.

Why not simply laminate you ask? Well, we have the original wood molding near the staircase, so the sheetrock had to fit underneath that.

Anyway, we’re talking medallions. So, we have this medallion, see? Obviously needed to save that baby! It could be a diy job, but I wouldn’t trust myself  or my husband to do it. I just had visions of that medallion crashing down on the floor. So, Dimas the contractor to the rescue.

Here’s what he did:

1. First thing is, he secured it with more screws, making sure it stays with the remaining ceiling. The screw holes can be patched up later.

2. Cut around it. Crap, I forgot to see what tool he used! I’m sure the hubby would’ve gone in there with a Sawzall , but he either did it manually with a utility knife or maybe used a Jigsaw.

3. With the medallion secured and separated from the rest of the plaster, it was time for the ceiling to come down.

4387415172_211e3823a5.jpg

4387415418_c5302ea342.jpg

4387414974_9730ce0dd7.jpg

4. Sheetrock hole was cut as close as possible and plastered all around.

4386653743_35b7655743.jpg

5. This is as far as he got, but you get the picture now. Maybe another coat of joint compound, sand, prime and paint.

Reclaim Home Value. Add Curb Appeal. Add A Cupola.

Reclaim Home Value. Add Curb Appeal. Add A Cupola. published on

dscf0698-337×382.jpg

Still bummed about being buried under a foot of snow? If so, then you’re probably already dreaming about the middle of April. You know, that strange time of the year when weeks of windy, overcast days in the mid 40’s magically turn into sunny days in the mid 60’s? Personally, I’m counting down the days until warm weather arrives while I spend long February days staring out the window debating the merits of shoveling my sidewalk against the challenge 14-inches of snow pose to my mail carrier. Anyway, eventually the weather is going to improve, and I’m going to need to get out there and do some overdue maintenance on my tiny piece of suburban splendor.

So what the heck should I do to jump start my spring home improvements? Standard landscaping and up keep aside, I’m thinking about taking some time to improve the exterior appearance of my home. My wife already is doing a great job of maintaining the inside of our home. After taking the beating of holding all that snow this winter, I’m thinking (like I imagine most people are) that the condition of my roof is probably going to need some attention.

Assuming that the roof is where I’m going to focus my time and energy, where the heck do I begin? Shingles are important, but no one is just going to notice that I got new shingles. I’m trying to do something that will make that group of old guys who stand at the edge of their driveway with beers in hand (yeah, just like King of the Hill) take notice of my improvements.

To that end, I’m considering buying a cupola for my crib.

What the heck is a cupola?

A cupola is one of those windowed boxes with a roof that typically sit atop barns, gazebos, and houses. City dwellers will most often recognize cupolas as the dome structures located on top of a old building, like a church or government building.

Now that the real estate market has some life in it once again, I have a feeling many people are going to be working on reclaiming their homes… and, to a certain degree, the value of their home. Cupolas not only provide a classic look to a house, they also improve curb appeal – which, in turn, improves the value of a home on the market.

So, if you wanna follow my lead and shop around for some cupolas as that snow works on melting away over the next couple weeks, here’s a few things to keep in mind as you’re window shopping:

Weather-resistance. Weather resistance is a lot less important to your grandparents who retired to Arizona than it is to those of us who still experience four seasons. Make sure the cupola you pick and the roofing material you select can handle all our different types of weather. Vinyl PVC board and copper sheeting tend to hold up best against the elements.

Styling. Almost every cupola has a window and some decoration. The more complex the decoration, the more $ needed to purchase. The most common cupolas in our area come with louvres, which allow for air flow but shed against the elements. Copper sheeting is recommended for the roof of a cupola, but roof designs can be bell-shaped, concave, or crown molded. Pro designers typically lean towards selecting one that closely matches your home roof. Oh, and if you want to top off your cupola with a weathervane or finial, make sure the cupola includes an interior mount.

– Roof pitch. Click here for a handy, web-based roof pitch calculator. Roofs come at a variety of angles. Cupolas need to fit properly on roofs. I don’t think I need to go into much detail here, but make sure you know the pitch of your roof before you buy a cupola.

*Guest post by Jonathan Bentz

Reclaimed Flooring

Reclaimed Flooring published on 5 Comments on Reclaimed Flooring

5 years ago, we paid around $6000 for reclaimed wide plank pine for a 600 square foot room (installed and finished). And that was the best price. Maybe we had more money to throw around back then, but we would never dream of paying that much for a single floor now.

Reclaimed wide plank is still pricey, but many companies run internet specials. There are also smaller local mills that may charge less.

The least expensive option, if it exists in your home, is to carefully pull up the existing subfloor/planks and scrape them down, then reinstall. Tons of work, but saving all that dough…..priceless.

kingstonlr.jpg
$6000 Floor, Marbletown, NY

planks.jpg
Original Planks, Bed Stuy Home

4fl.jpg
Scraped and Installed Ourselves: $0

Companies Offering Internet Specials

Aged Woods

Antique and Vintage Woods

Craftmark

Douglas Fir Floors

Old Wood Workshop

The Woods

Vintage Timber

Whiskey Wood

Primary Sidebar