Skip to content

Closing Up Windows

Closing Up Windows published on

Lukewindow

Light is one of the most desirable things a home can offer. You may ask why someone would want to close up a window. I believe I can answer that now since we actually got rid of not one, but two windows this weekend.

First of all, both windows had a view of the neighbor’s vinyl siding two feet away. It’s my guess that the neighboring house was built after our 1920 2 story. But we didn’t close up the windows because we were appalled by the view of ugly siding.

One window was in the kitchen. At first, there were thoughts of extending the counter and putting in a smaller window. That could have worked. Then we were like “Wait. Why not get rid of the window completely?” We opted for more cabinets instead of a bit of light, making this tiny kitchen that much more practical.

sheetrock

*Don’t look at my bad taping job. It will be covered by cabinets!*

The second window was in the bathroom. A small window looking out, again, on to the neighbor’s siding. There is a normal sized window right next to it with an unobstructed view of the bay. The sheetrock was already finished but this small window looked totally weird butted up against the wall built around the pipes and sewer line. When we took said sheetrock down to let the plumbers get at the gas lines they were replacing, we thought that was our window of opportunity (You like how I did that there?) to make this area look less…what’s the word I’m looking for?….stupid.

The window in question sits behind the bathtub. I was thinking about some built in shelves which still would have looked uneven. Then hubby was like “Eh, what if we get rid of this one too?” Fine.

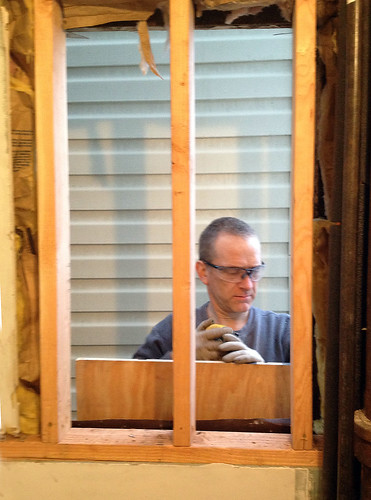
So, what’s the process of taking away a window? Skipping over the DOB legalities and heading right over to the how-to: It’s not as bad as I thought. Of course, it was Hubby doing all the work. And I should let you know that you shouldn’t try this if you don’t consider yourself a handy person. Bottom line is that you need to know what you’re doing enough to keep the moisture out of your house or you’re opening up a world of problems.

1. Take out rotted wood (in our case) and re-frame. Oh yeah, take out window first. Duh.
2. Build studs.
3. Plywood exterior side.
4. We have vinyl siding on this house so in this instance it’s plywood, tar paper, rigid insulation and siding. If you have brick or brownstone, it’s more skilled. Eh, chances are you’re in an attached house anyway and don’t have to worry about it.
5. Interior. Insulate between studs.
6. Sheetrock.
7. You know the rest. Tape, paint, done.

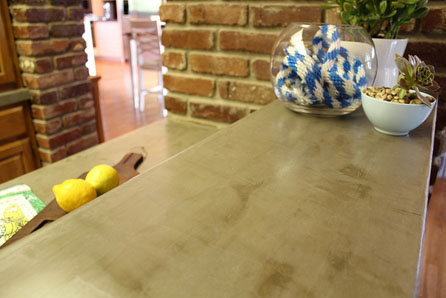
Cheater DIY Concrete Counter

Cheater DIY Concrete Counter published on 3 Comments on Cheater DIY Concrete Counter

I tend to go with tile countertops because they are inexpensive and easy to do but sometimes one needs a change in life. So, I’m researching. You can stick just about anything in resin but the problem with that is that heat will melt the epoxy. So what’s a DIY gal to do? I’ve always wanted to try a concrete countertop. Hell, why not? I’ve done concrete floors.

Then I came across Kara Paslay Designs’ blog post on a DIY concrete counter that you don’t have to pour. Duh! Why didn’t I think of that? I could never be bothered with pouring a countertop because you have to build a mold for the pour first and let’s be honest…Who wants to do that?

So all’s ya gotta do is skimcoat any roughed up and prepared surface with Kara’s recommended product called Ardex Feather Finish. A few coats, sand and seal.

Sounds too easy. I’ll let you know if it’s idiot proof since I’m pretty sure this idiot will give it a shot pretty soon.

Two Steps Back. One Forward.

Two Steps Back. One Forward. published on

Untitled

As of last weekend, we finally hit the reset button on the renovation. The house has heat and electric. The basement is cleaned out. Now, where were we before the storm?

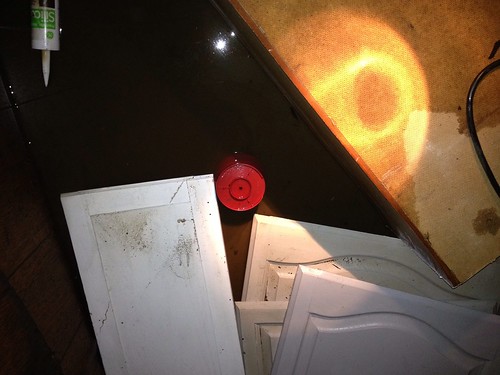
Oh yes, I was down in the basement painting the kitchen cabinets I intended to recycle. Ok, so those were trashed. I ended up finding 2 cabinets to recycle at a PA ReStore and then I caved and bought new unfinished ones at Lowe’s. The good news is that I don’t have to clean maple syrup and mouse shit from the insides of the cabinets. New has it’s charms. So I’m doing the cabinets again. How deja vu.

As mentioned, twas only our basement that flooded, so all of the new sheetrock was fine. I say “was” because since we had licensed competent plumbers over to install a new boiler, we had them run new gas lines throughout the house. That means cutting into some sheetrock. We hate doing sheetrock but we’re not getting the schmuck back who did it in the first place. That didn’t end well. It never does. That’s why we DIY.

So where’s this step forward? Got a clawfoot tub! Yay! It needs some work. “Some” is an understatement. Oh, and I finally bought some bathroom tiles. New slate. No overstock or discounts but like $1.48 per square foot. Not bad. Again, Lowe’s. So much better than Home Depot. The bathroom will be ready to tile once we re-frame and sheetrock that pipe area we demolished.

Funny. Don’t know if I ever mentioned that this house is my project and the hubby wanted nothing to do with it. Now here I am all “we” this and “we” that. Guess I dragged him into it, huh?

Somewhat Habitable

Somewhat Habitable published on

sink

After a slight hurricane setback on the Rockin’ Rockaway Rehab house, things are back on track. As you know, we were without heat and electric for a solid three weeks but it’s all good now.

The basement was gutted and cleaned up immediately. It took LIPA (LI Power Authority) ages to get people back to normal. There were rumors that nobody’s electric would be turned on until each and every home was inspected. Nah, they couldn’t do that. Folks needed to get a licensed electrician to certify the panel or it had to be okayed by LIPA for that individual home to get powered up. I was lucky enough to be around the day LIPA came by to inspect. They okayed me even though, between you and I, I knew that the panel had to be changed, which it was before I turned my power on.

I thought that once I had lights and outlets working I could get back to the renovation, but I wasn’t too happy working there in the cold. I hired the boiler replacement plumbers the same way I hire any contractor….went with the only one who showed up. Kew Forest Plumbing came, supplied an estimate and started work the day after I agreed to the price. Again, luck was on my side that I have a steam system. Hot water boilers are on back order, so there are plenty of folks still waiting for heat. Got me a new water heater too. Too bad we haven’t installed a shower yet.

Have I ever mentioned that we’ve had the gas turned off since August? Every time we turned it on, we discovered a new leak. It was at leak number five and at this point I’m totally freaked out by those old pipes. While the basement is open and while the plumbers are around, I’m having them run all new gas lines. Take that, Sandy. I meant to do it anyway!

After all this time, we finally set up a temporary sink on the first floor! There is a lone toilet sitting in a demoed bathroom on the second floor. We were running down to the basement sink to wash our hands. Or not. A sink in the living area? Only 1 flight from the toilet? How luxurious. And there’s warm water. What a concept. Living the good life!

Accessorizing with Stencils

Accessorizing with Stencils published on 1 Comment on Accessorizing with Stencils

stencil2

I always think of stenciling as a finishing touch to dress up a home after the renovation is complete. After having some setbacks in the house that I’m waiting on for repairs, I found myself there yesterday with nothing to do, so I decided to get to some of those finishing touches.

There’s the correct way to stencil and then there’s my way. Since I was anxious to get something done without running to the store to get more supplies, guess which way I did it?

To stencil properly, you should have the following materials on hand.

1. Paint & Stencil. Duh.
2. Stencil brush
3. Blue masking tape
4. Pencil
5. Tape measure
6. Level
7. Paper towel
8. Water or denatured alcohol
9. Stencil adhesive

If you don’t have these items on hand, you can do what I do and use your fingers and a foam roller.

1. Have your base coat down and have the stencil paint on hand. You may use as many colors as your little heart desires.

2. Measure out where to start and the distance between stencils. You’ll most likely be using the same stencil over and over. That’s where the pencil comes in but you can also mask off where it will go. Personally, I like to get this step over with so I can just paint my stencil, but you can stop and measure/level each time. Whatev. Up to you.

3. The spray adhesive will keep the stencil in place. If not on hand (I’ve never had it on hand.) you can tape the stencil but honestly, it pops up and if you’re sloppy like me, there will be some touch up. That’s where your fingers come in. You have to hold it down and you’re literally painting your fingers.

4. Dip the stencil brush or foam in paint and dab it off on a paper towel. You don’t want too much paint.

5. Stipple the brush into the cut outs. Do not, repeat: do not use strokes or it will bleed underneath the stencil. Been there, done that.

6. Carefully remove it without smudging the paint all over.

7. Take off the tape, blah, blah, blah. Beautiful, huh?

8. Repeat over and over again, cleaning the paint off the stencil each time.

9. Touch up with small brush as needed. If it looks perfect, well la-di-da….aren’t you superior?

stencil1

The stencil you’re looking at has dressed up a boring newly sheetrocked archway between rooms. After the setbacks, it made me feel a bit better about the house. She cleans up real nice.

Twice as Much

Twice as Much published on

IMG_8800

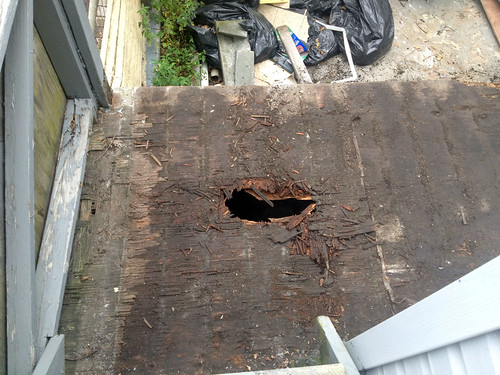
Original deck was taken down.

There’s an old warning about home renovation that goes “Expect to pay twice as much and for it to take three times as long.” I’ve always found this to be true except this time I was prepared for the worst.

Case in point is the back deck. It’s not even so much a deck as steps with a landing. Whomever built this thing must have been on some hard drugs at the time. The stairs are cutting into the house and one landing leans on a roof without any other support. It’s a nightmare.

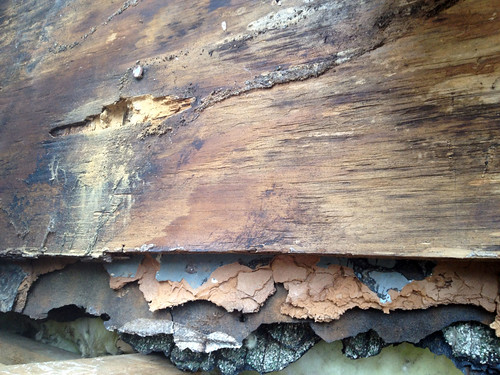
This is the final “big project” to tackle on the house. I left it for last because I knew it wouldn’t be simple. I’ll survive because my hubby is a structural engineer who has a penchant for removing rotting wood to add support. But I just want to warn others out there that this is what it’s all about. Opening up a can of worms. You remove a wall or a floor or a deck and chances are, what you see behind that won’t be pleasant.

As it’s been said on this blog a million times before, previous homeowners (in my experience anyway) tend to cover things up rather than correct them. The deck is over the basement. We are not only replacing the deck but the damage has spread to the side structures of the house and the basement.

I can’t imagine how much this would cost someone if they were paying a real contractor to do it. Then you have to consider that the contractor is doing the right thing because they sometimes like to cover things up also.

My point? I don’t know if I have one. Oh yeah, maybe it’s this: Expect to pay twice as much and for it to take three times as long.

At the end of the day, I’m gonna have me a nice new deck that will stand longer than the house itself.

photo2

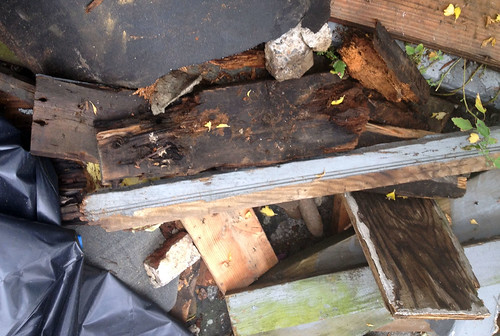
Some rotted wood that was removed

photo3

Roof that supported the landing

photo1

Side of house once vinyl was taken off

Sixteen Thousand

Sixteen Thousand published on

$16,000. That’s what’s left in my renovation budget. With that, I have to put in two kitchens and two baths. I’m not including the floors which will be $1900 to sand and poly and the deck that being rebuilt this week which may run about $2000. So, really, that’s $12,000 I have to work with.

Normal people spend $12k on a single bathroom. With my recycled materials and sweat equity, I’ma gonna try to make it all happen. I predict that I will go slightly over budget by about $5k.

This is where the blogging will get more fun. Blogging about plumbing, electric and new sheetrock = Boring! Now the house is going to start looking livable. I’ve even been making coffee and eating there again. There is one working sink in the basement and one working toilet on the second floor. Which reminds me, I need more wet wipes.

Today I will hopefully get some color on those walls. At least they are primed.

I’m seeing the low budget as a an opportunity to learn some new skills since I can’t afford to pay anyone. They say that this Jesus guy was a Jewish carpenter, so I figure what’s he got that I ain’t got?

I Want to Renovate Again.

I Want to Renovate Again. published on 1 Comment on I Want to Renovate Again.

Hello. My name is Phyllis and I’m a renoholic. Yes, we’ve already established that, which is why I have this blog and why flipping…or Phlypping (™ Miss Wit) is the most fitting career move for me.

But I’m not talking about the investment property I’m currently working on. I’m knee deep in renovations with that and I’m sitting here looking around my own house thinking that I want to rip into it again.
In my defense, it’s not just that I want to re-renovate. I kind of want to use some of the materials from my Bed Stuy house and put it into the Rockaway house because I was never in love with said materials anyway.

Check it out. During the renovation of my own house, I was hemorrhaging money and had to finish as quickly as possible to get tenants in here. Items were installed that I never would have wanted if it was not so rushed. New stuff, like Home Depot doors (solid, with panels, of course), new door knobs, stainless appliances instead of beautiful antique ones, typical oak flooring….you get the picture.

Now, these things are not horrible by any stretch of the imagination but if it was up to me, I’d replace them with historic materials. I have the chance now. I can remove my HD doors and use them in the other house. The appliances, the kitchen cabinets!

But who am I kidding? That’s too much work, because then it’s like I’m doing two houses at once.

Right??

Crimes of Homeowners Past

Crimes of Homeowners Past published on 2 Comments on Crimes of Homeowners Past

This is what happens when you don’t prime first.

This is my fifth major renovation and I’ve seen it EVERY. TIME. Why do people just cover up what needs to be repaired? Money issues? I don’t get that. Those band-aids aren’t cheap. Instead of fixing some holes in the plaster, is it really less expensive to drop the entire ceiling?

I found a piece of cardboard used to patch a hole in the wall the other day. Like, cut out from a box. That was nothing. I can fix that. What bothers me about this house is that there is a new roof and vinyl siding. Although that’s not bothersome in itself (well, the vinyl is), it worries me that there were no repairs made to the wood rotting beneath the new protection.

I was a bit torn. As an environmentally aware salvage freak, I wanted to keep materials out of the landfills. As someone on a tight a budget, I couldn’t afford to gut the entire house down to the studs. So, I fixed what I saw but I know that there are things I missed behind those walls I didn’t remove. And I kept and re-covered the holey ceiling plaster myself after removing the drop ceiling.

I’m not completely concerned because, as I stated in a previous post, most of the rot seemed to be under each window and I did take those areas down to the studs.

But what about crazy plumbing fixes….or just letting pipes leak? So much damage from leaky pipes! And gas leaks? And electrical issues? Is it better to save a few bucks and risk your life and the life of the house?

Here’s the deal. You don’t have enough money for repairs? Fine. Nobody can fault you for that. But how’s about you learn some DIY skills and fix this stuff yourself? Seriously, if you would cover the gaping floor hole from your leaky toilet with sheetrock rather than just fix the damn toilet, you shouldn’t own a house. Apartment buildings with supers are wonderful things. I know. That’s the way I grew up. Call this a rebellion against my parents.

It’s not going to repair itself on it’s own, whether you cover it up or not.

Just do the right thing. For you. For the house. For the next owner.

Like a College Dorm

Like a College Dorm published on

IMG_8803

Still a ways to go with the house but at least there are new walls and….yeah, that’s about it…new walls. It’s barely liveable but probably no worse than any other renovation that I’ve occupied full time. At least there is a toilet and a sink. They are located two flights from each other but they do exist.

We’ve come a long way in a week and some.

IMG_8801

Behind the Walls

Behind the Walls published on

IMG_8795

Hidden stash of 70’s/80’s porn

By Friday we had gotten the dumpster. I ordered a 30 yarder and they delivered a 20. The plan was to finish the entire demo by Saturday afternoon, but we decided to get rid of a bit more rotty sheetrock than planned so demo will continue this week.

Plumber Larry plumbed on Sunday. He knew his stuff and was able to repair all of the corroded pipes and then some in one long day. Hubby and I just acted as his gophers, running to Home Depot for materials. Two trips over the bridge back into Brooklyn on a hot summer Sunday with beach traffic.

Today is a day off for all except for the chimney guy, Manny LaSalle. Well, it’s not my day off but I’ll be doing some fun shopping for salvaged materials.

Anyway, here are some more finds.

IMG_8781

Wall paneling behind wall paneling

IMG_8793

This insulation looks like charcoal in person but it was actually some kind of cement. There were a couple of pieces of foam stuck in the wall. We think it was supposed to be concrete and foam insulation, but the foam was only in one spot.

IMG_8783

Doesn’t look like this “insulation” was doing much. Why bother?

IMG_8794

Kitchen wallpaper through the ages. Guess it was a child’s room at one point.

IMG_8786

Found this 70’s linoleum under the carpet. It will be reused.

tate

The Charles Manson Tate trials! Found under some kitchen lino. Also, papers from the 40’s during war time.

Stripped Naked

Stripped Naked published on 2 Comments on Stripped Naked

photo

Dayim, there were more pics from Demo Week but I left my camera card in the house. The photo above was from day 2. By day 3, that pile tripled and we had more piles going in other rooms. The dumpster comes today. A 30 yarder.

No terrible surprises so far. Yeah, some rotted wood where I figured there would be. Some sheetrock needs to be replaced. I’m satisfied with the wood floors we uncovered. Knock wood, it’s going ok.

The 30 yarder will be filled with drop ceiling tiles, wall paneling and carpets. That’s the bulk of it. Lots of “covering” of the original materials that just need some TLC.

Yeah, not much to report today. Just wanted to let y’all know I’m still alive.

Day 1: Left Behind

Day 1: Left Behind published on 1 Comment on Day 1: Left Behind

IMG_8768

Yesterday I just went over to the house with the dogs to clean up the bathrooms and kitchen, shop for essentials and figure out what I’m doing. I spent over an hour changing a lock and scratched my head quite a lot over the configuration of the house.

One of my favorite parts of a renovation is discovering things unearthed in the demo. Well, since I didn’t really start demo yet, here are some items the seller left behind.

No, not the dog and not the whiskey. The whiskey was a gift from the selling broker. I’m gonna need it.

IMG_8767

IMG_8772

IMG_8771

IMG_8773

IMG_8774

IMG_8775

Packing for the Beach House!

Packing for the Beach House! published on 4 Comments on Packing for the Beach House!

It’s been some some since I spoke about the new project. That’s because it’s taken forever to get a closing date and there were times I thought it wasn’t going to happen. Well, I’m finally getting the keys on Monday afternoon!

Most ladies get excited when they pack their bikinis for their beach houses, but I was psyched to pull out my trusty work boots and painting clothes.

Wanna see my packing list for the first week of demo? Sure you do!

1. Sledgehammer
2. Sawzall
3. Crowbars
4. Tool Bucket (Hammers, Chisels, Bear Claw)
5. Screw Guns
6. Extension Cords
7. Work Light
8. Ladders
9. Shovels
10. Shop Vac
11. Safety Mask
12. Gloves
13. Goggles
14. Contractor Bags
15. Floor Protection

Primary Sidebar