Skip to content

DIY Industrial Curtain Rod

DIY Industrial Curtain Rod published on

curtain

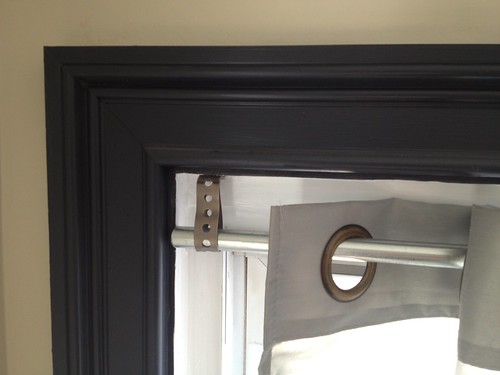
Here’s a simple and inexpensive way to hang your curtains.

First, a little history as to how I ended up buying my curtain rods at a plumbing supply place.

After rebuilding the rotted window frames, there wasn’t much space inside the molding to hang blinds. There was no way I wanted to cover the window trim.  Having spent a fortune on it, I wanted to show it off.  So, it had to be inside the molding and the I only had about a 1/2 inch to work with. The other thing was that this is a long window, measuring 88″ across, so most of the non-custom rods were too short.

First choice was the Ikea window panels. Love them! But alas, they would have been too pricey for this project.

I did find some cute curtains at Dee and Dee for like six bucks. Now to hang them.

Rope? I like to use rope to hang shower curtains. I figured why not curtains? Well, because there is still no bar. The rope would just sag in the middle. Tension rod would have been another solution, but I didn’t try that.

When I saw an extra piece of copper pipe in the basement, the light bulb went off. I went to the plumbing supply place to see if they had narrow flanges I can use to hang it, much like a closet rod flange. They did not, so I said “Screw it. Let’s use that punchy hole thing that is used to secure pipes.” Then I saw the price of the copper and decided on electrical conduit instead.

And so here we are. For under twenty bucks, I have some curtains and the rod. It took about 10 minutes to install, including the time it took to cut the rod down to size. If you don’t like the way it looks, rest assured, it’s mostly covered by the fabric anyway. Plus, there’s always spray paint.

rod

Apartment Two

Apartment Two published on 3 Comments on Apartment Two

tub

The Rockaway upstairs apartment is now ready for it’s (not so) close up! The original goal was to start showing by the end of May. (The original original goal was to have the house sold by the end of 2012, but we all know how that worked out.) Ok, so this new deadline was somewhat delayed due to the fact that I mistakenly decided to have a life and go away for Memorial Day weekend. But whatev. I’m back up to speed.

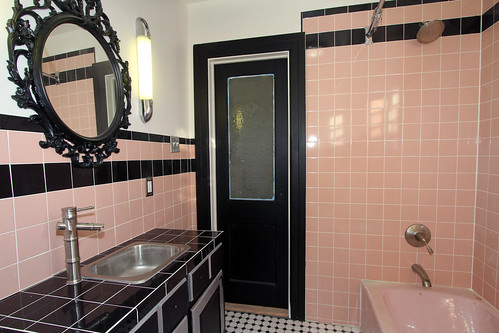
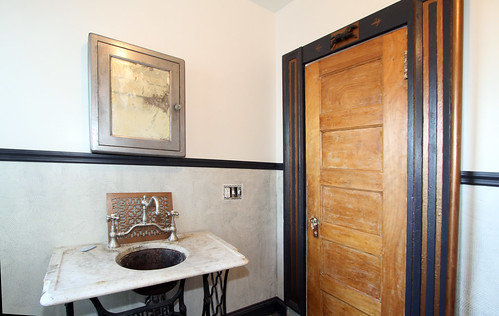
I wish every room could be as interesting as doing a bathroom or kitchen. Remember my original pink bathroom that I was determined to keep? Well, it has been resurrected! Still on the to do list: vanity pulls, scrape paint off door glass, lock set, stain saddle and a few other things that don’t show up in the photo.

kitchen

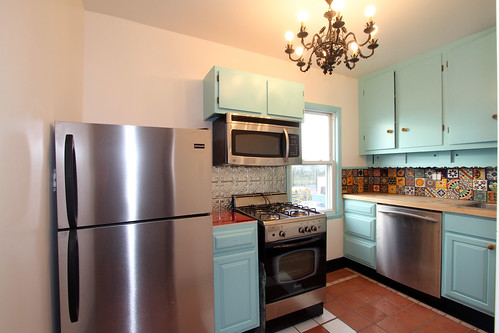
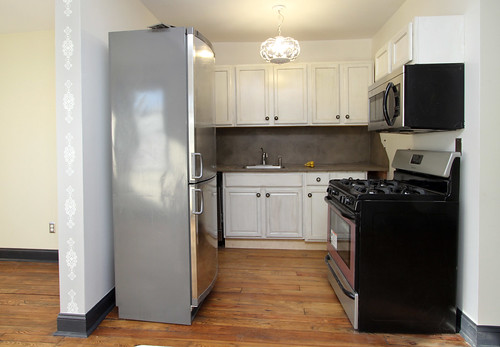
The decision to do a Mexican kitchen was born when I found the ceramic “terracotta” tiles at a Habitat Restore. The upper cabinets were there when I bought the house. Because of my not-so-great planning skills, the fridge, which was originally for the downstairs kitchen, was moved up here because it was too wide. It was meant to go on the opposite wall but proved too big for that also. I ended up tearing down some more cabinets to fit it in that corner. It works so much better there, but now I have to move an outlet. To do list: Move outlet, cabinet pulls, replace broken stove knob, switch plates.

livingroom

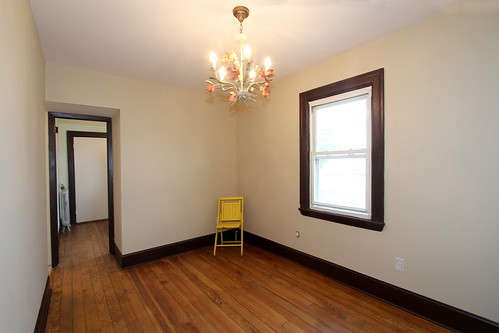
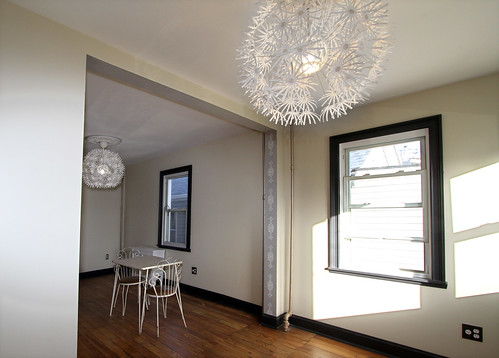
This is the living room. I stuck the chair in the photo because it looked so empty, but now it looks even more sad. To do list: Hang crystals from light fixture, re-coat window trim and inner white, switch plates.

frontroom

This is actually the small front room, but it looks bigger than the living room in this photo. It can be a second junior bedroom, an office or child’s room.

bedroom

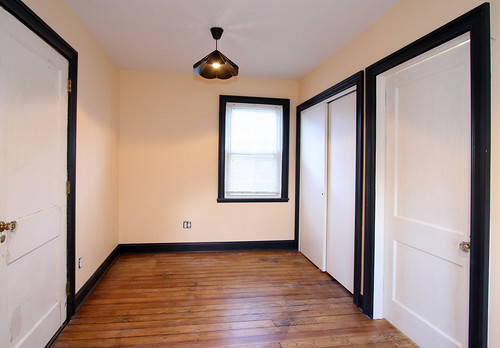
The main bedroom is Manhattan sized also, but it has a room off of it with a closet that can act as a dressing room. Nothing at all interesting about this corner photo. I just wanted to show off yet another vintage light fixture.

Related: Apartment One

Here are some “before” shots…

IMG_8621

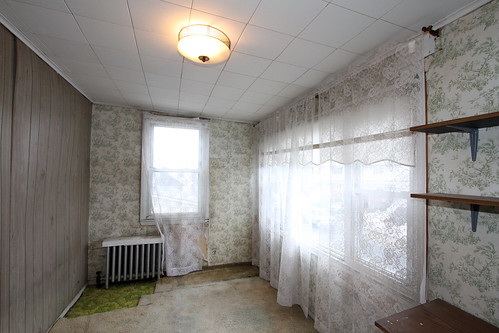
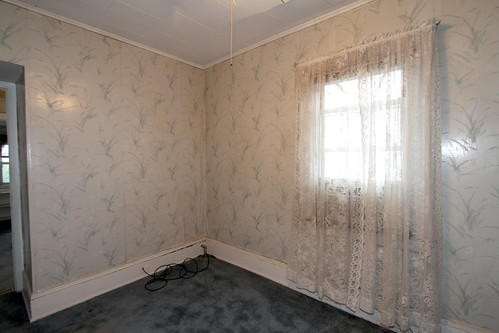
Front Room

IMG_8623

Living Room

IMG_8625

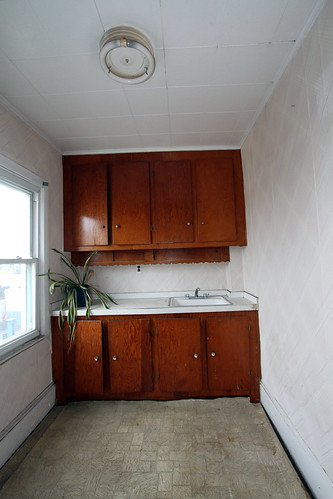
Kitchen

IMG_8629

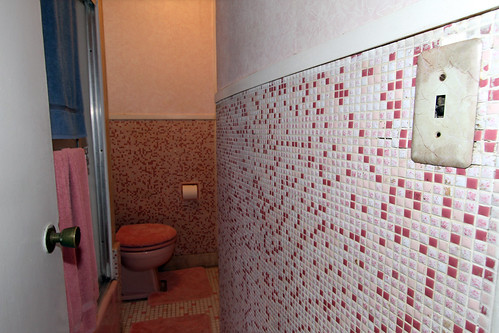
Pink Bathroom

Works in Progress

Works in Progress published on 3 Comments on Works in Progress

wood

Just some pics of the renovation process. Although the downstairs apartment is ready to show, I’ve decided to wait until upstairs is finished before inviting the public over to have a look. Now I’m pushing the date back to AFTER Memorial Day weekend. And no, I will not be working that 3 day weekend.

whtdoor

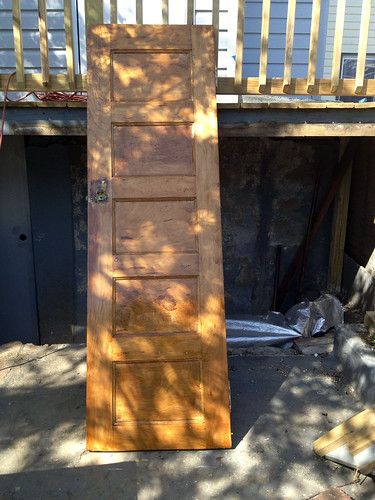
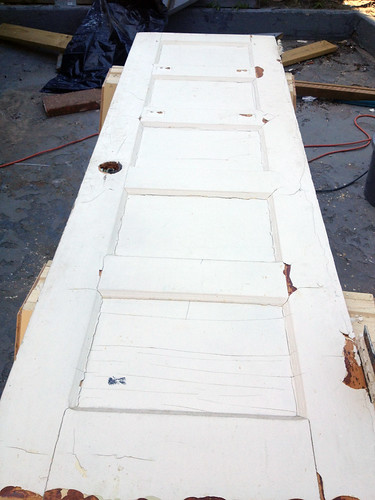
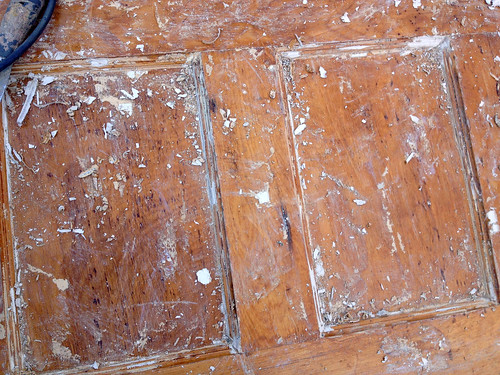
The door to the bathroom (above) was under $40 (maybe even $20?) and came with multiple layers of paint. I should have realized because of the weight of the thing that it was a decent wood, but I was delighted to find whatever-species-this-is when I stripped it down.

stripdoor

Please refer to the paint stripping post for DIY tips!

marble

Antique marble was originally used for the baseboard in the upstairs bathroom. It didn’t really match the new tiles that were installed so I cut this piece down to use as a saddle for the downstairs bathroom.

frosted

Same downstairs bathroom. After months of keeping roisin paper on the window, I finally discovered frosted window film. What a concept!

befvanity

Picked this up at a vintage shop in Newburgh for 25 bucks. Forgot the name of the place, but it’s owned by Barbara of Caffe Macchiato on Liberty Street.

vanitypaint

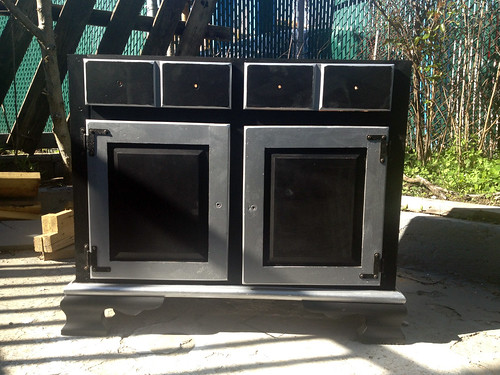
The piece is currently undergoing transformation to make it into a sink vanity for the pink bathroom upstairs. This is 2 coats of paint. Will need one more at least.

countersand

This chunky old wood will be the countertop for the “Mexican” kitchen upstairs. That’s a before and after sanding shot, in case you haven’t guessed. Love the grain!

And that’s it. Can’t wait to show the finished pictures! All in good time, my friends. All in good time.

Stenciled Door

Stenciled Door published on 2 Comments on Stenciled Door

door

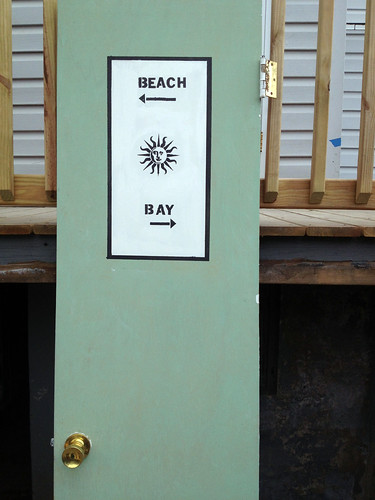
With a tight budget and desire to recycle building materials, I actually wanted to keep the hollow Home Depot doors that came with the house. Only a handful of them are still in good enough shape, but I thought it would be nice to think of them as blank canvases and make each one into a work of art (or some kind of crafty process).

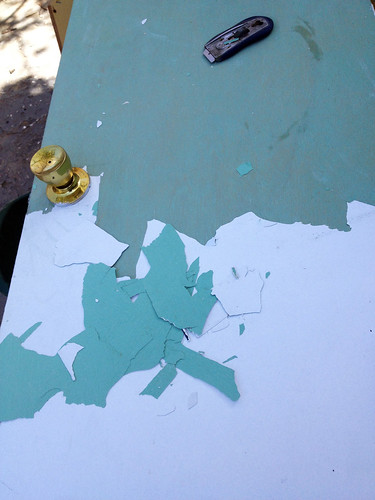
The closet door above was the first one to get all gussied up. The chipping paint revealed some beautiful turquoise that must have been there since the 40’s or 50’s. That was a keeper. What to do with that? I thought of those signs I found in the bathroom floor during demolition and decided to recreate that.

scrape

The paint was chipping off in big chunks, so scraping was a breeze.

tape

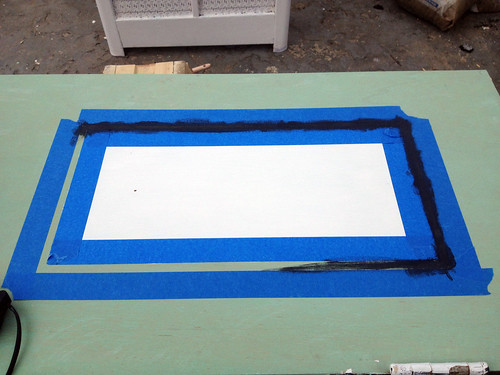
DIY is pretty simple. Just get some tape and stencils. Oh, and paint.

As someone without patience, I didn’t use a straight edge or pencil lines. It’s recommended though. I also hand-held the stencil letters and went along to the next one without waiting for them to dry. Yeah, it smears. Don’t take DIY tips from me.

closebeach

Didn’t have arrow stencil so the arrows were brought to you by the letter “I” and some tape for the point.

Funny story. This particular door faces East/West and the bay and beach are North/South, but I didn’t want to do up and down arrows.

Apartment One

Apartment One published on 5 Comments on Apartment One

living1

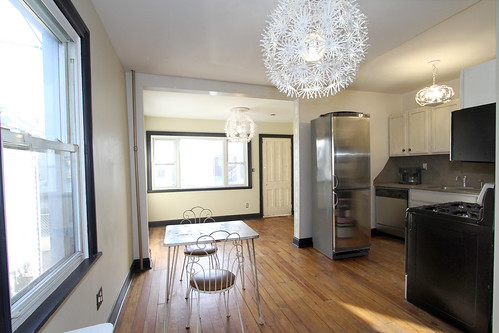
Open living/dining/kitchen area.

One half of the two family Rockaway house will be liveable by June 1st! As in liveable for normal people, not someone like me who no longer notices lack of switchplates and doorknobs. The self imposed deadline was set for this weekend to take some pictures and start spreading the word. Although it’s ready for it’s close-up, it’s a few days from being ready to show. Show by next weekend? Yeah, probably!!

The entire house will be for sale or rent by the end of this month. I call it a two story bungalow. It’s a cozy (that means small in realtor speak) 2 BR over 1BR, just under 1000 square feet for the whole house. Gotta do some comps and math to come up with prices. The website will get started (but not finished) today.

I’m on a roll baby and it feels good!

arch

kitchen2

Yeah, that toe kick needs to be painted and stove needs backsplash.

sinkdoor

The old singer sewing machine base trick. A favorite of mine.

bedroom

Long, narrow bedroom in the back of the house. I want to work a little magic on those plain, white doors if I get the time.

IMG_8617

Kitchen area before.

IMG_8788

Living room during demo.

Creative Door Trim

Creative Door Trim published on

horsehor

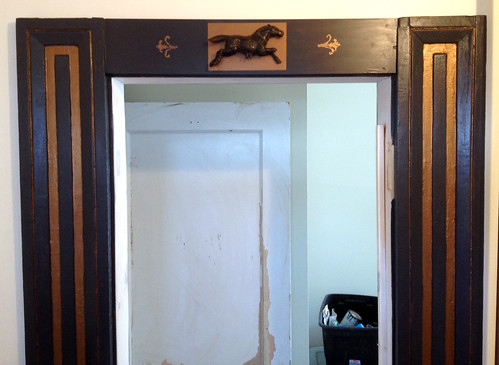
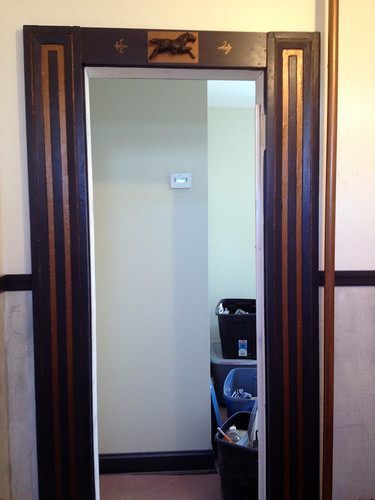
After having spent a couple of thou on molding for the entire house, my favorite trim was a result of righting a mistake and the cost was only 20 bucks.

This is the downstairs bathroom. Long story short, I had intended to do wainscoting on the lower wall and when I couldn’t find reclaimed I decided to do a faux effect instead (photo below). I don’t love it but that’s beside the point. Anyway, for some reason I was too lazy to continue the design all the way to the door, figuring that molding would cover it up.

Well, I don’t know what I was thinking. Your basic molding isn’t a foot wide. So, I’d either have to match the swirly design or get some wide ass molding.

I went with the wide ass molding. Found these side panels at Build it Green. Now the problem would be finding a top piece. After weeks of searching to no avail (You wonder why this reno is taking so long?), I had to put a piece of 2×6 in there and figure out how to make it look nice.

The horse was left over from my crafting days. The black horse didn’t pop on the dark colored molding so I added the copper “frame”. Still looked boring, so I added the stenciling on each side. Now the sides looked lost. Shit, I just want to finish this renovation but I’m a sucker for the details! Soooo, I had to embellish the panels with some copper too.

This door is currently my favorite part of the house. Probably because it’s the only thing I’ve actually finished (and not even…I still have to caulk).

horsevert

Nearing Homestretch, Another Setback

Nearing Homestretch, Another Setback published on

86501545_XS

Not my hand. Came from Livestrong article.

Ah, ’twas only a week ago that a renovation deadline was mentioned. I’m not one to be superstitious but perhaps I jinxed myself. Oh, I’m going to be finished in May, dag nammit, but I’ll be crossing that finish line with one hand.

Last Wednesday I purchased the remainder of molding to be installed upstairs. Oddly enough, what seemed like only a few rooms cost nearly $700. All of my time consuming shopping at re-use stores went out the window in the interest of finishing quickly. So, Thursday I start painting all the pieces prior to installation. If I had only invested in a second sawhorse, you wouldn’t be reading this post, but because I had to keep moving the pieces from the sawhorse to the other room to dry, these long strips of molding took over the house.

So, I tripped on one.

I caught my fall with my hands, the way people often do. Only my left hand landed on a piece of corner trim. Had it landed on a flat surface like my right, I doubt I would’ve been hurt.

It was extremely painful but more than anything I was bummed about not being able to continue work. I put an Amy’s frozen veggie wrap (all I had in the house) on it and took 3 Advil, then waited about an hour. Nah, I really had to stop working. Couldn’t even change my clothes because I wouldn’t be able to tie my sneakers with one hand.

Yesterday I managed to do some work. I filled nail holes and caulked. I even lifted things with my good hand. I was feeling good that I could keep going. This morning I’m in pain from overdoing it but I think I’ll just suck it up and soldier on. I’m convinced that it’s just a swollen bruise and nothing is sprained or broken. I know because I’ve been there and done that too.

BTW, I’m right handed. Who needs the left anyway? It’s just a spare.

Deadline: May

Deadline: May published on

kitchen

A renovation that was supposed to take about two to three months turns into a nine month process when all is said and done. There were unforeseen circumstances along the way, like the worst storm ever to hit the Northeast and a car accident that kept me away from the house for a few weeks. Those things set me back about three months or so, but I have no one to blame but myself for the rest of it.

Apart from spending my budget on some of the wrong contractors up front and having to redo some of their work, the real stagnation started after Sandy. I was in no rush to spend all my money and time on a house that nobody would want to purchase at the price I need to charge. Now that Spring is in the air and Rockaway is getting ready for the summer season, it’s a mad dash to the finish line.

The two apartments are very close to being finished. Now comes the tedious task of finishing work, making sure every small detail is in place. I should say that “small details” mean touch up repainting every room, a kitchen countertop, painting cabinets, bathroom vanity and installing all light fixtures. More than a day’s work, but we’ve come so far.

The exterior needs some prettying up, as does the basement.

Notice I didn’t mention a specific May deadline date. I’m hoping for the first week. Actually, between you and I, I’d like to see it done by the end of this month but I’m also trying to be realistic.

The house will be for sale or rent. I’m resigned to the fact that I will probably have to rent it for a year or two before Rockaway really bounces back. Doesn’t mean I won’t try to sell as that was my original intention, but the price I need to ask and where the market is at now are two different places.

But it’s all good. Either way, I’m going to take the summer off. A much needed break from the physical and toxic work called renovation. I’ll probably take that spare time to work on my Bed Stuy house. D’oh!

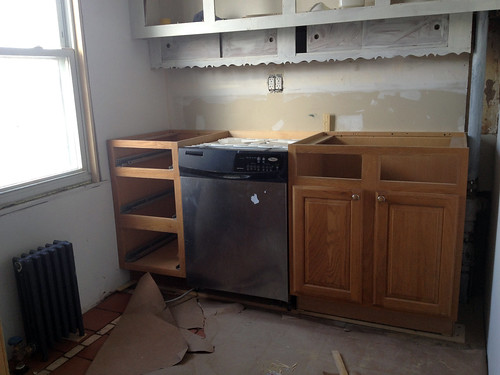
PS: About the photo above. It looks like a “before” shot, but believe it or not, that’s a progress shot. The floor is tiled. The cabinets are installed but not painted. The dishwasher and radiator are hooked up. It’s come a long way from the partially gutted room it was.

Goodbye Rosin Paper. Hello Rubber Tiles

Goodbye Rosin Paper. Hello Rubber Tiles published on 1 Comment on Goodbye Rosin Paper. Hello Rubber Tiles

installation

The old standby in renovation floor protection is rosin paper. There are so many drawbacks though. It gets dirty, it tears, it’s time consuming to put down and worst of all, it really doesn’t protect the floors all that well.

Back when I actually had a crafts room in my house, I bought some interlocking rubber tiles at Lowes to protect my hardwood floors. I’ve since gotten rid of the work room (It’s now just a junk room that dreams of one day becoming a dining room.) so I took up those tiles and brought them to the house that’s under renovation.

Sure, the initial investment costs way more than some paper but if the renovation is going on long enough that you have to keep changing the paper or if you’re doing multiple renovations, I say it’s worth it.

The tiles can be washed or mopped so you don’t have to live with the dust. They are water proof apart from the seams. They’ll last forever and they’re totally reusable. No need to install them around the whole house. Just pick them up and take them from room to room as needed.

I purchased Flexco (shown above) because I wanted it to look good in my house but there are less expensive tiles out there if design doesn’t matter.

Before and After Windows

Before and After Windows published on

window4

Remember when I was bitching about how time consuming the finishing work is? Well, tada! The windows are finally done!

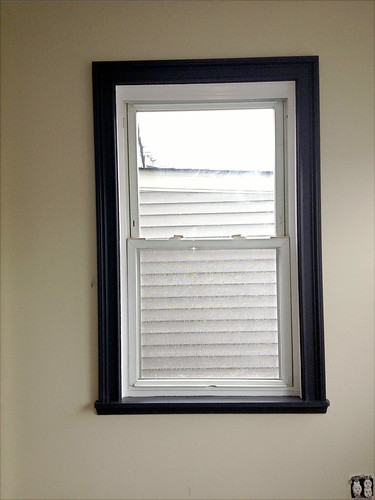
Can’t find the real “before” shots. Those would be initially clam shell molding with wood paneling. Then there was no molding with new sheetrock. Ok, so fast forward to dirty, uncaulked windows with 1 coat o’ paint molding. That would be the photo above.

window1

And this would be the “after”. Shush, I know there’s still touch up to do on that uneven line, but I swear I’m impressed with my cutting in skills. Never use tape. My hand is steady, Freddy.

window2

So, when it’s not so steady (see mark on wall, left side of window) nothing a little touch up can’t fix.

Pre-Offer Home Inspection

Pre-Offer Home Inspection published on

11

It’s essential to have a home inspection after putting an offer on a house. The inspector will take two to four hours to go over every detail so you know what you’re getting yourself into.

Lots of folks back out of the deal after reading the inspector’s report. That’s fine, but there’s no need to waste the $500-$1000 fee if you know what to look for prior to making an offer.

The first time you look at the house, the only items on your mind are location, size and style, right? It’s either a fixer upper or “renovated”. Total fixer uppers are easy. You know it’s gonna be a money pit. But those “renovated” homes are a bit trickier.

On your second visit to the house, take your time to snoop around some more. Here’s what you’re looking for:

1. Floors. Are they bouncy or soggy? If there’s carpeting, what’s underneath? If it’s tongue and groove, check to make sure they have some sanding life left in them. You can tell by the thickness of the boards. It’s not a big deal to replace floors. It’s just an expense.

2. Basement. Do you see any water marks? Is there a dehumidifier down there? A sump pump? If so, ask why.

3. Basement II. Check out the boiler, water heater and electric panel. Let’s keep this fairly simple. How old or new do they look? Do they have maintenance stickers?

4. Basement III. Look up at the ceiling. The floor joists are those 2x6ish pieces of wood spanning every 12″-16″. The beams are chunkier. Maybe they are 4×4 or larger. Maybe they are steel. You want to make sure there are enough posts holding up those beams if it’s wood. The posts should be sitting on concrete, not dirt. If any of this stuff is rotted, they will need to be replaced or “sistered”. Rot could be a sign of larger issues such as water leakage from above or termite infestation.

5. Exterior. If it’s stone, does it have cracks? If brick, will it need pointing? If wood, do you see any peeling paint or wood rot? How are the gutters and flashing? Check the pitch of the landscape to see if water would puddle up and/or enter the house. Are there drains in the back yard?

6. Electric. Make sure there are enough outlets in each room. They should all be three prong. Bathrooms and kitchens should have GFI outlets near water sources. If none of the above, the electric will need an upgrade.

7. Plumbing. Look at the drains under sinks to make sure there there are no leaks. Also check for leaks around toilets and bathtubs. Oh, almost forgot! Go back down to the basement and make sure the copper pipes are not corroded.

8. Follow your nose. Do you smell gas? Mold?

9. Windows. How old do they look? If they are original, have they been maintained or are there storm windows? Do you feel drafts around the windows meaning it’s not insulated?

10. Work quality. This is my own theory. I don’t think an inspector will voice concern about a house if it has a bad caulking job, but hear me out. If the finished product looks sloppy, chances are a low end contractor was used to save costs and that means there may just be band-aids on some problem areas. Look for overuse of caulk, grout film on tile, bumpy sheetrock seams and messy paint jobs. I go a step further and even turn my nose up at material quality. Cheap Home Depot wainscoting is usually covering something nasty! I shouldn’t say that. You’re right. I’m a snob. But buyer beware!

Again, nobody is telling you to be the inspector but these are some things you should look for. Are they fixable? Absolutely! But it’s better to know what you’re getting into before you put in an offer. And that, my friends, is the reason I always buy total wrecks.

Good luck!

Home Bars

Home Bars published on

wine-celar-collection

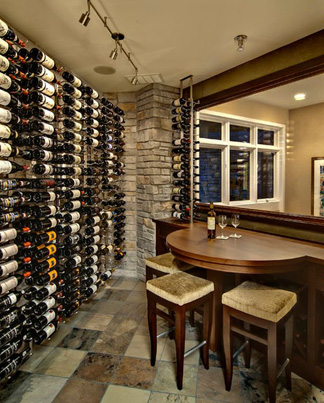
Doesn’t matter if you’re a big drinker or not. Home bars are pretty darn cool. Whether it’s a tiki bar or Mad Men version, what better way to entertain your guests than pretend you’re a bartender?

tiki-bar-at-the-wolfs-lair-in-h

Who needs a tiki bar when you can have an entire tiki room?

classic_basement_bar

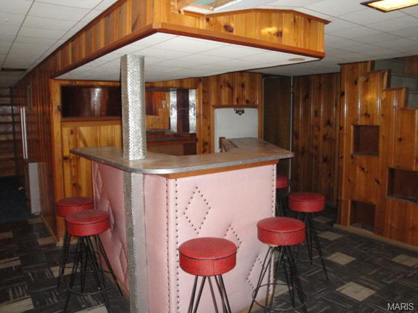
This cute pink bar was in a home for sale in St. Louise, MO. Entire home was listed at $55k.

29c263e0fe942c48330d0a42582a57db

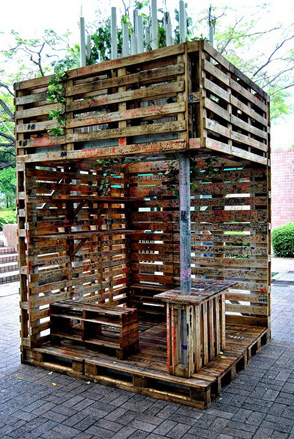
Outdoor pallet bar. How much does this cost? Oh yeah, free.

1073c4bd6b7957553ccadaf46aedbd99

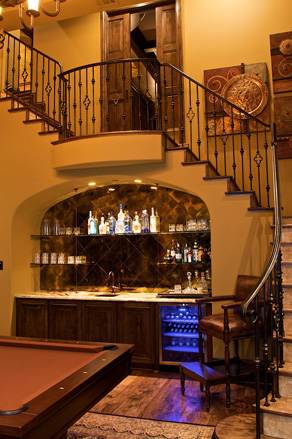
Ok, so the house is a bit McMansiony but the idea of putting the bar under the stairs is great. Plus, they have a pool table.

Rebuilding Gutted Rooms

Rebuilding Gutted Rooms published on

mud1

It’s been six months since renovations started on the Rockaway house. Yeah, I thought I’d be finished within three. Although most of the big, nasty damage was dealt with immediately, I ignored the worst problem until recently.

The rear deck was built into the house without thought of water infiltration. One stair stringer was supported by the house with vinyl siding cut around it and caulking to fill gaps. Gutters on the second floor were not properly cut and pulled away from the siding. Both the first and second floor rear mudrooms had mold and wood rot.

It’s not that the problem was ignored so much as put off. The two rooms were gutted and the deck was repaired to a point months ago. The tough thing was figuring out what to do with those stairs that were part of the house. Just patch it up the way it was?

Nah. Here’s where I needed an experienced company to come in. This wasn’t a DIY or jack of all trades handyman job. After a few phone calls, I went with Topline who does windows, siding and doors. We agreed that the best thing to do would be to take the stairs out completely and redo the entire back wall of siding and gutters, then rebuild self-supported stairs.

skylight

(Funny story. I left the room for 10 minutes and my husband created a “skylight”. Totally rotted ceiling/side replaced.)

But this isn’t about the vinyl siding or deck stairs. This is about the two mud rooms that can finally be dealt with because there are no longer leaks.

The entire house was not gutted. Probably should have been, but there were things I wanted to salvage, such as the floors. Anyway, whatever WAS gutted, we took great pains to repair properly.

What does that mean? It means replacing rotted wood. It means adding extra support where there wasn’t any before, including wall studs and flooring joists. It means new insulation.

It’s almost easier to rip everything out and start from scratch but if I did that, I would have to call this blog “Newly Renovated Home” rather than “Reclaimed Home”, now wouldn’t I?

All The Small Things

All The Small Things published on

window

So, your floors are finished, sheetrock is up, you’ve painted and the molding is installed. Think you’re done? Think again. The finish work is one of the most tedious and time consuming parts of the job. It doesn’t really take much skill but it does take patience.

The above photo is my before caulking window casing shot. I don’t have an after because I didn’t finish. Spent the morning vacuuming and wet-wiping dust. Caulked some, filled nail holes. Didn’t get to paint it.

Unfortunately, I had to save those old vinyl windows because it wasn’t in my budget to replace them. After cleaning them up (I forget whether this is the before or after clean shot) it looks like I’ll have to paint them. That’s the thing about adding even one new element to a room. Then everything else looks horrendous next to it.

Anyhoo, a few rooms in the house are so close to being finished. So close and yet so far.

Primary Sidebar