Skip to content

Like a College Dorm

Like a College Dorm published on

IMG_8803

Still a ways to go with the house but at least there are new walls and….yeah, that’s about it…new walls. It’s barely liveable but probably no worse than any other renovation that I’ve occupied full time. At least there is a toilet and a sink. They are located two flights from each other but they do exist.

We’ve come a long way in a week and some.

IMG_8801

Behind the Walls

Behind the Walls published on

IMG_8795

Hidden stash of 70’s/80’s porn

By Friday we had gotten the dumpster. I ordered a 30 yarder and they delivered a 20. The plan was to finish the entire demo by Saturday afternoon, but we decided to get rid of a bit more rotty sheetrock than planned so demo will continue this week.

Plumber Larry plumbed on Sunday. He knew his stuff and was able to repair all of the corroded pipes and then some in one long day. Hubby and I just acted as his gophers, running to Home Depot for materials. Two trips over the bridge back into Brooklyn on a hot summer Sunday with beach traffic.

Today is a day off for all except for the chimney guy, Manny LaSalle. Well, it’s not my day off but I’ll be doing some fun shopping for salvaged materials.

Anyway, here are some more finds.

IMG_8781

Wall paneling behind wall paneling

IMG_8793

This insulation looks like charcoal in person but it was actually some kind of cement. There were a couple of pieces of foam stuck in the wall. We think it was supposed to be concrete and foam insulation, but the foam was only in one spot.

IMG_8783

Doesn’t look like this “insulation” was doing much. Why bother?

IMG_8794

Kitchen wallpaper through the ages. Guess it was a child’s room at one point.

IMG_8786

Found this 70’s linoleum under the carpet. It will be reused.

tate

The Charles Manson Tate trials! Found under some kitchen lino. Also, papers from the 40’s during war time.

Stripped Naked

Stripped Naked published on 2 Comments on Stripped Naked

photo

Dayim, there were more pics from Demo Week but I left my camera card in the house. The photo above was from day 2. By day 3, that pile tripled and we had more piles going in other rooms. The dumpster comes today. A 30 yarder.

No terrible surprises so far. Yeah, some rotted wood where I figured there would be. Some sheetrock needs to be replaced. I’m satisfied with the wood floors we uncovered. Knock wood, it’s going ok.

The 30 yarder will be filled with drop ceiling tiles, wall paneling and carpets. That’s the bulk of it. Lots of “covering” of the original materials that just need some TLC.

Yeah, not much to report today. Just wanted to let y’all know I’m still alive.

Day 1: Left Behind

Day 1: Left Behind published on 1 Comment on Day 1: Left Behind

IMG_8768

Yesterday I just went over to the house with the dogs to clean up the bathrooms and kitchen, shop for essentials and figure out what I’m doing. I spent over an hour changing a lock and scratched my head quite a lot over the configuration of the house.

One of my favorite parts of a renovation is discovering things unearthed in the demo. Well, since I didn’t really start demo yet, here are some items the seller left behind.

No, not the dog and not the whiskey. The whiskey was a gift from the selling broker. I’m gonna need it.

IMG_8767

IMG_8772

IMG_8771

IMG_8773

IMG_8774

IMG_8775

Packing for the Beach House!

Packing for the Beach House! published on 4 Comments on Packing for the Beach House!

It’s been some some since I spoke about the new project. That’s because it’s taken forever to get a closing date and there were times I thought it wasn’t going to happen. Well, I’m finally getting the keys on Monday afternoon!

Most ladies get excited when they pack their bikinis for their beach houses, but I was psyched to pull out my trusty work boots and painting clothes.

Wanna see my packing list for the first week of demo? Sure you do!

1. Sledgehammer
2. Sawzall
3. Crowbars
4. Tool Bucket (Hammers, Chisels, Bear Claw)
5. Screw Guns
6. Extension Cords
7. Work Light
8. Ladders
9. Shovels
10. Shop Vac
11. Safety Mask
12. Gloves
13. Goggles
14. Contractor Bags
15. Floor Protection

DIY Home Security:Webcam Surveillance Systems

DIY Home Security:Webcam Surveillance Systems published on 2 Comments on DIY Home Security:Webcam Surveillance Systems

Guest post by Jeremy Kushner, a home security and automation enthusiast who blogs on topics related to crime, security, home improvement and automation. You can find more of his posts at his blog, Home Alarm Systems.

Do you ever wonder what happens at home when you aren’t there? Would you like to be able to view your front door, back yard, home office or check in on your pets from your cell phone or office computer? Home video surveillance systems are becoming more affordable and smarter.

You’ll need these things to get started.

– Computer with good processing power and internet access
– Web cameras
– Surveillance software

Webcams

Since webcams are inexpensive and easy to connect, it’s a great place to start with a DIY home surveillance project. Select cameras based on where you want to place them and what you want them to capture.

Better quality video makes it easier to view facial features clearly. It is best to use a higher resolution video such as digital 720p or 1080p. Lower resolution cameras also work well and may be just fine for most locations, they are also less expensive.

A few top rated webcams that support both Mac and PC include the Logitech HD ProWebcam, and Webcam C525, Creative Live! Cam Socialize HD AF. Microsoft’s LifeCam Studio Webcam does not work on a Mac, but is a good camera. These webcams range in price from $40 to $99.

Surveillance Software

Depending on the type of features you desire, you can find free or low-cost software for managing your cameras under $70.

Freeware – Free downloadable software

Two free, easy webcam software, Yawcam, short for Yet Another WebCam, and Vitamin D are basic and easy-to-use. Both support live video streaming and still shots and are perfect for use at home.

Vitamin D supports one camera and offers a search view with thumbnails and color coded frames with people in them. It has unique video clip rules such as detection of unknown objects or people inside or outside of a set area; it can even detect loitering. It will record, send an email or play a sound when a video clip rule is broken. Both Yawcam and Vitamin D feature motion detection. Yawcam’s features also include a built-in web server, text and image overlay and FTP image uploading for safe storage.

Low-Cost Downloads

For more features, WebCam Monitor by Deskshare allows you to monitor, preview and record one camera at a time. It’s ideal for monitoring a small area such as a home office or playroom. WebCam Monitor is available as a free trial and costs $69.95 to purchase.

WebCam Monitor not only offers motion detection, but sound detection too. This is a nice feature not found in many low cost monitoring software systems. The system also starts recording before motion is detected, capturing the event immediately, without delay. Recording can be scheduled at set time intervals to capture time sensitive activity. The system sends email alerts, and has audible alarms.

If you’re looking for multiple camera support, try Security Monitor Pro, the professional-grade version by Deskshare.

Another affordable download is the Willing Webcam by Willing Software. This too has a free trial and can be purchased for $39.99.

Not just surveillance software, Willing Webcam enables you to use it for video capture and distribution. You can stream live video or time-lapsed images from your webcam or other video sources to a web site.

Willing Webcam’s surveillance features include motion detection, email, text or image alerts, remote access and management that allow you to view and control the system while you’re away from home. Add date stamps to images and video and archive them safely via FTP upload.

Willing Webcam comes in both a “Lite” and full-featured version. The Lite version doesn’t offer some of the convenience features such as email or image alerts, remote management, FTP upload or video streaming.

Once you choose your software, you’re ready to go. After you have your system up and running, you’ll find it useful for things like being alerted about break-ins, yard and porch thieves or misbehaving pets taking it out on your furniture and ensuring your peace of mind while on vacation.

Curb Appeal: Window Boxes

Curb Appeal: Window Boxes published on 1 Comment on Curb Appeal: Window Boxes

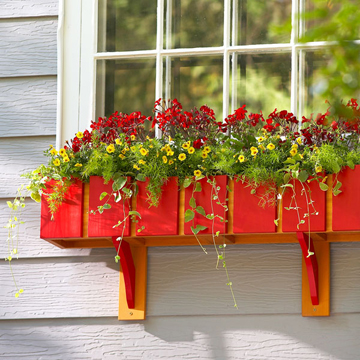
How do you accessorize the front of your house for not a lot of money? Well, window boxes would be a good start! The bright box shown above has a DIY tutorial on the Lowe’s website.

I like this interchangeable plant idea because you can never get bored. Stephanie Lynn lists ten window box DIY project plans in her post!

The Polished Pebble posted Pottery Barn planters. Pleasantly pretty.

It’s not all about the box. For folks like me who can’t maintain live plants, this is a great idea! Bottle holder window box. Personally, I’d make sure those bottles are secure in there, knowwhatimsayin?

Who says you even need a real window? This reclaimed wood window box is for sale from Aunt Debbie’s Country Store for 24 bucks. For that price, I wouldn’t even bother taking the time to make it myself. Just order it.

Built-In Corner Closet

Built-In Corner Closet published on 2 Comments on Built-In Corner Closet

IMG_0385

First of all, please excuse my inferior quality iPhone image. Ok, now that that’s out of the way, this corner built in closet is in FDR’s home in Hyde Park, NY.

There are built-ins that take up entire walls or a good portion of the room but this corner design would fit nicely in a small room. Looks easy enough to build from scratch (for a carpenter, not moi) but I’m wondering if one can come up with the perfect salvaged materials to do this. It’s game on for me because I have some tiny bedrooms in the new house and I think I wanna go with the corner thang.

How To Build A Planter Box

How To Build A Planter Box published on

Welcome new advertiser, Bunnings Warehouse (see sidebar)! They are Australia’s version of Home Depot. The mega home improvement store has a great website to boot. Check out their DIY section, including videos, brochures and planners.

The site also gives tips on sustainability and energy cost savings.

So go on and get lost among the 146 DIY videos on subjects ranging from choosing paint to installing a pool.

Refacing Furniture

Refacing Furniture published on 2 Comments on Refacing Furniture

Hey kids! Here are more ways to save those pieces of furniture from the landfills. Plus, your friends will envy you for your kick-ass creations!

Idea #1: Plaster some vintage signs on that sh*t.

Idea #2: Old rulers and yard sticks! I’ve made frames and small pieces from rulers but never thought to do an entire surface. Pretty cool.

Idea #3: Laminate. Gorgeous laminate. I wouldn’t even know where to find stuff like that.

Idea #4: Got time on your hands? Bottle cap it.

Decorating Doors

Decorating Doors published on

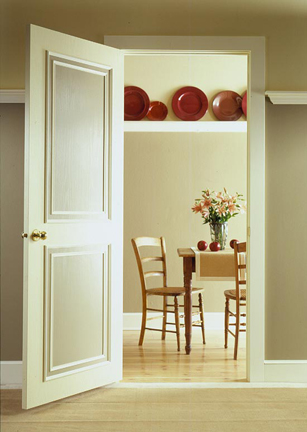
Got a bunch of plain doors you don’t really want to replace? Fancy them up instead of removing them. Start with a colorful paint and some antique hardware and go crazy with other techniques.

Ok, so the door above is actually a beautiful antique door to begin with but you can use chalkboard paint on any door. Mount an old frame or some molding around the chalkboard.

Create your own panel door. Do as many panels as you like. Whatever width of molding you want. Personally, I find mitering to perfection a bit difficult, but the good news is that there are ways to cheat.

This is a great fake-out. That door just has painted panels. No carpentry involved! Oh my, it doesn’t get any easier than that.

These panels were made from pre-cut artist stretchers that interlock. Miter schmiter.

Don’t forget that any of these techniques can be used on kitchen cabinet doors as well.

The Finish Line

The Finish Line published on

IMG_7983

The only time we’ve ever finished our renovations have been when we put a house on the market. Well, this time we’re not going anywhere but it’s probably a good idea to finish our own house before taking on the next project.

The thing is that we’ve lived in a construction zone in one house or another for the last 18 years so we are quite used to it. Plus, this place is so close to being done that we tend to forget there’s still work to do.

Nobody ever realllly finishes their renovations anyway, do they?

Here’s the punch list. I don’t have too much faith that we’ll get it done any time soon, but perhaps we can check off a few items.

1. Light fixtures. I keep buying them, but I don’t install them.

2. Paint basement steps.

3. Convert work room into dining room. Ugh. Now that I’m embarking on my first flip, the Reclaimed Home store is going out of business. I now have the task of liquidating my merchandise and crafts. Years of crap to sift through. Then I just move the table and chairs in, right? Nah, we want to take down a wall. Demo in an already finished room.

IMG_9293

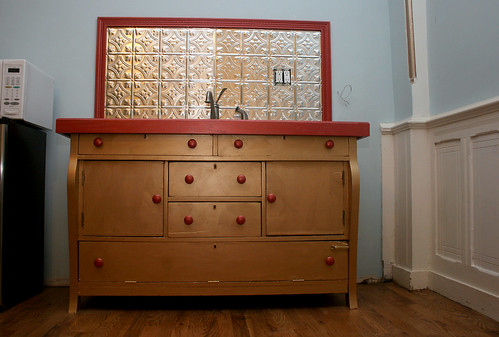
4. Get rid of pissy cabinet. It was nice while it lasted but we no longer need a sink downstairs. Plus, the cats are peeing on it.

5. Get rid of cats. Only kidding!

marble

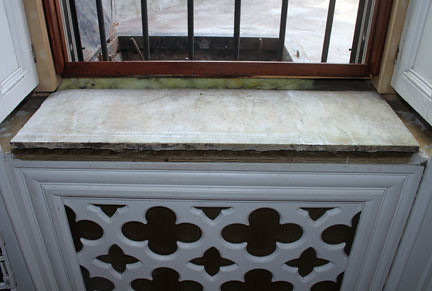
6. Molding for window sills. We did the marble and never finished it off.

7. Fireplace screen. It’s not fixed to the mantel and it needs painting. Currently being held up by a table I pulled out of someone’s trash. Classy.

garden bath door

8. Molding in bathroom. We finished that bathroom 5 years ago and still, no molding.

9. Redo stairs from garden to parlor level. Yeah, that’s a job for the stair guy.

10. That damn deck! Ha, it’s going to go another summer before we get to it.

Groovy Stairs

Groovy Stairs published on

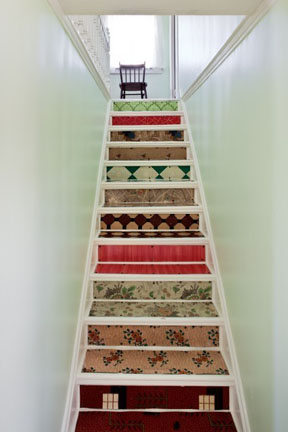
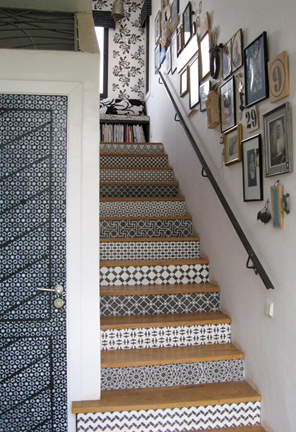
Howzabout some ideas to spice up those steps? These can be done without rebuilding your whole staircase.

Lovin’ the vintage linoleum stairs but it’s hard to come by real vintage lino these days.

Soda crates! Or choose any kind of crate you can get your hands on. Notice how they just inserted the reclaimed treads in the middle without messing with the bannister?

These are actually porcelain tile. They fooled me. I thought it was stained or faux painted wood. The Italian tiles are awesome but they may be pricey and hard to come by. Nothing wrong with using the real thing. Just sand and stain.

Oy. That seems like a ton of work. Not to worry. Cut the risers and stencil them on a table BEFORE installation. Still a ton of work but at least you won’t break you’re neck.

Primary Sidebar