Skip to content

Polyurethane Alternatives

Polyurethane Alternatives published on 2 Comments on Polyurethane Alternatives

 cat_01678.jpg

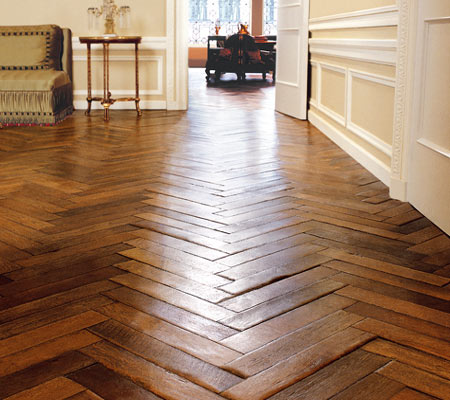
My antique oak floors aren’t in terrible shape (not my house above!) and they are not in high traffic areas, so they don’t need that hard shell of plastic covering them. I’m thinking of going with a poly alternative. Probably just a maintenance waxing will do the trick. But in researching waxes, I did come up with a few green heavier duty options.

These are better for the environment than polyurethane. Some of them do contain solvents and other nasty stuff, but they are more natural than poly.

Natural oils seep into the wood instead of sitting on top so the grain isn’t hidden. Have you ever seen an antique floor that has been refinished so it looks like laminate? Yuck!

Here are three poly alternatives to start:

1. Waterlox. This is a tung oil and resin mix. Pure tung oil wouldn’t hold up too well on a floor. On the plus side, there’s no need to sand the floor between coats and it’s possible to “patch” a worn area to blend in with the rest of the floor. This can also be tinted. Down side, for me anyway, is that even the satin finish is pretty glossy. Personally, I HATE gloss!

2. Bioshield Hard Oil. This is a low VOC product made up of linseed, tung and castor stand oils mixed with resin and some other funky stuff. It’s said to enhance the grain of the wood while being durable and water resistant.

3. Eco House Hardwood Floor Oil. Linseed, Chinese wood oil, citrus thinner and resin are the ingredients in this Canadian product. It has a honey tone and it is tintable.


Salvaged Crate Cabinets

Salvaged Crate Cabinets published on 5 Comments on Salvaged Crate Cabinets

 teacabs1.JPG

I caught this on Web Urbanist. Rupert Blanchard is my new hero. He’s been creating furniture out of reclaimed materials for some time now, but these upcycled crate cabinets are really to die for!

Now, before you get overly excited, the guy is in London. Lucky you if you’re a British reader. For those of us on this side of the pond, well, we’ll just have to copy and go DIY (sorry, Rupert).

teacabs3.JPG

teacabs2.JPG

10 Home Projects for the New Year

10 Home Projects for the New Year published on 2 Comments on 10 Home Projects for the New Year

photo.jpg

Make 2010 the year to get ‘er done! All of those little jobs you’ve been putting off around the house. Stop whining and just do it!

1. BEWARE THE FROZEN PIPES! Don’t let it happen to you. Have you turned off the main water supply to your garden hose? Are there any exterior pipes that need looking into? Are your interior pipes in a warm room or well insulated? Ya know, they do sell foam pipe insulation. Get friendly with that. You can also buy electric heating cord to wrap around pipes just in case the situation calls for it.

2. INSULATE! INSULATE! INSULATE! This is a frigid winter. What the hell are you waiting for? Your rooms may be well insulated (or not) but don’t forget crawl spaces in your attic and basement. If you can’t get to it, rent a machine and blow in insulation.

3. MIND THE GAP! Caulk is your friend. And that Great Stuff….ooh, that’s a keeper! Fill spaces around your windows, doors and molding. If you can’t feel the draft, you know the candle trick, right?

4. OUTLET INSULATION. Believe it or not, cold air can come through electrical outlets. You can buy outlet insulation pads at any hardware store. On a difficulty scale of 1-10, this is a zero.

5. PLASTER TOUCH UP. Ok, it’s not all about cold weather. You’ve been looking at those cracks in the ceiling all year? Get off your arse, chase them out and patch them up. The plaster fairy god mother ain’t coming to help out any time soon.

6. PAINT! Do as I say and not as I do. Once those plaster spots are finished, don’t leave them sit for another year. They are meant to be covered with paint.

7. YUCKY GROUT. They sell these things. They’re called grout brushes and some genius invented them. You can screw them onto a paint pole or mop handle. Use elbow grease and/or bleach and your grout should shine again. IMPORTANT! You’re not done yet! Seal the grout before use so it doesn’t soak up moisture and dirt by the next day.

8. DID I MENTION THAT CAULK IS YOUR FRIEND? How’s that caulk looking around your sink, bath and countertop? Yeah, I thought so. FYI, you can remove nasty old caulk with a heat gun.

9. GUTTERS. Oh screw it, it’s too cold to go up there now. You should’ve thought of that in the fall. Hopefully you did so when the snow and ice start to melt, your gutters aren’t clogged.

10. PESKY PLUMBING AND ELECTRICAL. Leaky faucet? A light fixture with one non-working bulb? Clogged drain? Loose outlet? Bet you have it in your power to do any of these. No more procrastination. 2010 is the year!

* The WTF photo above IS NOT of my house. It’s in a work place. Let’s see if the manager comes forth.

Categories

DIY Upcycled Door Radiator Covers

DIY Upcycled Door Radiator Covers published on 2 Comments on DIY Upcycled Door Radiator Covers

4106570947_3852fa119e.jpg

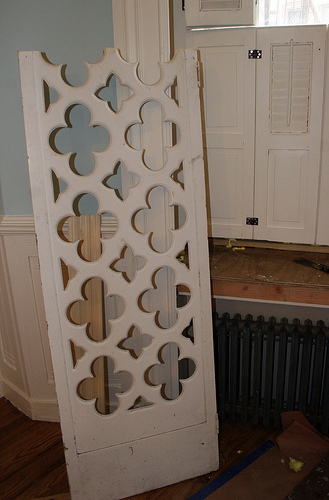
A thousand years ago we raided this Prospect Heights home for free reclaimed materials. The couple were about to embark on a massive renovation and posted their salvage on the Brownstoner forum. It was free for the taking, the only catch was that folks had to bring tools and remove everything themselves. Kind of like a demo party, only we had to be very careful.

4109917371_fc990699b7.jpg

We snatched up a bunch of goodies that we’ve used or I’ve resold. The two closet doors sat around for awhile. I thought of making tables out of them but then decided on radiator covers.

This was a pretty easy project because the radiators are set back, so we didn’t have to build sides.

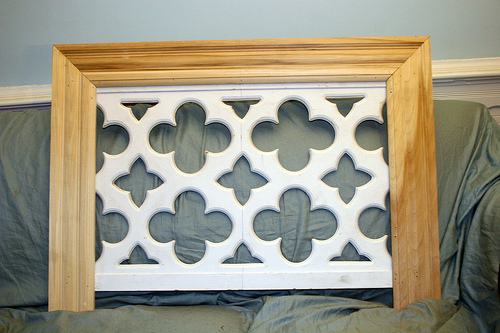
All you need to do for this front cover is build a picture frame without the bottom. If you have all of the necessary power tools, I probably don’t have to tell you how to do this. If not, you’ll need a miter, hand saw, staple gun, hammer and nails or screws and a drill, glue and a tin snips.

Measure twice cut once.  Measure twice cut once. Measure twice cut once. I can’t stress this enough.

4109918299_be766a4092.jpg

So you you miter the frame, glue before securing and add the decorative piece to the back.

4109916597_0c9d1f7f54.jpg

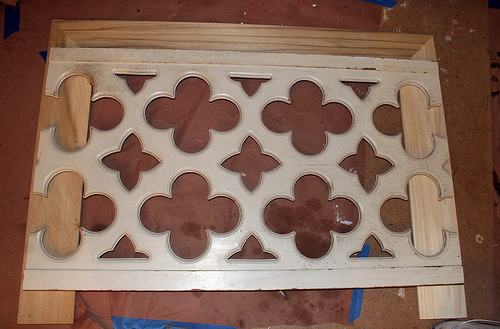
Here’s what it looks like from the back.

4106572155_9c9aebf223.jpg

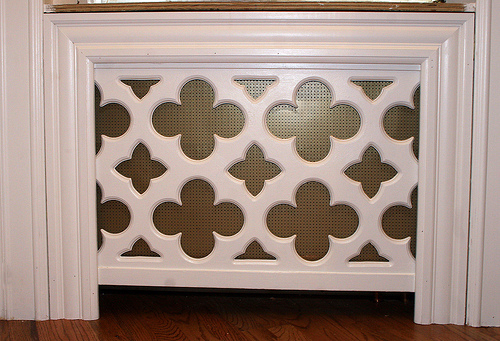
Voilà! Painted with the mesh backing. Now searching for salvaged marble slab for the window sill.

Our Mini Kitchen

Our Mini Kitchen published on 5 Comments on Our Mini Kitchen

 img_9289.jpg

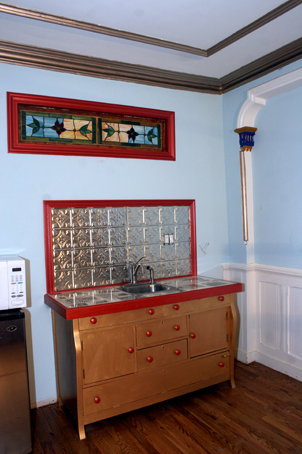
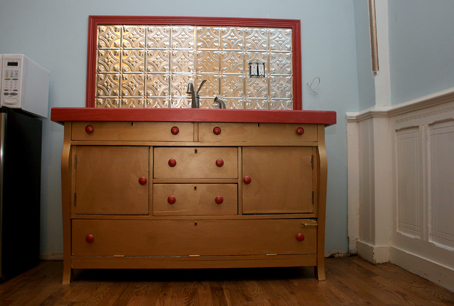
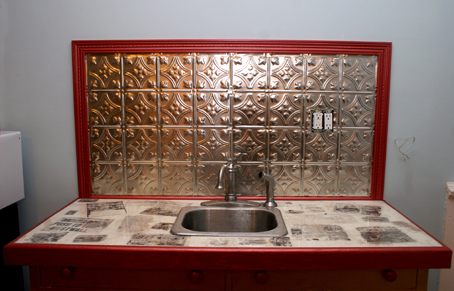
You saw the kitchen counter top a few weeks ago. Now the entire kitchenette is finished! Almost. Since we don’t live in Brooklyn full time and we don’t cook, there’s no need for a real kitchen. A microwave, toaster and electric kettle will suffice. Nope, not even those plug in burners. We have menus.

This cabinet, made from an antique sideboard, is pretty much the kitchen. We’ll probably build some shelves above the mini fridge and maybe try for more storage on each side, but what you’re looking at is the “work station”.

This is what took us about 3 years to complete (well, the whole apartment), but no more washing dishes in the bathroom sink! Weezy, we’re movin’ on up!

img_9293.jpg

img_9294.jpg

Brownstone’s Past in Resin Counter

Brownstone’s Past in Resin Counter published on 6 Comments on Brownstone’s Past in Resin Counter

 8done.jpg

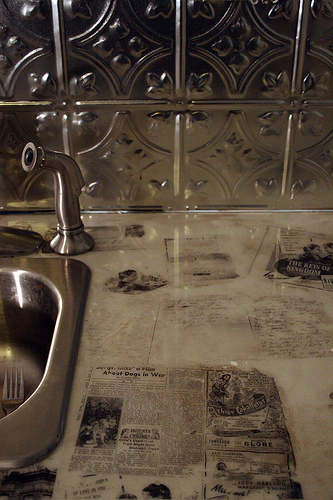
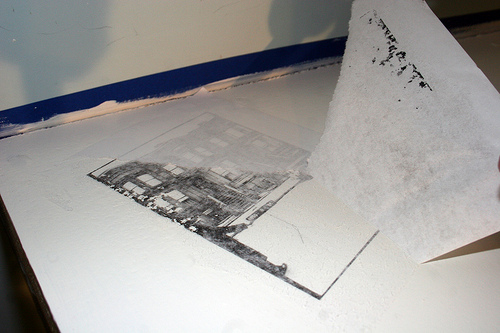
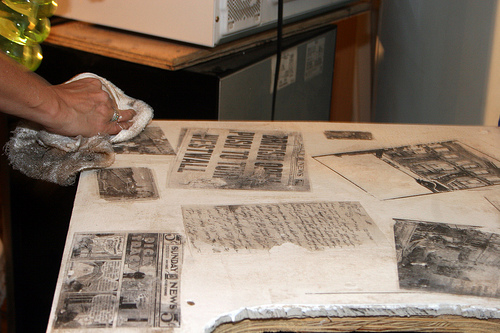
Ever since we found old love letters and newspapers in a cubby hole during demolition, I’ve been meaning to incorporate them back into the house so they can remain part of the history. Well, four years later, the kitchenette resin counter top is finally (almost) finished!

The idea was to use the original letters and newspapers, but Emilia, an expert on various processes, thought it might be too thick and cumbersome under the sealant, so she recommended the photo transfer process. Nothing about this process is particularly green. The only thing reclaimed here is the history.

Here’s a step by step of what was done:

1drill.jpg

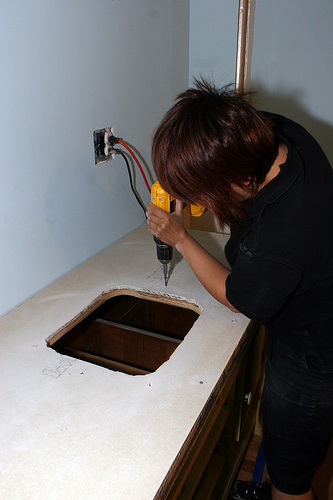
1. Emilia suggested we use a masonite board (There’s a name for this. Emilia?). It’s lightweight and waterproof with a smooth surface. Unlike wonderboard, it remains intact when screwed down.

2paint.jpg

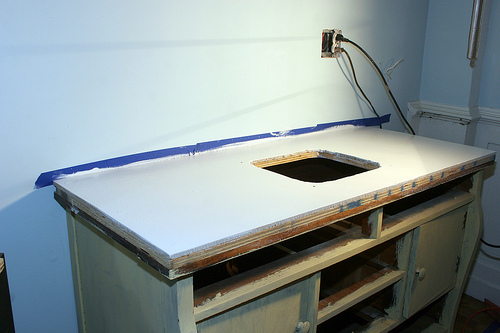
2. Primed and painted.

3images.jpg

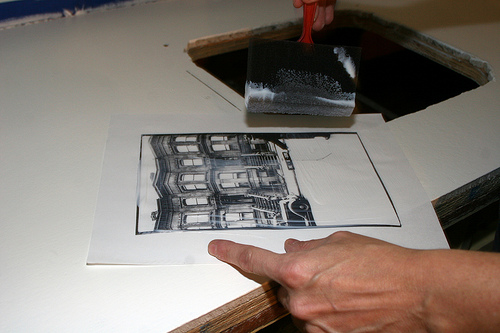
3. Print images on an inkjet or have copies made. It doesn’t matter if it’s toner or ink. One thing you should remember (which Emilia didn’t!) is that you need to print backwards if there is writing. The transfer is a mirror image.

4medium.jpg

4. Apply painter’s medium to counter and back and front of photo. Enough so that it’s well covered, but don’t overdo it. I tried Mod Podge on another project and although it worked, I don’t think it transferred as well as the medium.

5scraper.jpg

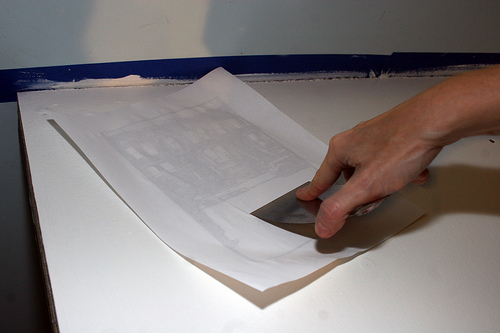
5. Use a scraper tool to spread the medium around once you place it face down on the countertop. Leave it for a about a minute.

6peel.jpg

6. Test a corner first to make sure it transferred. It doesn’t all peel off perfectly at once. There will be paper residue. Take a damp sponge or better still, your fingertip, and rub the spare paper away until smooth. Not too rough or you’ll take the image away!

7glaze.jpg

7. Optional: We glazed it with a metallic bronze to give it an aged look.

8. Let dry overnight before applying resin.

9 and beyond. About the resin, it’s a 2 part solution. You just have to make sure to mix it really well. Keep mixing if it’s taking a while to apply. You can pour it or brush it on. Make sure it’s thick enough. I ended up doing 2 coats. To deal with air bubbles, use a heat gun for a few seconds. It will take a few days for the resin to properly dry, so make sure you stay out of that room so as not to kick up dust or anything.

And that’s it. Our resin is so smooth. It looks like buttah!

Quick Fix Bed

Quick Fix Bed published on 5 Comments on Quick Fix Bed

 3053353393_afdf6a1145.jpg

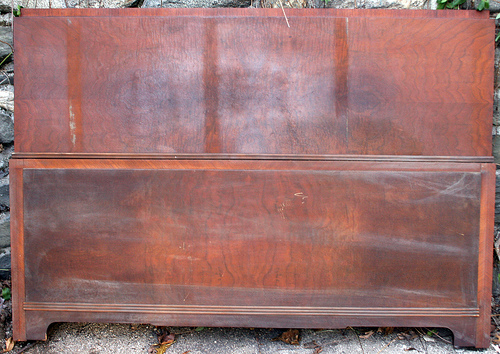
Before

We’ve been sleeping on a futon on the floor for about 2 years now in Brooklyn. Maybe it was ok to do that in college, but we’re in our 40’s. We also don’t have a dresser. We pile the clothes up in our unpainted DIY closet. Since we’ll be down there full time for about a month during the holidays, we’re trying to get the living conditions under control.

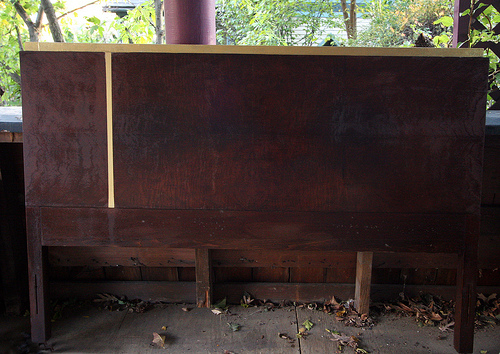
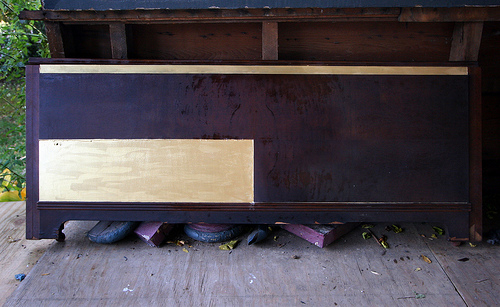
This means a real bed (or a real platform for the futon). The bed in the photos was purchased as part of a set. The other pieces were sold off, but nobody wanted this boring old thing. I had intended on sprucing it up, but since it sat in the damp garage for so long and got moldy and warped, I had no choice but to do refurbish it.

Instead of finding replacement veneer, I ripped off the damaged bits and painted them gold. The Howard’s Restore A Finish was still wet when I took the photos. I was thinking of embellishing the bed with photo transfers or stencil, but I kind of like simple, clean lines (ok, it has to be cleaned up).

What do you think? More to do or am I finished? I don’t know if I’m just being lazy or I like it this way.

4043657753_e1b0db7304.jpg

4043656615_c566996856.jpg

Categories

Never Too Early To Winterize

Never Too Early To Winterize published on 1 Comment on Never Too Early To Winterize

 frozen-pipetmp.jpg

Today is Blog Action Day and the theme is global warming. Perhaps I wrote a “Winterize Your Home” post in the past, but since I have no memory, I thought it would be fitting to share my tips.

It’s only October, but it feels like winter. Especially since we didn’t have much of a summer this year. Whether you’re a homeowner or renter, it’s always a good idea to be prepared for the cold weather. It will keep you warm and save you (or your landlord) money.

1. Take the friggin air conditioners out of the windows already! You folks are like those people who leave their Christmas decorations up until Easter. The window units create a draft.

2. Any other drafts? Well, what are you waiting for? Insulate! You can rent equipment to blow insulation into your walls and attic. Seal around window and molding gaps with Great Stuff or fiberglass. Just do it. It’s not a big deal. Totally a DIY job.

3. The plumbing! Turn off outdoor hoses and insulate cold basement pipes. Trust me, I know from experience. They will freeze and the pipes will burst. It’s not pretty. If you have a weekend place, turn off the water when you’re not there.

4. Check your boiler. Admittedly, I never do this. And admittedly, I’ve been stuck without heat for a day or two in the middle of winter.

5. Clean your gutters. I’ll let you wait until autumn is over for this one. But do it before the big freeze!

6. Stock up on eco-friendly salt. How many times have I run out of my pet safe salt only to run to the bodega and buy that toxic crap? Lots. Not this year. Ok, maybe just once.

7. Do you have storm windows? Granted, there may be a couple of sunny days left in store, but you can start getting them ready.

8. Program your thermostat. No need to have the heat at full blast when nobody is home. If you don’t have a 5-7 day programmable thermostat, this is the year to get one.

Wet Stoop in Front, Hole in Back

Wet Stoop in Front, Hole in Back published on 3 Comments on Wet Stoop in Front, Hole in Back

 3920879914_989eabecd8.jpg

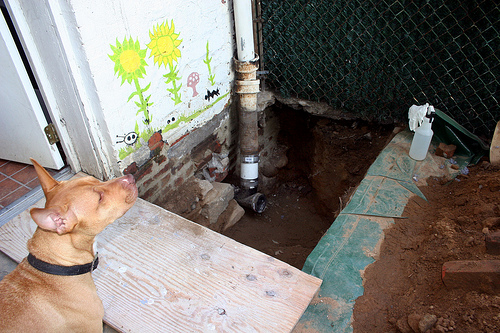
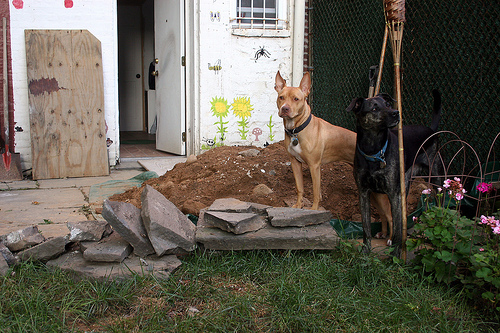
Guess the husband got bored with our half finished living room so he decided to start a new project. He and the next door neighbor are digging up our backyard and adding some drainage. At least that’s what I think he said. Why else would he have that huge hole back there?

3920880880_c9b8d1a0b6.jpg

Our basement doesn’t exactly flood, but it gets pretty wet. By changing the pitch away from the house and putting in some drains, the problem should be resolved. The water damage was already repaired on the interior of the house, so if we don’t deal with this soon, we’ll have done that work for nothing.

3920093925_41b570ee6a.jpg

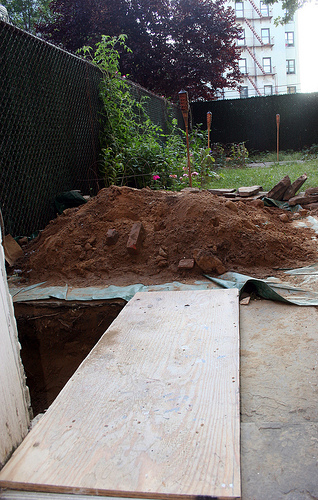
My husband thinks he’s Mr. Safety, but see that sheet of plywood? I put it there. He had the hole dug right near the back door, no covering and no warning given to anyone else in the house.

3920097113_1f34d38231.jpg

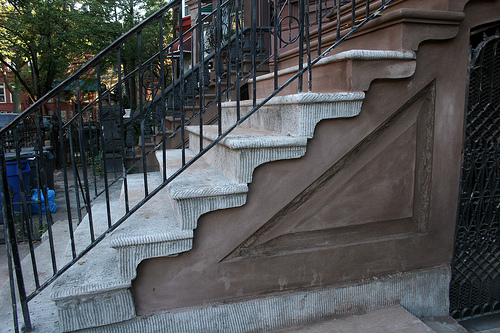
Remember our $10k stoop? Yeah, still working on it. The guy is doing a nice job, but he’s taking his sweet time. Granted, we had to wait a few weeks for the cement to set. Granted, it was a crazy, rainy summer. But there were plenty of days he could’ve showed up that he didn’t. Typical contractor, focusing on getting the jobs but not pleasing his clients.

The other night when we got home, there was a wooden stick blocking the steps. We use the garden gate, so no biggie for us, but there was no warning for the tenants. Why not do every other step or half the step so they can go in and out?

Well, we’re used to living like this. I just hope the tenants had no intentions of hanging out on the stoop or barbequing in the back for the remaining days of summer.

Is My Husband Building A Bomb?

Is My Husband Building A Bomb? published on 5 Comments on Is My Husband Building A Bomb?

3894679392_c8eea794d1.jpg

He says it’s a zoned heating system. He’s been potchkerring around down in the basement for months now. I don’t know from plumbing, so I have no clue what’s going on. If he’s trying to kill me and collect insurance money from the house burning down, a bomb would be the way to go. Right?

Well, let’s say I’m just being paranoid. So, here’s what we’ve got….Beacon house. Six zones on a 3 BR, 2600 square foot house. Overkill? Our bills are $250 per month. We only use half the house and the rest is for “guests” whom we never invite over. Call it trying to save money. Call it saving the planet, but it’s silly to heat rooms that don’t see use.

Materials cost us $1000 to date and that doesn’t include the 6 thermostats we’ll need or the hours of labor. I can’t wait to see if there’s a difference in our bills.

Has anybody done this before? I’m curious to know what plumbers charge.

3893889611_895bb4076b.jpg

3894680390_29f00cf9c4.jpg

Categories

Do You….Caulk?

Do You….Caulk? published on 3 Comments on Do You….Caulk?

 3874925383_3cc0fb080d.jpg

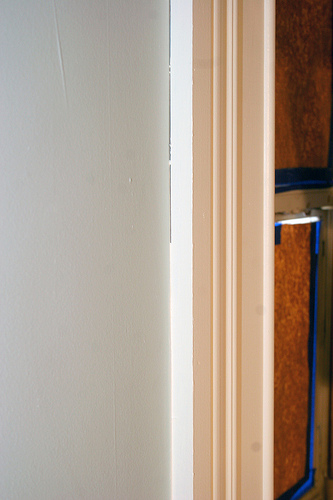
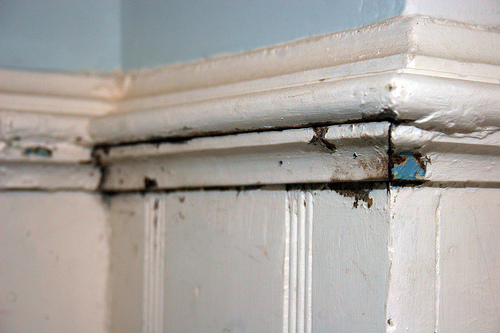
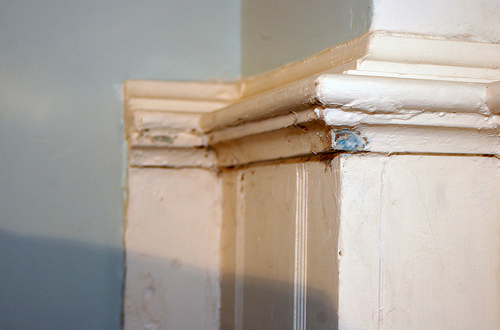
Top half of trim, untouched. Bottom, caulked.

Picture this: You’re all finished with a major renovation….demo, wiring, plumbing, plastering, blah, blah, blah. You’ve done a meticulous paint job and now you’re ready to kick back, pop a beer and relax. But you’re not finished, are you?

I know. I’ve been there. I get lazy and quit mid job. But you’ve gotta find the energy to caulk! It really makes a difference, as seen in these before and after photos below. No, you won’t do it months from now. Just do it and get it over with.

Now, I know I don’t have to do a DIY instructive on how to caulk.

Do I?

Oy.

Ok.

1. Buy the right color and type. There’s caulk for molding, tubs,doors, windows. Don’t be cheap. Get a good brand. No, the color won’t match your paint exactly. That’s why you buy paintable.

2. Remove any dirt in the area.

3. Cut the tip on a slight angle with a blade. Not a huge hole. Not so small that it won’t come out. Like you can fit a baby pea through the whole, but not a big pea.

4. Oh, tools you need to have….a caulk gun. You knew that already, though.

5. Um, have some water, sponge and paper towels handy too.

6. Ok, so hold the caulk gun at a 45% angle and apply pressure while you’re moving it along. It may come out in spurts and that’s ok. They call this “beading”.

7. After you do your “beads”, go back and smooth it out with your finger or a sponge. They actually make tools for this so you don’t have to use your finger.

8. The paper towels are to clean up your mess.

9. The caulk will shrink, but you don’t want to apply it too goopy. Less is more. You can always go back and hit it a second time.

10. Don’t fear the caulk. It’s the easiest thing in the world. You oughta be ashamed that you’re even reading this.

3875710820_56fc52f527.jpg

Before

3874922401_a3d415a24c.jpg

After. Unpainted, obviously.

3874918029_feffbd0cc6.jpg

Before

3874918843_6939cd844a.jpg

And after.

3874919579_95314f3f8a.jpg

And before.

3875709676_75281fdc9c.jpg

After. The end.

Categories

Local Produce From Brooklyn

Local Produce From Brooklyn published on 3 Comments on Local Produce From Brooklyn

 3826903579_c5af20033a.jpg

We have a vegetable garden in the backyard of our Bed Stuy brownstone. Tomatoes, peppers, basil. We’ve never planted a thing in our lives and we don’t cook. But here’s a DIY to vegetable gardening.

1. Get tenants with an interest in gardening.

2. Share backyard with said tenants.

3. Tell them you’re too busy renovating the interior of the house (not a lie) so the backyard is their baby.

4.  Skip town while the work is being done.

5. Try to keep the dogs from eating and shitting on the veggies.

6. Reap what they sow.

City Tech DIY Classes

City Tech DIY Classes published on 3 Comments on City Tech DIY Classes

 citytech.jpg

Here ya go! A schedule-slash-description of The City Tech Continuing Ed courses in Brooklyn.

Urban Energy: Incentives for Solar, Wind and Energy$mart Savings

Saturday, October 24
1:00 pm to 5:00 pm
A Free Community Program
HHT 081

How can you benefit by switching to renewable energy? Financial Incentives are available for solar electric or photovoltaic systems and a new tax credit is available for small wind turbines. Choose 100% wind power through your utility and save on taxes, green your roof or make your Home Energy $mart. The Solar Coordinator from the Center for Sustainable Energy at Bronx Community College, as well as key players in our city’s energy future will show you how to calculate the costs and benefits for using clean energy. You can gain incentives by making your home energy efficient.

Trea Case, Director Center for Sustainable Energy

NYSERDA’s Green Job Training Program
Did you know The New York State Energy Authority (NYSERDA) will reimburse tuition fees when you complete a certificate as a Home Energy Auditor, Building Performance Inspector, or Energy Envelope Inspector? Learn how to gain credentials and grow your career for the green economy.

Lecturers:

Tate Ryder, Senior Project Manager for Renewable Energy NYC Economic Development Corporation
Green NYC by 2030:
How the City will reach 30% reduction in carbon emissions by 2030

Wendy Fleischer, Pratt Center for Sustainability
Energy $mart Savings:
The NY Energy Star Multifamily Performance Program improves a building’s and reduces energy costs

David Seiter, Future Green
Green Roof Tax Abatement
Property Tax Abatements for installing a Green Roof

Con Edison Community Energy Program
Buying Green Wind Power: Elimination of Sales Tax

Rob Ashmore  Aeon Solar, NYSERDA Certified Solar Installer
Cash Incentives for Solar Installations
New York State Energy Research and Development Authority (NYSERDA) that provides cash incentives for the installation of new Solar Electric or Photovoltaic (PV) systems by Eligible Installers.

Debra Salomon, Green Educator
Urban Turbines and Solar Cities
91 Lumi Solair  solar/wind powered streetlights are being installed in the Brooklyn Navy Yard. Estimated savings?  $600,000 in installation costs and $11,000 per year in electricity costs. Now that’s Green!

Hands-On Home Repair Workshops
Everything You Wanted To Know About Your Home (But Were Afraid to Ask)

Weds, 6:30 to 9:30 pm
$40 for each class, 3 classes for $105
HHT 078

These hands-on workshops teach you how to make basic home repairs and avoid calling in a professional plumber, electrician, carpenter or painter. We’ll show you how to repair a leaking toilet and patch and plaster a wall. Learn the basics of residential electricity and how to install a light fixture. Install a lock, cut a molding, unclog a trap, spackle a wall and become your own favorite handyperson.

Classes and dates as follows:

Homeowner’s Basic Tool Kit
Replace a lock, hang a cabinet, cut a board, level a shelf, install an anchor bolt in a hollow wall: This class introduces you to common household repairs and shows you which tool will get the job done. Discover your inner handyperson and save on home repairs!
October 14

Homeowner’s Guide to Basic Plumbing
Basic plumbing:  How to fix a toilet, bleed a radiator, unclog a drain
October 21

Home-Green- Home: Improving Your Home’s Indoor Air Quality
Is your home making you sick?  Breathe free and by using green cleaning products, no VOC paint and plywood, and removing your shoes. Studies show that asthma rates dramatically decrease when indoor air quality improves. Good Health? It starts at home.
October 28

Plumbing Fixtures that Fit (Your Style and Budget and Pipes)
Before you update your kitchen, move your toilet, or select a shower-spa
You should speak to a plumber and a designer. Here’s your chance.
November 4

Plaster and Sheetrock Repair
Repair drywall, frame and tape, patch plaster, repair plaster moldings.
November 11

Everyday Electricity You Can Do Yourself
How to replace a fuse, change an outlet, install a fixture, test
for power and splice a wire.
November 18

Hands-On Home Décor : Let There Be Lights—in every room
How to select and install the correct light fixture for bedrooms,
kitchens, living rooms and offices.
December 2

Installing Ceramic Tile for Floors and Walls
How to create a level surface; select  floor tile, design a
backsplash, and install like a pro.
December 9

Get in the Tongue and Groove
How to repair old floors and install new wood or floating floors.
See a range of flooring materials from wide plank to bamboo.
December 16

Home Design Toolkits

The  Art of Home Décor
Wednesday, January 6 -27
6:30 to 9:30pm
12 hours $150
HHT 070

Add beauty, drama and focus  to your home. Showcase your skills and explore your creative spirit. Dress a window, hang a picture select a palette or choose an accent piece. NYC designers show you how!

Home Staging for Homeowners
Wednesday, 6:00 – 9 p.m. February 3
3 hours $40
REX 081

Home staging uses professional design techniques to increase a home’s appeal to its potential buyers. This lecture/lab gives hands on instruction. Have a property you want to sell? Could it use some quick design tips? Bring a picture and leave with practical, affordable ways to increase sales. Rise above the competition and get your listings sold.

Home Staging for Real Estate Professionals
Wed February 10, 6:30 – 9:30 p.m.
3 hours $40
REX 080

Home Staging is a proven and time-tested method to help you market and sell your client’s home. In today’s economy, realtors can rise above the competition and get their listings sold. Making simple changes, removing clutter and depersonalizing the home allows the potential buyer to visualize the space and imagine living there. Invest in your future and prepare to become an Accredited Staging Professional.
Real Estate Continuing Education Credits are available.

Register with City Tech or call 718 552 1170
Painted Medallions

Painted Medallions published on 5 Comments on Painted Medallions

 3796246076_0f0cb63b5d.jpg

Tip #45 (I just made that up) on dressing up a house: Colorize your details! A bit of color can go a long way in showcasing your architectural features.

Case in point: The Medallions. If you have a white medallion on a white ceiling, shame on you! Trick that beeatch out! Make her shine!

My new favorite thing for detail is metallic paint. Not only did I do the latest medallion in blue and gold metallic, I’m using a warm silver for the plaster crown molding. Brownstone Bling, Baby!

A few things you should know before you start:

1. Ugh, it’s a real pain in the arse to stand on a ladder and work up on the ceiling. It can take 2 full days to a week for fine details.

2. Which means, if you’re buying a new medallion, by all means….work on it BEFORE installation!

3. Back to old medallions, be sure to strip away multiple layers of paint if it’s covering grooves. Spread a thick layer of Peel Away, cover with plastic and leave overnight. You may have to do this twice.

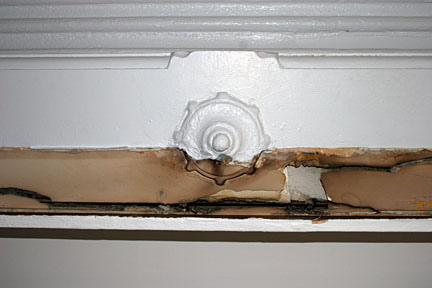
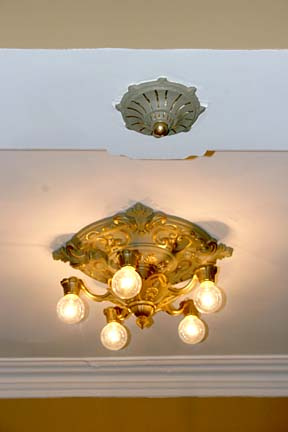
3a. See the photo below of the little detail we found in the wall. You can’t really see the beauty of it with all that paint. The medallion above the light fixture in the “after” shot is a reproduction.

4. Spray paint makes life a lot easier, but keep in mind that it’s not easy to paint over, so you’ll need at least two coats to top it. On the blue and gold, I sprayed the gold and hand painted the blue, but I had to go over both about 3 times.

3795425435_5f2437199d.jpg

297752334_ad900666fe.jpg

297758807_cb01f074b8.jpg

Primary Sidebar