
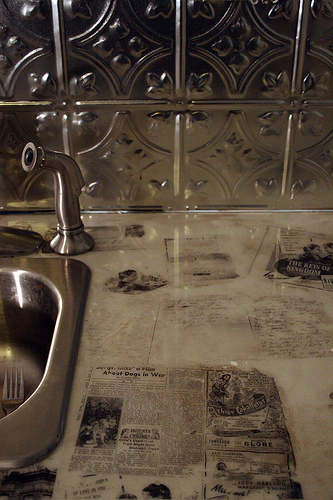
Ever since we found old love letters and newspapers in a cubby hole during demolition, I’ve been meaning to incorporate them back into the house so they can remain part of the history. Well, four years later, the kitchenette resin counter top is finally (almost) finished!
The idea was to use the original letters and newspapers, but Emilia, an expert on various processes, thought it might be too thick and cumbersome under the sealant, so she recommended the photo transfer process. Nothing about this process is particularly green. The only thing reclaimed here is the history.
Here’s a step by step of what was done:
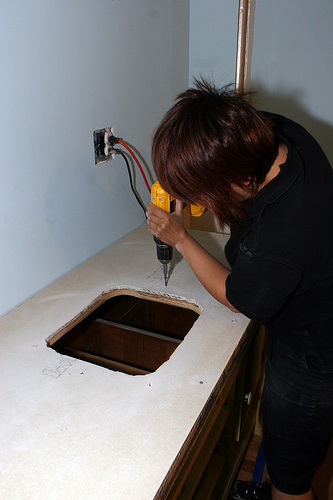
1. Emilia suggested we use a masonite board (There’s a name for this. Emilia?). It’s lightweight and waterproof with a smooth surface. Unlike wonderboard, it remains intact when screwed down.

2. Primed and painted.
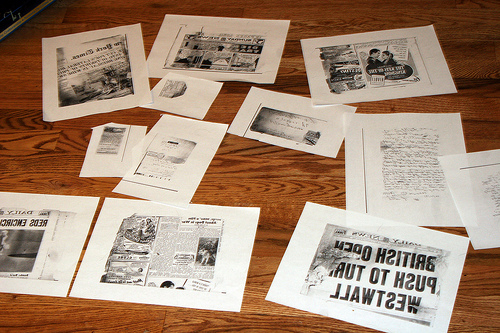
3. Print images on an inkjet or have copies made. It doesn’t matter if it’s toner or ink. One thing you should remember (which Emilia didn’t!) is that you need to print backwards if there is writing. The transfer is a mirror image.
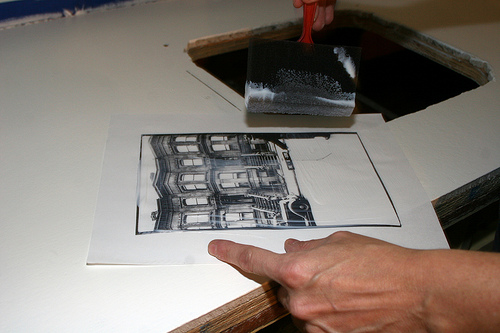
4. Apply painter’s medium to counter and back and front of photo. Enough so that it’s well covered, but don’t overdo it. I tried Mod Podge on another project and although it worked, I don’t think it transferred as well as the medium.
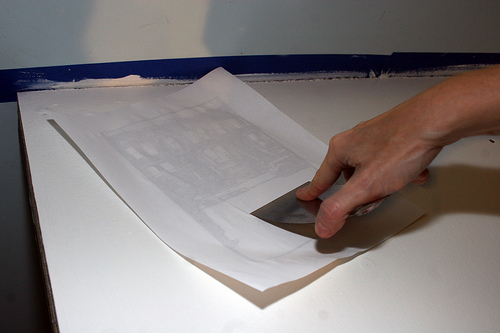
5. Use a scraper tool to spread the medium around once you place it face down on the countertop. Leave it for a about a minute.
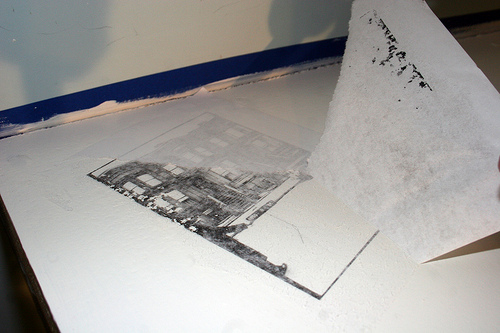
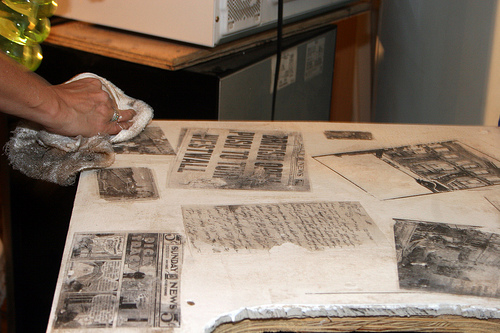
6. Test a corner first to make sure it transferred. It doesn’t all peel off perfectly at once. There will be paper residue. Take a damp sponge or better still, your fingertip, and rub the spare paper away until smooth. Not too rough or you’ll take the image away!
7. Optional: We glazed it with a metallic bronze to give it an aged look.
8. Let dry overnight before applying resin.
9 and beyond. About the resin, it’s a 2 part solution. You just have to make sure to mix it really well. Keep mixing if it’s taking a while to apply. You can pour it or brush it on. Make sure it’s thick enough. I ended up doing 2 coats. To deal with air bubbles, use a heat gun for a few seconds. It will take a few days for the resin to properly dry, so make sure you stay out of that room so as not to kick up dust or anything.
And that’s it. Our resin is so smooth. It looks like buttah!
6 Comments
Hey looks so cool , do you have a bigger pic of the counter?
Click on the images. They link to the flickr page. You can see them as big as you want.
Wow…that counter is really beautiful! Nice work.
[…] meanwhile, as you can see from the stolen pic above, it seems there are people who actually manage something in the way of house-keeping beyond switching the occasional […]
[…] saw the kitchen counter top a few weeks ago. Now the entire kitchenette is finished! Almost. Since we don’t live in […]
cool project, and I like the end result!