Skip to content

Virtual Faucet Creator

Virtual Faucet Creator published on 1 Comment on Virtual Faucet Creator

faucet.jpg

Create your dream faucet! California Faucets offers online design software that allows customers to choose any handle, spout and finish they desire. You can start from scratch or modify an existing faucet.

Once finished, you print it out and bring it to a dealer, where they order your custom design. It would be even better if you can just shoot it off to them via the internet.

I don’t need a faucet at the moment but I want to do it just for the heck of it.

Via Materialicious

Zero VOC Paint at Home Depot?

Zero VOC Paint at Home Depot? published on 4 Comments on Zero VOC Paint at Home Depot?

bgproduct.jpg

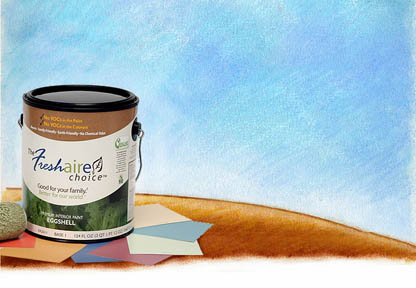
You know the green building movement has taken off when Home Depot starts selling no VOC paints. Fresh Aire Choice is the latest zero VOC paint to hit the market and it’s being sold exclusively through that orange big box store.

Now I don’t know my paint science, but the company claims that chemicals are put back into other paints once the color is added. Fresh Aire technology uses a pre-measured ColorFresh™ colorant pouch which dissolves into the paint base without expelling any chemical odor.

The paint comes in 65 colors and is Green Guard certified.

Via Leed Pro

Local Reclaimed Lumber

Local Reclaimed Lumber published on 2 Comments on Local Reclaimed Lumber

planks.jpg

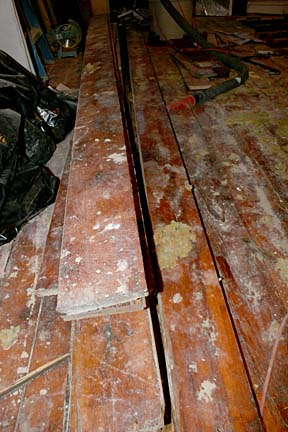
It’s not like there’s a reclaimed building material megastore store in every neighborhood. Using second hand lumber is a labor of love. The day we launched we did a post on reclaimed flooring resources, but it was internet based. Since then, we’ve been trying to find local…and less expensive….wood.

Craigslist has been the best resource. If you go this route, you really need to start thinking about your project months in advance and check the postings religiously. The listings exist, from someone who ordered too much flooring to someone taking up a subfloor to someone tearing down an entire house. You should be able to transport the material at the drop of a hat and be willing drive to CT and NJ. It can be a full time job.

M. Fine Lumber is located right here in Brooklyn. They are not some new fancy pants green building supply company. They’ve been in business since the 1930’s and carry all sorts of recycled wood.

Build It Green in Queens is a re-use store. You would have to be extremely lucky to find 500 sq ft of wide plank flooring here. But keep in mind that wood studs and molding don’t grow on trees and yet they can be found here. As well as used electric boxes, cabinets, etc. (Editor’s note: Ok, I know that studs and molding ARE trees. Poetic license.)

The Old Barwood Site is for serious builders. These are whole barns up for sale. National listings but there are a few in upstate NY and PA. If you’re working on a huge project with a contractor, perhaps you can talk the contractor into it. Too much to take on for a simple DIY job.

DIY: Polishing Brass

DIY: Polishing Brass published on 1 Comment on DIY: Polishing Brass

before.jpg

Before

after.jpg

After

Oh, you’re probably thinking “That’s easy. Why would I need brass cleaning tips?” Well, let me tell you, Sweetie, it’s not as easy as you think. I’ve been working on some tarnished antique light fixtures and I found out that it’s not a 5 minute job.

I think I’ve got a good system now, but I learned by trial and error.

Two things to consider before you even start:

1. Is it really brass? A magnet will NOT stick to brass. If it’s only brass plated, tread lightly.

2. Does it have a coat of lacquer on it? If so, you’ll have to remove that before polishing. Soak the piece in warm, soapy water first to determine whether or not it’s sealed. If the tarnish doesn’t wipe away, it’s coated. You can try to soak it in hot water or boil it if it’s small enough, but you may need lacquer thinner to remove it.

Ok, so now you’re ready to begin. This is for completely tarnished pieces. If it’s just alittle dull, by all means, skip the first few steps and just polish it.

Soak the item in warm soapy water for about a half hour. Gently “scrub” away the black with the rough end of a sponge or 000/0000 steel wool. I said gently!

You’ll need gallons and gallons of vinegar if you have large pieces. I used the slop sink for my fixtures. Make a solution of 3/1 vinegar/water. Add some salt. Maybe a pinch of lemon. And even some dish soap. I throw it all in there because, hey, ya never know. But it’s really the vinegar that does the trick. Soak for oh, another half hour. Again, gently “scrub”. Alternatively, you can add flour and make a paste.

After this step, your piece is probably bright pink. Not what you had in mind? Don’t freak out. Now clean with Brasso, Never Dull or Wright’s Brass Polish. That will get the pink out. Now the problem is getting rid of that nasty polish. Soak yet again in soapy water or wipe away with boiled linseed oil.

Brass tarnishes when exposed to air, so it should be re-coated when you’re finished.

Some other tips people swear by:

Ketchup. Yes, it works! But that ketchup smell will linger forever!!

Apply a verrry thick coat of Brasso so it doesn’t dry out. Leave on for 30 minutes.

Sulfuric and Hydrochloric acid. Never tried it, it seems pretty harsh.

Kool Aid. I have no idea why.

Wednesday Linkorama

Wednesday Linkorama published on 1 Comment on Wednesday Linkorama

coneyisland.jpg

Get your kids involved with your DIY projects! Why shouldn’t they help out? Playhouse Design Competition For Kids over at Choochicoos. Deadline April 25th.

Things you should know about wetlands on your property. Living Well in Westchester talks about building additions while protecting the natural habitat.

You MUST watch this video on Materialicious. It’s about 5 minutes long and will make you all teary eyed. Dan Phillips built his home out of 85% recycled material and helps others realize the dream of home ownership. All they need is a credit history and a job. Could be minimum wage. They must help build their own recycled home, but experience is not mandatory. This is in Texas, of all places.

Here’s another cool video, this one from Brownstoner. Coney Island in the 40’s. My parents would take me here when I was a kid in the 60’s and this video put a smile on my face. Some of these things still existed in the 70’s. Unless my warped mind is remembering something completely different. Laughing Lady/Fun House? Was that Coney Island?

The Brooklyn Blogfest is May 8th at the Brooklyn Lyceum! Mark your calendars. So you can remind me to go. Non-bloggers are welcome also. Only The Blog Knows Brooklyn will keep us posted as the plans progress. Last year’s Blogfest was sponsored by Partida Tequila and there were margaritas galore. They’ve yet to find a sponsor for 2008. Hello Stoli?

The Kitchen Designer posts her top 10 secrets of lighting design. “Lighting is jewelry.” Yes! I totally agree. But you can live without jewelry. You can’t live without lights. Unless your own of them kooks who doesn’t like modern conveniences.

Antique Lighting Supplies

Antique Lighting Supplies published on 1 Comment on Antique Lighting Supplies

light.jpg

Of all my antique addictions, light fixtures hit me the hardest. They are small and easy to carry and I can work on them in any room in my house. So, I keep buying them and then they sit around getting even more tarnished than they were when I purchased them.

I’m starting to work on a few fixtures now. Of course the “bargains” are always missing pieces. Stuff you can’t find at Home Depot. Finding replacement parts for vintage items would be insanely difficult without the internet.

Below is a list of suppliers. Prices and items may vary only a bit, but you have to hit every option if you’re looking for a unique piece. Always good to take measurements and snap a photo to email. They know their inventory better than you and it will shave hours off of your search.

Happy hunting!

Antique Lamp Supply
My Lamp Parts
Antique Hardware
Paxton Hardware
House of Antique Hardware
Old House Lights
Antique Lamp Company
The Bulb Collector

Learn To DIY

Learn To DIY published on 3 Comments on Learn To DIY

schools.jpg

I think I know everything. But between you and I, I don’t. Here are some DIY courses offered in and around NYC. Not just home improvements, but fun, creative stuff as well!

Learn to upholster at Furniture Joint. Downtown, NYC. The whole reason behind this post. I keep buying “bargain” antiques that need reupholstering. No longer a bargain after bringing it to a pro. I MUST learn to do it myself or stop the purchasing addiction.

Venetian Plaster classes from Stuccolustre in Yonkers. I wish someone could just teach me the art of taping a joint. Plaster and skimcoat? That would be a dream. Would the Venetian Plaster technique cover all my flaws?

The art of blacksmithing in Florida, NY. Offered by The Center for Metal Arts. I just want to be able to say “Oh yeah, I’m a blacksmith.” This could actually come in handy to repair those rowhouse gates. A little iron working skills never hurt anyone.

Yestermorrow is a serious design/build school located in Vermont. Courses for the homeowner wanting to gain some knowledge and for professionals looking to build on their skills.

I came across this video series from Marc Adams School of Woodworking. For those who don’t have the time for scheduled classes.

None of these classes are inexpensive, but when you consider how much you’re saving in the long run by doing it yourself, it looks like a pretty good option.

Categories

Sound Proofing Existing Walls

Sound Proofing Existing Walls published on 4 Comments on Sound Proofing Existing Walls

wall3.jpg

Plain sheetrock

wall.jpg

Living Room detail

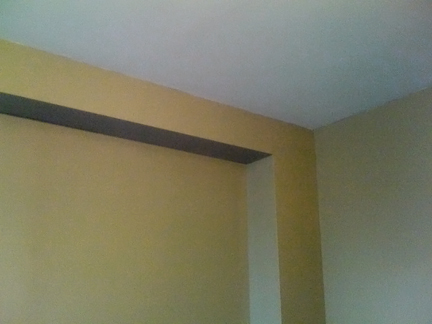
We screwed up. We built out an interior wall to hide plumbing and didn’t insulate for sound proofing. D’oh! So now we’re trying to come up with ingenious ways to control noise without ripping out the area in question.

There are a few solutions:

1. Build the wall out more. Use a drywall such as Quiet Rock or insulate and use regular sheetrock. Since we’re terrible at taping, we don’t like this option.

2. Blow in insulation. This isn’t feasible for us as there isn’t enough space between the pipes and the wall.

3. Cover with cork or fabric. Homasote offers both options as well as other sound proof wall materials.

4. Use a paint such as Acousti-Coat, a water based latex formulated with hollow ceramic microspheres, sound absorbing fillers and resins.

5. Build the wall out with ornate plaster (or fake plaster) detail. The most complicated of all options. And guess what? This is probably what we’ll do. Why? The house has alot of period detail which we’ve tried to match on rooms that needed gutting. Our oversight was a blessing. We now have an excuse to take straight edge drywall and make it look fabulous. We may need to use something behind the molding for soundproofing, but hey, it saves us from taping!

6. Put it off until we no longer notice it. Actually, this is our most likely scenario.

Sound Proof Foam

**PS: Sorry about the horrible iphone photos. Didn’t have my camera on me.


DIY: More Wood Stripping Tips

DIY: More Wood Stripping Tips published on

spr1.jpg

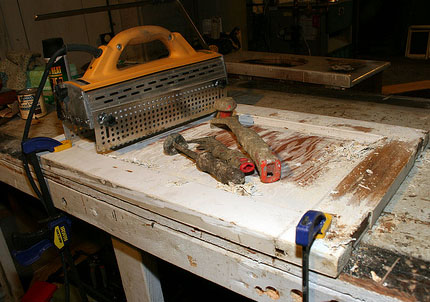
This is a follow up to last week’s wood stripping post. One reader is having a hard time with the SPR and asked for some tips. As I responded in the comments, it’s not perfect, but it is, IMHO, the fastest thing out there.

The reader commented that their SPR only heats up the middle section. I thought it may be possible that this is a faulty unit or the power source isn’t strong enough. The SPR should be used on a 20 amp circuit with a heavy duty extension cord. Anything less may cause the tool to work inefficiently or trip your circuit breaker.Continue reading DIY: More Wood Stripping Tips

The Design*Sponge DIY Contest

The Design*Sponge DIY Contest published on

diy-icon.jpg

Design*Sponge will be giving away $1500 in prizes for their 2008 DIY contest. Submissions will be accepted until March 2nd, so get your sh*t together!

The contest is sponsored by 2Modern.com, Sparkability , Growmodern and Ready Made.

Your project can be anything that you’ve created yourself for the home, including furniture, decoration, tableware, fixtures, etc.

Prizes are as follows:

*1st place: $500 gift certificate to 2Modern and a check for $150
*2nd place: Check for $450
*3rd place: Check for $300
*Honorable Mention: Check for $100

Polls open to voting on Wednesday, March 5th and they’ll be accepting votes through Sunday, March 9th. Winners announced on that Monday.

See guidelines here.

Good luck!!

Stripping Paint: Heat Gun,SPR or Chemicals?

Stripping Paint: Heat Gun,SPR or Chemicals? published on 3 Comments on Stripping Paint: Heat Gun,SPR or Chemicals?

paintremovers.jpg

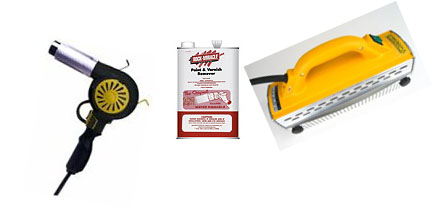
Answer: Paint stripping usually requires all of the above. The Silent Paint Remover to finish large areas, the heat gun for detail the and chemicals to clean it up.

But let’s take a closer look. Shall we?

See my original Silent Paint Remover (aka Infrared Paint Remover) post here. I’ve only used it on wood, but the company says it can be used on metal, marble, plaster and concrete. BUT, you should do a test on the area first. The SPR cuts the stripping time in half. Maybe even more. It goes through all of the layers in one shot and doesn’t take too much time before the paint starts to bubble. The tool is a bit cumbersome and too large for corners or small areas.

Which is why you’ll need a heat gun. Same process. You’re heating the paint until it bubbles and lifts off the surface. Scrape away and viola! So why can’t you do the entire job with a heat gun? It is SLOW! Takes much longer to heat than the SPR and covers a smaller area.

It’s possible to get away without using chemicals, but there’s nothing like that toxic stuff to clean it up. Rock Miracle is my harsh chemical of choice. Nothing green about this! On the other hand, since it works best, you’ll be using alot less of it than gentle strippers. Tip for stripping a flat surface such as a door: If you don’t own a heating tool, put a very thick coat of Rock Miracle on the horizontal surface and let sit for about 4 hours. Must be horizontal and must be thick or it will dry out. This will take off all layers. Ordinarily, you apply a thinner coat and let it sit for about 20 minutes and that only gets off a layer at a time.

Peel Away comes in several “flavors”. I use this for plaster as it’s gentle enough. I find it best to cover overnight. It will take off several layers at a time.

You must always neutralize after using chemicals or the paint/poly will peel. What you use will depend on the surface you’re working on. Chemicals are much messier than heating tools. And no matter what, don’t forget to clean up well and dispose of the lead paint properly.

The tools are a great expense up front. The SPR is about $400. However, it’s worth it if you’re going to be doing alot of stripping. I can’t tell you how much I spent on chemicals before discovering the SPR.

And don’t forget….SAFETY, SAFETY, SAFETY!

Your Restoration, Your Health

Your Restoration, Your Health published on

peelaway.jpg

I see inquiries about lead testing all the time and I kind of don’t get it. FACT: If your home was built prior to 1978, they used lead paint. Period. End of story.

Well, let me backtrack here. If your home was gut renovated since the late 70’s, good for you. No lead. If it was properly restored, the lead is probably all but gone. I can assure anyone that our Bed Stuy home, which still has most of the original detail intact, is lead free. We stripped all of the wood and even chipped away at most of the paint on the walls before skimcoating.

But if you’re one of these old home psychos lacking in funds, (like us) you’re not buying a newly renovated house. No, you see an old, decrepit, haunted looking house and you want to rescue it. The challenge is exciting. It’s an addiction. Don’t fight it.

Whether you hire a contractor or go DIY, if you’re living in the home during renovation, it’s not a healthy atmosphere. Even if lead is not an issue, there is still dust and fumes to consider. You obviously need to take safety precautions. I don’t want to be a downer, but you’ll be breathing in alot of crap.

After nearly a year of DIY renovations on the brownstone, I crashed and burned. My body just said “Ok, I’m taking a break now.” It wasn’t one big thing, but a series of little illnesses. A cold, a flu, vertigo, stomach upsets. It was partly from fatigue and stress, but I had been living under some nasty conditions during the reno. I detoxed for a week and I was fine after that.

Would I do it again? Absolutely! No other way! What would I do differently?

* Clean up better. I vacuumed, but didn’t wipe everything down with a wet sponge.

* HEPA Vacuum and Air Cleaner. Didn’t have either.

* Take more breaks. I literally woke up and got to work immediately then worked until dinnertime. Stretching, exercise and fresh air would’ve proven beneficial.

* Detox after a month or two, not a full year. I picked up the “cleansers” at the health food store. It’s no fun taking them, but they work! It’s a week long process taking a series of natural pills and you’ll want to stay close to the toilet. I also took a respiratory cleanser since I was breathing in God knows what kind of dust particles throughout the year.

* Open windows. If you can drag a piece to work on outdoors, do it. Not always possible if you’re working straight through winter.

* If you have children or pets, keep them out of the work area until finished and cleaned up in that room. Keep in mind that the dust will take a few days to settle.

* Polyurethane, paint and new material (some carpets and fabrics) send off some nasty fumes. Air out the room! Avoid the area for awhile if you can.

There is no reason to panic and move into a new construction. Try to avoid the lead as best you can. Worst case scenario, your lead levels are high. It should eventually run out of your system and you’ll have normal levels again one fine day.

Safety Tips

Categories

Neighborhood Housing Services:DIY Course

Neighborhood Housing Services:DIY Course published on 3 Comments on Neighborhood Housing Services:DIY Course

home_maintenanc_1_2.JPG

Neighborhood Housing Services, or NHS, is a non profit housing organization that has been helping New Yorkers improve their homes since 1982. They educate the community on everything from first time home buying to being a landlord to diy repairs.

NHS helps people get mortgages and gives loans towards down payment and home improvement. They counsel folks on ownership and foreclosure prevention.

I’ve never taken one of their home maintenance courses, but I’ve heard nothing but rave reviews. I just noticed that the East Flatbush branch is offering a class that begins this Monday, February 11th. There is also a Wednesday class available which starts on February 20th. Classes meet once a week for 10 weeks, from 6pm-9pm. Topics covered are: safety, basic plumbing and electrical, carpentry and framing.

NHS does have other locations around NYC and offers more advanced courses, so do check them out!

NHS East Flatbush Courses : 718.469.4679.

Hey Kids, Build Your Own Home. It’s Easy!

Hey Kids, Build Your Own Home. It’s Easy! published on

completed08.jpg

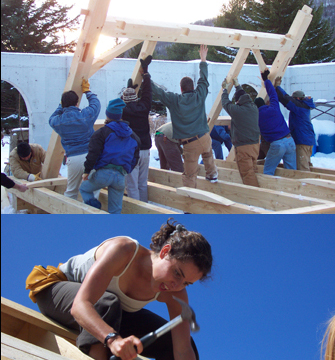
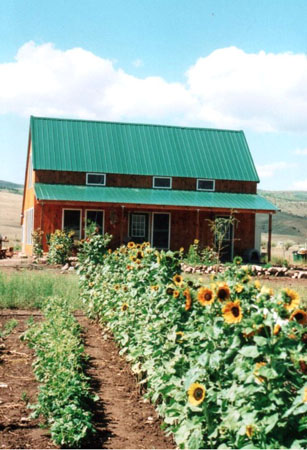
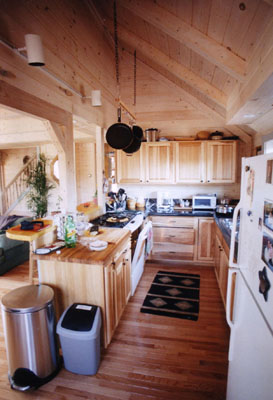
Amateur home builders….your day has come! First Day Cottages are designed with the novice in mind, so they require few tools and are tolerant to error. They are said to be extremely durable and if I may say so myself, pretty tasteful looking.

Architect David Howard founded the New Hampshire company in 1995. The laminated post and beam construction kits contain the wood, roofing, windows and even kitchen cabinets. You’re on your own when it comes to the foundation, plumbing and electric. Leave those things to the professionals! These homes contain no sheetrock or plywood. The interior is entirely wood.

interior01.jpg

Styles include The Original, simple design, The Saltbox and The Cape. Prices start at $29,800 for the kit. Additions and porch plans can be ordered. Shipping, heating, electric, foundation, appliances, etc could run another $30k-40k, but that still brings you in under $100k for a sweet looking home. That you built yourself.

First Day Cottage

Via Materialicious

Primary Sidebar