Skip to content

Recycling Day

Recycling Day published on

 baby2.jpg

I’m still trying to pump out the handmade inventory in time for the holidays. Can’t even upload it to the online stores because I don’t have enough stuff to fill my space at the Gifted show this weekend. I’m having great fun playing with all of the salvage and junk I’ve been collecting over the years.

baby6.jpg

My second child. The first one was a very crude screened in baby. This one has class. She’s in an old clock case. I love the eyes!

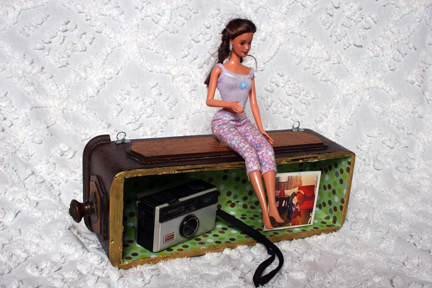
mebox.jpg

Non functional diorama in an antique sewing machine drawer. No, that wasn’t by Barbie, but that is a photo of me and I think that was my mom’s camera. It’s hard to distinguish what I grew up with and what I picked up at garage sales.

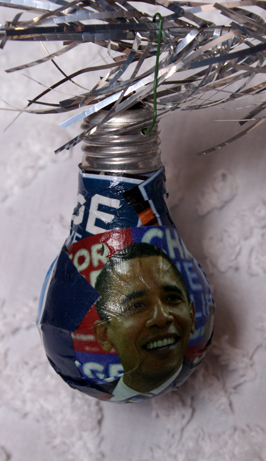
obamabulb.jpg

What Christmas tree would be complete without an Obama ornament? I was lucky that a bulb blew out this morning. I made other ornaments but I used new glass balls. I like them better, but they’re not recycled. I’ll have to find some ugly used ones to cover.

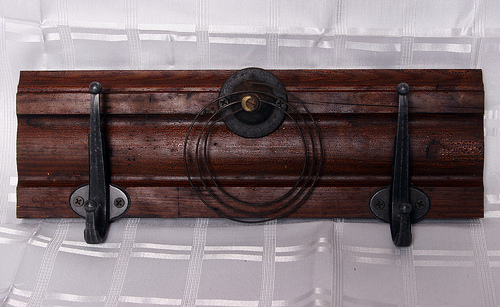
chair1.jpg

Someone put this chair back out on the curb thinking it was useless. It’s now a lovely coat rack.

barb1.jpg

And speaking of racks, here’s another use for Barbie. She’s a decorative topper on a hook thingy made from an old yard stick. The stick is too delicate for coats. Dog leashes? Hats?

10 Things I Can’t Live Without

10 Things I Can’t Live Without published on 2 Comments on 10 Things I Can’t Live Without

 gorilla.jpg

I’d like to pay homage to some of the greatest inventions that I can’t live without. Whether they’ve helped me through a DIY project, a photo shoot or a cold winter’s day, they are things I need in my life.

Without further adieu…. A List:

1. Gorilla Glue “For the toughest jobs on earth.” Word.

2. Power Drill

3. Howard’s.If you don’t have the patience to sand and restore a piece of furniture, just apply some of this magic restorer.

4. Vinegar

5. Swiss Army Knife. Never leave home without it on a photo shoot. Screw driver, scissor, pliers, saw and of course….cork screw.

6. iPhone. Not because I’m obsessed with my email and internet. Not because I love having a camera in my pocket at all times. Not because I can listen to music or watch videos. The applications that can be downloaded are endless…GPS, tip calculator, flashlight, level, tape measure, dog whistle and fake calls to get you out of awkward situations.

7. Staple Gun. Reupholstery was never so easy. Backing frames. Bang! Bang! Who cares if it’s a crappy job? It’s sooo simple.

8. Bungees. They can take the place of clamps and hangers in a pinch. 

9. Duct Tape

10. Hand Warmers. Saved my life last Sunday.

How Do These Etsy Mofos Do It?

How Do These Etsy Mofos Do It? published on 4 Comments on How Do These Etsy Mofos Do It?

 3081115566_39c7050cab.jpg

So, as I reported yesterday, I’m taking much of my salvage and vintage flea crap and upcycling it for the winter season. I’m doing this partially because I only have one more outdoor day at the Brooklyn Flea and partially because, well, it’s the holidays and nobody is buying furniture as gifts.

Ok, so I woke up at 5am and got right to work. A few distractions here and there, some breaks, but by quittin’ time, I had only finished five pieces. WTF? Am I a dimwit or something?

What I want to know is this: How do people find enough hours in the day to produce several pieces, photograph them, measure and write text, then upload them to Flickr, Etsy and other stores? And I think some of these people have full time jobs!

And don’t get me started on the days I have to cook get take out, clean, do laundry and pay bills! Who are these superpeople and how can I become one of them?

So, hey, come bring me hot chocolate at the Brooklyn Flea this Sunday where I’ll be freezing my ass off. The following 2 weeks I get to do the Gifted show because I bitched and moaned and he just wanted to shut me up. Squeaky wheel gets the oil!

3080279055_3b73ebe0f7.jpg

3080279359_b0a8ebce88.jpg

Craftin’ The Night Away

Craftin’ The Night Away published on 3 Comments on Craftin’ The Night Away

3078819430_c38f9e39b0.jpg

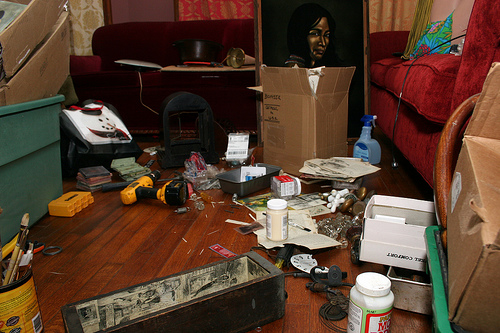
My disorganizational are amazing. The plan this week was too organize my crap and work more productively. As you can see from the photo above (my living room floor), it ain’t happening.

I’m trying to make the shift from falling back on selling vintage pieces to doing more hand made items for the holiday crafts scene. It’s tons of fun! But only if you have your act together.

3077987967_10fc9b9ef4.jpg

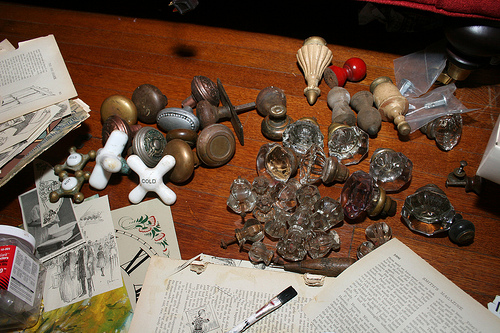
I tried separating doorknobs by spreading them out on the floor. I’ll make some coat hangers and such out of them.

3078819732_19e19646bd.jpg

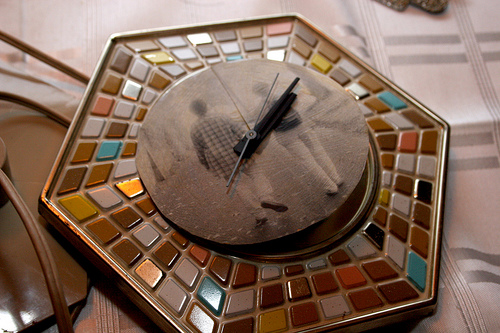
I took apart this clock to add the photo only to lose the screws. Now I can’t put it back together. Pathetic, huh?

3078820054_b2dbcf0630.jpg

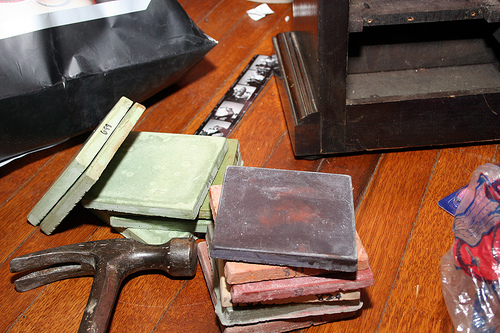
Ok, this was fairly simple and I managed to accomplish something. I bought these irregular concrete tiles last year and they’ve been sitting in my basement ever since.

3078817216_c04b126c30.jpg

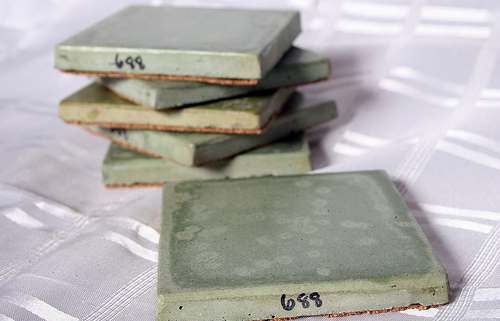
Add cork to the back and they are coasters! I left the numbers because I kinda like them.

3077986673_74bdcb0e45.jpg

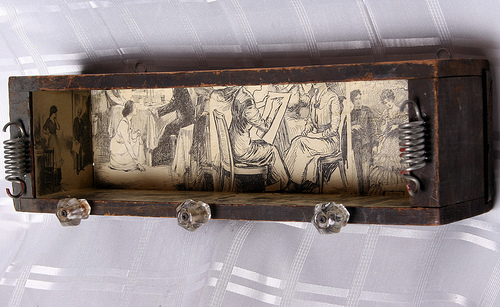
This key holder/shelf would’ve taken less than a half hour to make. Too bad I couldn’t find screws, then I broke one of the glass knobs, then I couldn’t get the screw out of the replacement knob, then I couldn’t find the Modge Podge, then I couldn’t find the scissors…..I took this photo while the glue was still wet on side “hooks”. You can see them starting to slide down.

Local Handyman Service

Local Handyman Service published on

today.jpg

When we finished our Bed Stuy duplex renovation we got Today’s Maid cleaning service to come in and tidy it up for us. Two gals came and spent a few hours for $350 and the place was spotless and dust free. They weren’t available for our more recent tenant move out.

Today’s Maid is branching out. They’ve just started offering a handyman service. I can’t find the exact rates, but they have three pricing structures: hourly, monthly service package or job estimate.

So for all of you lame asses who can’t unclog a drain or change a light bulb, this is for you! But really, if you’re gonna call, watch and learn. Also a good idea for those lacking in the time department. I’d love to put together a to do list for someone else to take care of. Hey, what a great gift idea for your blogger buddy!

Categories

DIY: Replacing Wainscoting Panels

DIY: Replacing Wainscoting Panels published on 9 Comments on DIY: Replacing Wainscoting Panels

 8.jpg

Remember my blue Bed Stuy living room? That post was back in July. Here we are four months later and I’m still stripping the wainscoting. Cut me some slack. I think I’ve actually worked on it twice since then. Half the room is stripped and we’ve encountered some problems along the way.

Like most everything else in this God forsaken house, the wainscoting was in bad disrepair. As I started taking off the paint, the caulk and plaster holding it together came along with it. We need to replace about 1/3 of the panels.

It was easier than I thought. Especially because it was Hubby doing it, not me.

wain1.jpg

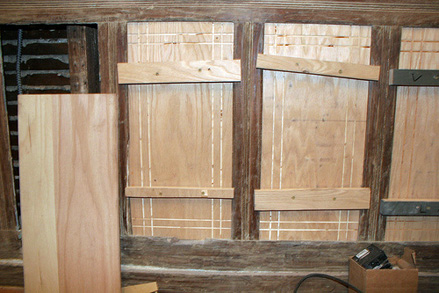
First “we” took a piece of plywood and cut it to size. Best thing to do is get the measurements off the original piece. They’re inset, so you want it to overlap (or rather, underlap) enough to glue the edges. Those boards across are just holding it in place until the glue dries. There’s nothing to screw it into on the inside.

3032435297_8dc7a1ce05.jpg

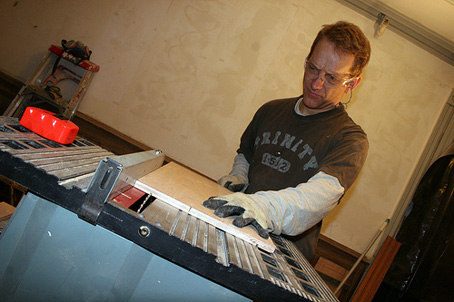
Next “we” had to recreate the groove design. We did this with a table saw. Adjust the blade to the proper height so you’re not cutting the whole damn piece in half. Then just guide it through. Measure twice, cut once!! *Please note the safety gear: gloves, goggles and earplugs.

wain2.jpg

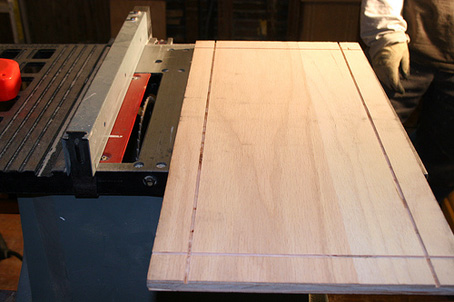
So, there you go. Clean, straight lines with a table saw. You can use a variety of tools, but this was fairly easy as the straight edge was in place. If you don’t own a table saw, you can always rent one.

And PS: Don’t cut your fingers off.

Categories

Asbestos: Yikes!

Asbestos: Yikes! published on 2 Comments on Asbestos: Yikes!

asbestos1.jpg

Asbestos should not be a DIY job. Don’t tell that to my husband.

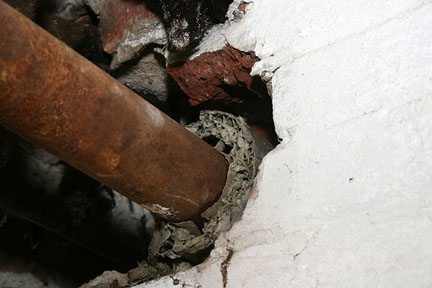
We knew we had encased asbestos around our pipes in the basement when we bought the house. We also saw that some of it had already been removed by the previous owner. Judging from everything else he did in this house, I’m sure he didn’t remove and dispose of it correctly.

Yesterday was project “Zoned Heating System” or something of that sort. This involved cutting into some pipes wrapped in asbestos. There wasn’t a lot of this nasty stuff left and my husband is Mr. Take A Chance when it comes to these things. So….did I mention you shouldn’t do this yourself?

asbestos2.jpg

Anyway, let’s say you’re as underdeveloped as my husband and decide to go DIY with asbestos removal. Here’s what he did:

1.  Mask for asbestos!

2. Hazmat suit! Wear that hood and put protection on your shoes. Don’t forget the gloves. Take this off should you leave the room and dispose of it afterward.

3. Rent a HEPA vacuum. All hubby did was get a HEPA filter for our shop vac and put a plastic bag around it to contain the dust flying out. Rent the vacuum.

4. Seal the room.

5. The asbestos should remain wet at all times while scraping and go directly into bag which will be sealed shortly after.

6. Asbestos must be properly disposed of. No, you cannot just throw it in your trash. Contact your local dump and see if they take it. Or call the DEC or EPA. In our case, we have some perks since Hubby works in the business. He has access to hazardous waste dumping at work.

I need to say this again to avoid any liability. You shouldn’t do this yourself. Hire a pro. We only had a few inches on a few pipes, so we took the chance. And again, my dimwitted husband works with OSHA all the time, so hopefully he knows what he’s doing.

Hopefully. Cough, cough.

Read up:

Asbestos Do-It-Yourself Abatement
DEC
Natural Handyman
EPA

Categories

Rewiring Lights for Dummies

Rewiring Lights for Dummies published on 5 Comments on Rewiring Lights for Dummies

light1.jpg

One of my very first posts on this site was a how to on rewiring antique light fixtures. As a new blogger, I kind of scrapped together some posts from electrical websites. Now that I’m a seasoned rewirererer I’d like to add some tips. Refer to the first post as a guide, but these should come in handy as well.

light2.jpg

1. Have all of your tools and supplies together before trying to do this.

2. Before you go and take the fixture apart, study how it’s put together. Take pictures or draw a diagram. I’m talking wiring as well as parts.

light3.jpg

3. Organize yourself as you dismantle the light. Keep a dish for screws or put them back into the fixture while you’re working.

4. Remember that if you need to wash or polish the fixture, you should do it while there is no wiring. Duh!

5. Don’t throw away the original sockets or socket covers just yet. It’s always best to replace them, but sometimes it’s really difficult to find sockets to fit these lights.

6. If you don’t have cardboard socket covers, you can substitute electrical tape.

light6.jpg

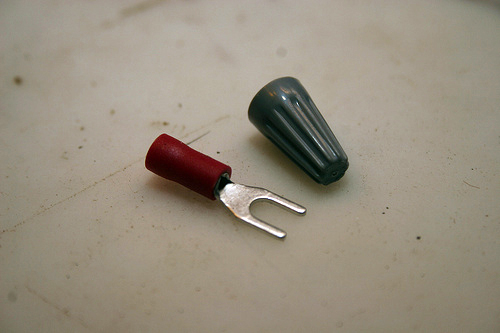
Spade terminal and wire nut

7. You can use wire nuts instead of electrical tape when twisting wire together.

8.  Spade terminals may be safer than just putting the wire under screws, but they don’t always fit in place.

light4.jpg

light5.jpg

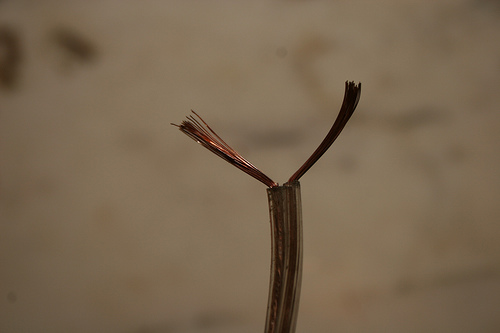
Leave more wire to work with.

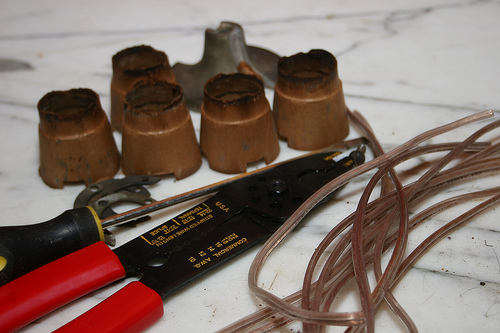
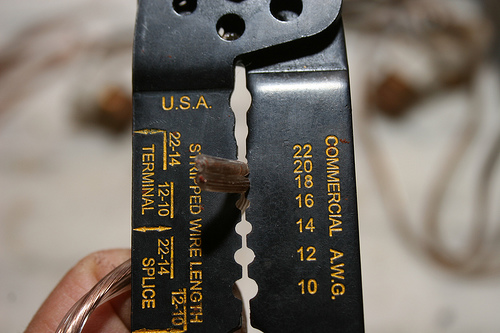
9. Make sure you have the correct wire gauge. Easiest thing to do is take old wire or fixture and ask where you buy it. The number is on the side of the wire. Match that to the stripper number. Make sure you release your grip as you pull or you may take more than the plastic protection.

10. When stripping wire, make sure you leave enough sticking out so you don’t have to go back and do it a second time.

11. Test, test, test before installing the fixture!

Categories

City Tech DIY Courses

City Tech DIY Courses published on 3 Comments on City Tech DIY Courses

2705397844_eb768c76ea.jpg

Here it is! The run down of how-to classes being given by City Tech this fall/winter. Stop whining about getting ripped off by contractors and sign up now! Contact Debra Salomon for more info.

HANDS-ON HOME REPAIRS  (8 individual sessions) HHT 078

Everything You Wanted To Know About Your Home (But Were Afraid to Ask)
Thurs, 6:30 to 9:30 pm, Oct 16 – Dec 7 No class on Thursday November 27
$35 for each class, or 3 classes for $95
“These hands-on workshops teach you how to make basic home repairs and avoid calling in a professional plumber, electrician, carpenter or painter.  We’ll show you how to repair a leaking toilet, patch and plaster a wall, caulk your tub and bleed a radiator. Learn the basics of electrical circuitry, service panels and circuit breakers and how to install a light fixture. Find out how to plant a shrub or grow an indoor garden. You’ll learn to open valves and unclog traps, and become your own favorite handyperson.

Beginners Guide to Tools
Beginners guide to tools and power tool safety.
October 16

Homeowner’s Guide to Basic Plumbing
Basic plumbing:  How to fix a toilet, bleed a radiator, unclog a drain.
October 23

Plaster and Sheetrock Repair
Repairing drywall, patching plaster, hanging shelves.October 30Electricity 101A primer on electricity, wiring and fixture installation.
November 6

Basic Carpentry
How to fix a door that sticks, repair a window sash, install a molding and hang a towel bar.
November 13

A Gardner’s Handbook: Inside and Outside
Finding the beauty of plants in your backyard, or place an orchid in a sunny window and be amazed when it blooms. Gardening soothes the spirit and creates year round color, both inside and outside.
November 20

Floating Floors and Ceramic Tiles
When it comes to laying a floor, the secret is in the preparation. Learn how to create a level surface, do a dry run of your pattern, and install a floor that will last for years.
December 4

Hanging Wallpaper
Wallpaper hides a range of flaws and is easy to install once you get the hang of it.We’ll show you how to remove old wallpaper, clean the residue, and line up strips so the pattern blends precisely.
December 11

Categories

Make A $5000 Chandelier For Like 20 Bucks

Make A $5000 Chandelier For Like 20 Bucks published on 2 Comments on Make A $5000 Chandelier For Like 20 Bucks

michaelmchaledesigns_thumb.jpg

These Michael McHale chandeliers on Kim Valee’s site caught my eye because they are made with reclaimed pipe fittings. I can understand why the prices are outrageous…. it’s Swarovki crystal. House of European Design does similar work and hey, it’s under $3000!

WTF? Still too much? Come on, this isn’t a highly skilled DIY job here. Piece of cake. Forego the Swarovki and stick some friggin crystals and bulbs on a pipe and you’ve got yourself a fine reproduction. Hell, I’ll do it for you for a couple of hundred bucks. Who wants one? I’m taking orders.

NY Times: On The Cheap

NY Times: On The Cheap published on 4 Comments on NY Times: On The Cheap

 25109789.JPG

Did we all see this already? Forgive me. I just got to the style section today. Some innovative ideas on how students reuse trash and found objects. 

25051571.JPG

Cute for plants and hats, but t’would be even better as cat beds.  

25051543.JPG

I love this. I did some switch plates with old wallpaper and used gift wrap. Similar idea. 

25051475.JPG

All they are showing here is that the person painted their walls red. No big whoop. I posted this photo because I wanted to show my husband that I’m not the worst painter in the world. Is that red paint on the crown molding? And they didn’t touch it up before the Times photographer came in? Come on, have some pride!  

DIY: Make Stuff Out Of Stuff

DIY: Make Stuff Out Of Stuff published on 3 Comments on DIY: Make Stuff Out Of Stuff

 waterski.jpg

I’m trying to get back to my original idea of this business, which is to give salvaged material a new life. It’s been a tough year organizing the grand plan and I often find myself just buying vintage items to turn around and resell.

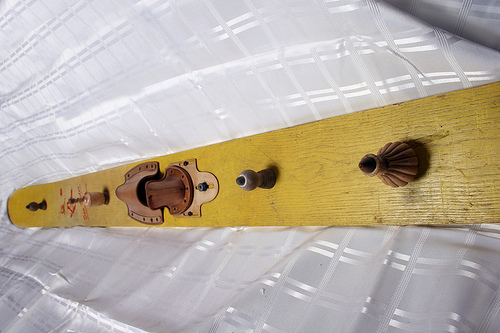
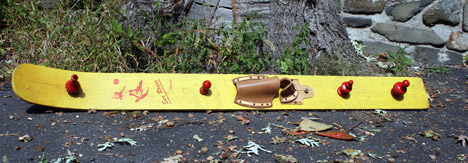
Today I actually got to do some work. The other pieces are in progress, but I did mostly finish one I can show off. I bought a set of water skis that I thought would be totally cool to just hang on a wall. Well, people loved them, but alas, they didn’t sell. Then I had this brilliant idea to make coat hooks out of them. Ok, it was my friend James’ idea, but don’t tell anyone. My idea was to do something too elaborate for my baby skills: make a bookcase with a ski on either side.

Anyway, it was pretty easy. I had these wooden finials in my garage and they already had screws in them. All I had to do was drill pilot holes and screw them in. A bit of glue to help them stick. Put some hooks on the back for hanging and Bob’s your uncle!

In retrospect, I probably should have left the finials unpainted. Do they look like nipples or dog penises or is it just me?

Categories

What Were They Thinking?

What Were They Thinking? published on 1 Comment on What Were They Thinking?

 2873104301_f035489ed9.jpg

We’re in the home stretch of our Brooklyn brownstone renovation. Not really, but we’ve done 3 out of 4 floors plus hallway and laundry room. It only took us 3 years to get to this point. Well, a year and a 2 year break.

Anyway, the point of this post is to let everyone know that we have seen it all. This is our fourth DIY renovation and we’ve witnessed some pretty crappy work from previous owners and “contractors”.

A few things we’ve encountered:

1. Carpeting over rotting floor. (1st home)

2. Modular home not bolted together. (2nd home)

3. Support beams cut away to make room for pipes. (3rd home)

4. Workers put screws in our gas line after we fired them. When we turned on the gas supply to the stove, the screws fell into the valve so it could not be turned off. Luckily, the hubby decided to turn it on to blow out some dust before connecting, which is the only reason we discovered it. (1st home)

But ah, the Bed Stuy house wins the prize.

1. Boiler venting into the fireplace.

2. Tile floor under bathtub sitting on concrete directly on joists. Rotted joists.

3. Spliced two prong extension cord running up from basement instead of installation of new outlets.

4. Old penny fuse box. 1 fuse per floor.

5. Leaky gas stove.

2873102293_abfbc8c66f.jpg

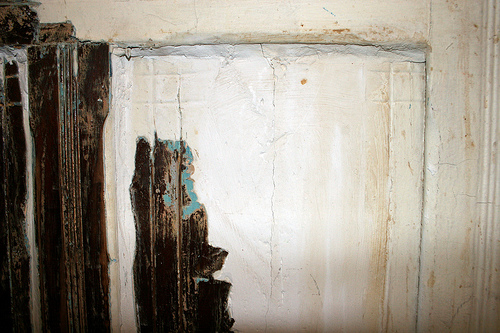
And that was just some of the dangerous stuff. I haven’t even covered the cosmetics (like mirrors glued directly to plaster walls). But this weekend as I stripped paint from wainscoting caked in plaster, I reached my breaking point. It’s bad enough to strip 50 years of paint, but what’s with the plaster??? Like 1/2 inch. Yes, the wood was cracked, but what’s wrong with a touch of wood putty? Why the plaster? And caulk? Why? It took me all day to strip 3 panels.

But then why should it surprise me coming from people who let their kids write on the walls?

People, man.

Categories

All Hail Eddie: Brooklyn’s Salvage King!

All Hail Eddie: Brooklyn’s Salvage King! published on 13 Comments on All Hail Eddie: Brooklyn’s Salvage King!

**Archive. Originally posted October 2, 2007.

eddie.jpg

His prices are insane!


strip.jpg

Stripping Paint

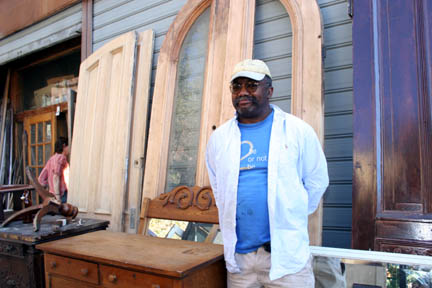
Eddie Hibbert is famous in Brooklyn. At least amongst those of us struggling to restore our 100 year old homes. Located on Greene and Grande in Clinton Hill, Eddie doesn’t have a website. He doesn’t answer his phone. He opens at noon and is closed on Sundays and Mondays. And yet…he can’t handle all the business he gets.

An ex firefighter and member of the Vulcan Society, Eddie found his way into the salvage business some 30 years ago while living in Harlem. A guy who was salvaging brownstone details told him that the artisans who built these fine homes wouldn’t be around forever and the value was bound to go up. Eddie listened. He studied up on antiques and volunteered to help “mentors”. He started out by selling to the antique shops on Atlantic Avenue. His 2 original stores were on Myrtle Avenue.

Apart from the usual Brownstoner crowd, Eddie’s customers range from Williamsburg artists to folks looking for unique headboards such as doors or mantles. He gives work to guys who need it, but has to be careful about whom he takes with him into people’s homes. A long time customer who was there the day I was interviewing Eddie chimed in “He’s too kind hearted for his own good!” Eddie just says “I’m a simple guy.”

What you’ll find: Everything. Dig for it or ask. Doors, Mantles, Fireplace Inserts, Shutters, Newell Posts, Fretwork, Stained Glass…..if it came out of a brownstone, it’s here.

Primary Sidebar