Skip to content

Historic House Colors

Historic House Colors published on

image001.png

1917 Color Chart

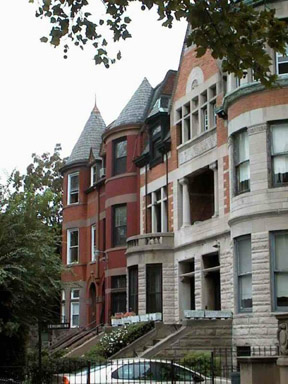
This is the third season that’s come and gone when we said we’d paint the exterior of our house but didn’t get to it. I want to go all pink and purpley, but the hubs wants something a bit more macho. He may get his way because I just found out we’re in a historic district.

I’ve been grooving to Charles Rupert’s Old House Colors website, which deals with both interior and exterior colors. He explains the “bullseye” method to finding the original colors of the house. Choose shaded and out of the way areas where sun or overenthusiastic painters haven’t reached. Sand a few areas, not just one, down to the wood. Various trim may have been different colors. After sanding, wipe clean with mineral oil to get a better idea of how it may have looked originally.

Old House Web is a great resource for traditional paint colors, including products from California Paint.

If choosing a color scheme is overwhelming, there are services that do it for you. Historic House Colors, based in Michigan, does consultations through the mail. Prices start at $550.

Victorians=Spooky

Victorians=Spooky published on

1006005.jpg

With Halloween just around the corner, this seemed appropriate. I found a cool article on Victorian homes over at Our Strange World, a blog dealing with the paranormal.

The article starts out: “With their bay-windowed towers, widow’s walks and creaky floors, Victorian homes are the go-to image for being creepy and haunted — the place where some bogeyman-type will give chase to neighborhood children.” It sites films such as “The Amityville Horror and “Pacific Heights”.

Growing up on horror films and seances, it makes perfect sense to me why I’m in love with Victorians. I do want to decorate my home with gargoyles and dragons. And I must admit that there’s something about a decrepit old haunted looking house that makes me salivate.

My Beacon home looks spooky. But the energy is so positive that it’s the first home in 15 years that I didn’t smudge (smudge=ritual to clear house of negative energy). Just goes to show you, looks are deceiving.

Crown Heights House Tour

Crown Heights House Tour published on

stmarks.jpg

When: Tomorrow! October 6, 2007. 10am-5pm. Tour begins at noon.
Where: St. Gregory’s RC Church, 991 St Johns Place bet. Brooklyn & New York Aves.
Cost: $25

This is the inaugural tour of the Crown Heights North Association. 10 houses, 2 churches and 1 community garden. This tour features period detail and restoration, as well as more modern touches combined with ecologically green products and technology.

Tickets and Info

Historic Mansions of Dutchess County

Historic Mansions of Dutchess County published on 1 Comment on Historic Mansions of Dutchess County

275426198_2104a41a94.jpg

If you’re an old home fanatic like myself, you can spend the entire weekend touring the historic mansions in Dutchess County. Wilderstein is my favorite, a dark Queen Anne style home still undergoing restoration. And if you’re in the area, Wing’s Castle is not so far and it is a must see!

Hudson River Valley National Heritage
Staatsburgh
Olana
Vanderbilt
Wilderstein
Montgomery

Salvage Road Trip: Albany

Salvage Road Trip: Albany published on 6 Comments on Salvage Road Trip: Albany

I recently took a trip up to Albany looking for inexpensive salvage. Here’s what I found:

alb1.jpg

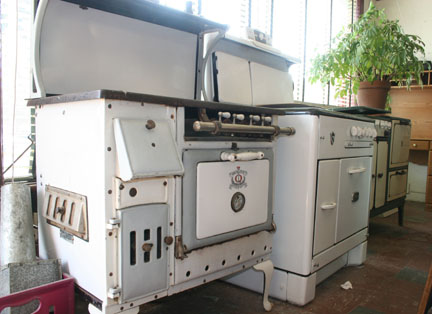
Stoves at Historic Albany Warehouse

The Historic Albany Foundation Architectural Parts Warehouse is a private, non profit working to promote the preservation of Albany’s buildings. They do not ship, nor do they have inventory on their website. They are chock full of doors and windows and have some great antique stoves and good prices.

alb2.jpg

Silver Fox Enterprises

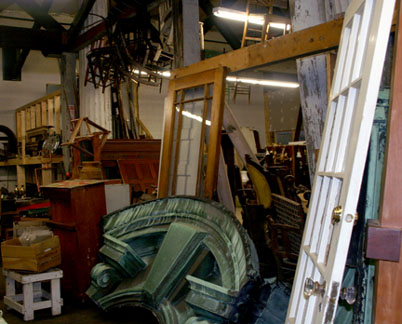
Next I hit Silver Fox Enterprises. This was like shopping in style for salvage. It was bright, well organized, spacious and clean. And the best part is the prices are pretty good! They transform salvaged items into functional home furnishings, kind of like what we intend to do, but haven’t gotten around to yet. On weekends, there is live music and vendors.

Next I went up to Troy, about 8 miles north of Albany. There’s a whole “antiques district”, which is about 2 blocks long. Because these were antique furnishings and not salvage, the prices were higher. However! You would have to search far and wide for prices this good closer to NYC.
Bournebrook Architectural Salvage, across from Bournebrook Antique Center (closed) has tubs and sinks which are in great condition. They also have some vintage refrigerators, mantles, stained glass and hardware.

DIY: Repointing Brick

DIY: Repointing Brick published on 6 Comments on DIY: Repointing Brick

point1.jpg

Tools:
4” or 6” Trowel
Jointer
Tuck Pointer (Joint Filler)
Old Screwdriver
Bucket or mixing basin or wheelbarrow
Spritzer / mister or mortar brush (Or old but clean paint brush)
Mortar hoe or heavy duty drill with mixing paddle

Materials
Mortar – Type N, Type S or from scratch (Sand, Hydrated Lime and Cement)
Clean water

Safety
Rubber gloves
Glasses/goggles
Respirator
point2.jpg

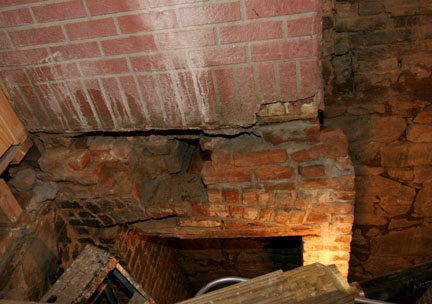
If your basement foundation looks like this, you shouldn’t attempt it yourself if it’s your first time. This is serious damage and yes, it supports the house. Call a pro. Yup, it’s our house.

Steps

1. Remove loose mortar from joints to a depth of 3/8”. This can be done with a raking tool (special tool with two wheels and a point that can be set to the depth you want to remove the mortar), an angle grinder with a diamond blade (quick but very messy) or just an old screwdriver. The idea is to remove enough mortar so the new mortar will stick but not so much that you end up rebuilding the wall. The new mortar will hold the original mortar in place so don’t sweat it that the old mortar is a little soft – unless it is just sand and it is flowing out.

2. Clean out raked joints using a brush, whisk broom or vacuum. The area you prepare will depend on your access, your experience, the atmospheric conditions etc…Damp down the joints and brick by misting using the spritzer, spraying with a wet brush or using a hose with the nozzle set on mist.

3. Mix the mortar – unless you are really going for volume and have gained a little experience mix by hand using a shovel or hoe or even with the trowel if it is a small area. It is easier just to use a bag mix – if you can use Type N (1 part cement, 1 part lime, 6 parts sand) the lime is more workable and will allow the joint to flex over time. Type S (1 part cement, 3 parts sand) is stronger and more rigid and should only be used for concrete block or brick rather than clay brick. You can buy the sand, cement and lime loose if you are buying large quantities and want the extra headache. Add the water a little at a time and mix well until you have a wetter consistency than you will use– allow the mortar to slake (start setting up) – it should stiffen but when you work it will loosen up. This is where practice and experience comes in with gauging the amount of water required. If you mix it too wet, add a little mortar to stiffen the mix.

4. Place a scrap piece of plywood below the area you are pointing to catch the mortar that will fall. Pick some mortar up from the basin or bucket with the reverse side of the trowel (so the handle is down and out of your way) and place the long edge of the blade to the horizontal joint. Use the tuck pointer to shove the mortar into the joint – working you way along the joint while pushing the mortar in to fill up the joint. If the mix is too stiff the mortar will be hard to compact into the joint, if it is too wet it will sag out of the joint – this may be due to the mortar not having slaked enough so you may need to give it more time. Fill horizontal joints and then work on the vertical joints – but try to work a small area at a time so that the mortar is still workable in the horizontal joints while you fill the vertical.

5. As time passes the mortar will lose workability when it reaches a certain point junk it and start again. Mortar will fall – as long as it doesn’t get contaminated with dust or dirt you can pick it up and mix it back in with the rest of the mortar. Adding water as you go will weaken the mortar and cause it to crack. After a few minutes you should go back over the joints to tool them using the jointer or the tuck pointer – this helps compact the mortar and you can strike a different profile (concave, raked flat etc…)

6. The trick is to get a rhythm going between raking the joints, mixing, slaking and pointing so that you are not wasting time between steps.

7. If it’s dry and/or hot, I spritz down the joints after they set up to stop them drying out – not too much that the cement or lime is washed out, however.

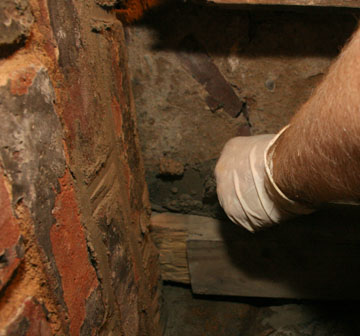
8. For those hard to reach areas – especially if it is not a cosmetic job – I use my hands to fill the joints and strike the joint with my finger – this is where the rubber or surgical gloves pay off.

Some Links:
Marshall Town
DIY Network
Gardening Data

Dream Homes: Wing’s Castle, Millbrook, NY

Dream Homes: Wing’s Castle, Millbrook, NY published on 7 Comments on Dream Homes: Wing’s Castle, Millbrook, NY

wingex.jpg

wingtub.jpg

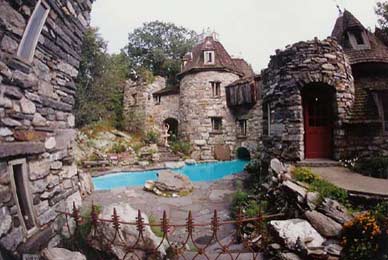
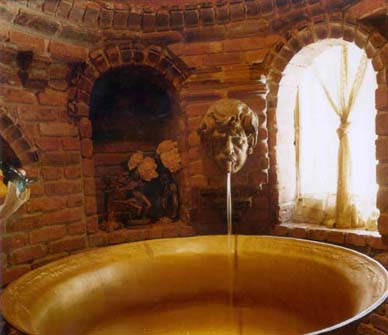
I visit Wings Castle whenever I’m in the area because it’s an inspiration to any DIY fanatic. I mean, they built this themselves! With reclaimed materials! The swimming pool is a friggen moat!

When I found out Wings Castle was for sale, I started saving my pennies. Currently listed at $5,850,000, I still have a few more years to go before I can afford it. I’m taking donations if anyone wants to see me finish the ongoing 30+ year project started by Peter Wing.

Dupont Castle

Buying A Castle

Buying A Castle published on

4515brancastel.jpg

Dracula’s Castle is for sale.

The price of a European castle doesn’t seem as outrageous as the price of a Manhattan studio apartment. You can buy a castle for under a million. Who cares if it’s a shell in Hungary? What else are you planning to do with your retirement?

Castles For Sale
Viviun Real Estate
Mercure Real Estate
Wists Castles

Alpine and Jasper: A Love Story?

Alpine and Jasper: A Love Story? published on 6 Comments on Alpine and Jasper: A Love Story?

alpinestrashjpg.jpg

alpinesletter.jpg

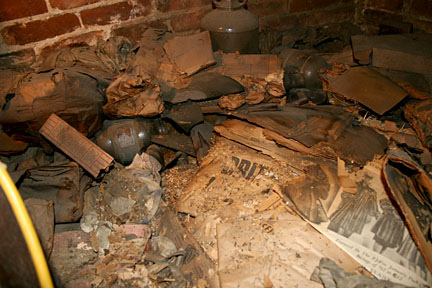
Before the Bed Stuy house, we never found anything of value during our renovations. When we started demo on the 4th floor, we discovered a cubby hole that had been closed off for years. What we found in there was a woman’s trash, but the cool thing was that it was trash from the 1940’s.

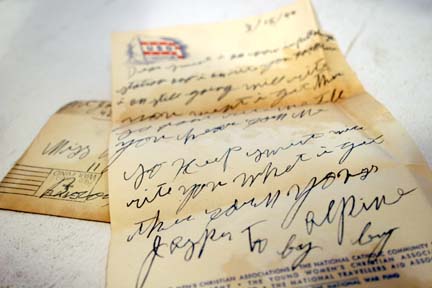
As we pored over stacks of love letters, newspapers and miscellaneous garbage, we gathered that the woman was probably renting the room when this was a boarding house. Judging from the hair care products, we guessed she was African American. Judging from the letters, liquor bottles and fishnet stockings, we suspected she may have been a bit of a wild one.

Most of the letters were from Private Jasper, who was getting moved around during the war, but was never in combat. The correspondence went on for about three years. Many of the letters were the same: “I miss you.” “Stay Sweet.” It’s clear from the final letters that Alpine stopped writing back to Jasper and he gave up on her, brokenhearted.

We did a search on the internet, but couldn’t find either of them. Perhaps they’re no longer with us or perhaps we didn’t have the time to try harder. We archived the letters and war time newspapers and I plan on using a few of them in a resin countertop so Alpine and Jasper can keep a place in the history of our home.

Building Materials: Get ‘Em While You Can!

Building Materials: Get ‘Em While You Can! published on

This was posted on the forum yesterday. Since I haven’t yet figured out how to allow folks to post photos, I asked her to send me some pics so I can post here. Looks good!

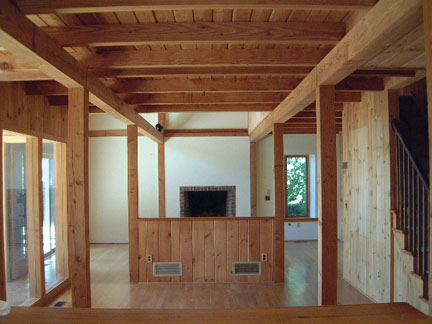
Selling off contents of a modified Post and Beam house in Greenwich, CT. Walls/ceilings of knotty pine, white oak and red oak floors,fir stairs, lofts, loft railings,, Exterior/interior doors, Anderson casements, picture windows, Velux sky lights, French doors, double French doors XO, 6 ft sliders, Trane XL 80 gas furnace, ducting, 40 gal gas hot water tank, toilets, bidet, whirlpool tub, frameless shower doors, electric garage motor,amd more. All materials in EXCELLENT condition. Buyer removes. Cash only.

Also have materials in 9 other houses, includine 4 gorgeous kitchens which are on my website and available NOW. All in EXCELLENT condition. Contact Cathy @203-869-5365 or deepdiscount@optonline.net

If you are a “Dumpster Diver”, and you know if you are one, get to know me! Check out my web site www.deepdiscountdemolition.com, email me your address and I’ll add you to my list for notice of sales. Let me know what you need, if I don’t have it today, I will soon. Recycle, get great stuff at “deep discount” , Thanks

outpost.jpg

intdemo.jpg


sliders.JPG

Silent Paint Remover

Silent Paint Remover published on 4 Comments on Silent Paint Remover

Tools I Can’t Live Without

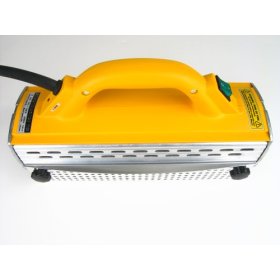
spr.jpg

A friend turned me on to the Silent Paint Remover only after I finished stripping 3 floors of my brownstone. With a whole room of wainscoting to go, it was still worth it for me to give it a shot.

Unlike a heat gun, the SPR heats a 5″x12″ area at once, so it goes lickety-split. You’ll still need the heat gun or chemicals for small corners and clean up, but I’d highly recommend this tool to get through large areas with multiple coats of paint. It can save days, maybe weeks, on large projects.

If you’re working on a flat surface, you can move it along to heat the next area while you continue to scrape. For vertical surfaces, I invested in the hands free kit, which saves my arms, but isn’t much faster as it is inconvenient to make adjustments each time you move along.

Although it’s more environmentally friendly than harsh chemicals, you still need to wear a mask and gloves if you are working with lead paint. You must be mindful of your wood with this tool. Don’t leave it in place too long. It WILL burn your surface! When you see smoke, it’s time to remove it.

For more details and where to purchase, see following links.

House in Progress
Silent Paint Remover
Air Nailers
Eco Strip

Primary Sidebar