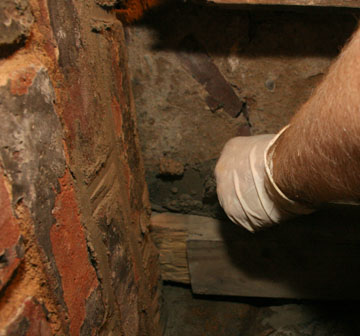
Tools:
4” or 6” Trowel
Jointer
Tuck Pointer (Joint Filler)
Old Screwdriver
Bucket or mixing basin or wheelbarrow
Spritzer / mister or mortar brush (Or old but clean paint brush)
Mortar hoe or heavy duty drill with mixing paddle
Materials
Mortar – Type N, Type S or from scratch (Sand, Hydrated Lime and Cement)
Clean water
Safety
Rubber gloves
Glasses/goggles
Respirator
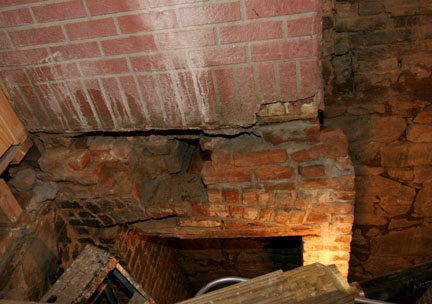
If your basement foundation looks like this, you shouldn’t attempt it yourself if it’s your first time. This is serious damage and yes, it supports the house. Call a pro. Yup, it’s our house.
Steps
1. Remove loose mortar from joints to a depth of 3/8”. This can be done with a raking tool (special tool with two wheels and a point that can be set to the depth you want to remove the mortar), an angle grinder with a diamond blade (quick but very messy) or just an old screwdriver. The idea is to remove enough mortar so the new mortar will stick but not so much that you end up rebuilding the wall. The new mortar will hold the original mortar in place so don’t sweat it that the old mortar is a little soft – unless it is just sand and it is flowing out.
2. Clean out raked joints using a brush, whisk broom or vacuum. The area you prepare will depend on your access, your experience, the atmospheric conditions etc…Damp down the joints and brick by misting using the spritzer, spraying with a wet brush or using a hose with the nozzle set on mist.
3. Mix the mortar – unless you are really going for volume and have gained a little experience mix by hand using a shovel or hoe or even with the trowel if it is a small area. It is easier just to use a bag mix – if you can use Type N (1 part cement, 1 part lime, 6 parts sand) the lime is more workable and will allow the joint to flex over time. Type S (1 part cement, 3 parts sand) is stronger and more rigid and should only be used for concrete block or brick rather than clay brick. You can buy the sand, cement and lime loose if you are buying large quantities and want the extra headache. Add the water a little at a time and mix well until you have a wetter consistency than you will use– allow the mortar to slake (start setting up) – it should stiffen but when you work it will loosen up. This is where practice and experience comes in with gauging the amount of water required. If you mix it too wet, add a little mortar to stiffen the mix.
4. Place a scrap piece of plywood below the area you are pointing to catch the mortar that will fall. Pick some mortar up from the basin or bucket with the reverse side of the trowel (so the handle is down and out of your way) and place the long edge of the blade to the horizontal joint. Use the tuck pointer to shove the mortar into the joint – working you way along the joint while pushing the mortar in to fill up the joint. If the mix is too stiff the mortar will be hard to compact into the joint, if it is too wet it will sag out of the joint – this may be due to the mortar not having slaked enough so you may need to give it more time. Fill horizontal joints and then work on the vertical joints – but try to work a small area at a time so that the mortar is still workable in the horizontal joints while you fill the vertical.
5. As time passes the mortar will lose workability when it reaches a certain point junk it and start again. Mortar will fall – as long as it doesn’t get contaminated with dust or dirt you can pick it up and mix it back in with the rest of the mortar. Adding water as you go will weaken the mortar and cause it to crack. After a few minutes you should go back over the joints to tool them using the jointer or the tuck pointer – this helps compact the mortar and you can strike a different profile (concave, raked flat etc…)
6. The trick is to get a rhythm going between raking the joints, mixing, slaking and pointing so that you are not wasting time between steps.
7. If it’s dry and/or hot, I spritz down the joints after they set up to stop them drying out – not too much that the cement or lime is washed out, however.
8. For those hard to reach areas – especially if it is not a cosmetic job – I use my hands to fill the joints and strike the joint with my finger – this is where the rubber or surgical gloves pay off.
Some Links:
Marshall Town
DIY Network
Gardening Data


6 Comments
That’s your house? I hope you didn’t pay much for it.
Yeah1,
What the hell is holding the wall up?
Murray, we probably paid too much for it. We’re suckers for detail, which the house has plenty of, and pretty much nothing scares us off at this point.
Yeah1, the hubby (he wrote the article) can give you a better answer than I can. I’ve summoned him to do so, but be patient because he has a real job (structural engineer), unlike me.
Yeah, I don’t know if that was a rhetorical question, but I’ll answer anyway. That was a fireplace at one point, so there’s actually framing behind the fake brick on top.
[…] bathroom in that time, but I know…still pretty lame. To be fair, it took a while to get the structural work done. Lots of repointing and sistering of joists, leveling floors, yada, […]
[…] Foundation. Repointing is the most boring job in the world, but it’s extremely […]