Skip to content

Garden Apartment Now Livable!

Garden Apartment Now Livable! published on 5 Comments on Garden Apartment Now Livable!

 3761844192_ed931f38a8.jpg

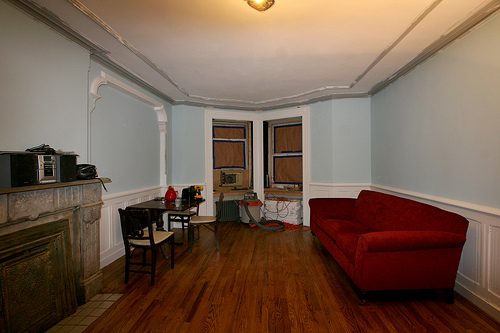
After four years of restoration, two of those years on this particular apartment, I am pleased to announce that our dwelling is finally habitable. It’s far from finished, but it’s done enough so that we can furnish it and work around that.

This is normal for us. We haven’t lived in a house that wasn’t under construction since 1994 back when we were renting. Once we get this kitchenette sink in, we’ll probably give it a rest, leaving some areas without moulding or paint for a few years.

But for now…..a couple of weekends off to enjoy Brooklyn.

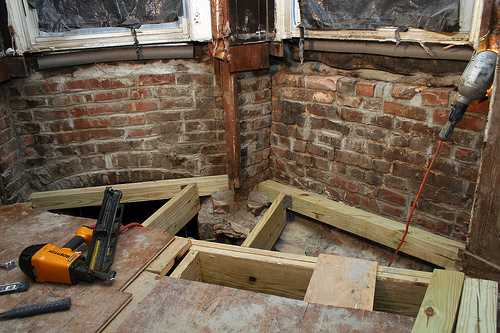
Ah, seems like only yesterday it looked like this….

3336280492_83b4668d3e.jpg

Wanna see a “To Do” list?

1. Work around windows

2. Get shutters in

3. Radiator covers

4. Sink, counter top, backsplash

5. Paint sink base

6. Finish moulding

7. Strip doors (ugh, more stripping)

8. Clean up mantel

9. Re-do hearth (damn, forgot about that!)

10. “Fancy paint” for trim and medallion

Related:

Progress

Boiling Hardware

Boiling Hardware published on 11 Comments on Boiling Hardware

 3698644237_02dda81233.jpg

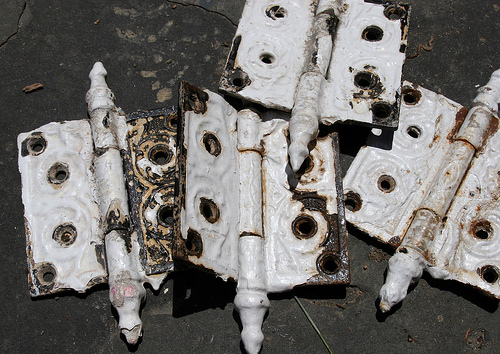
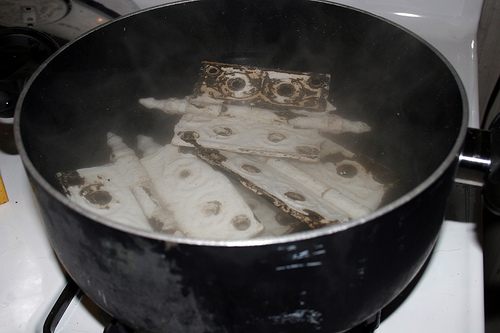
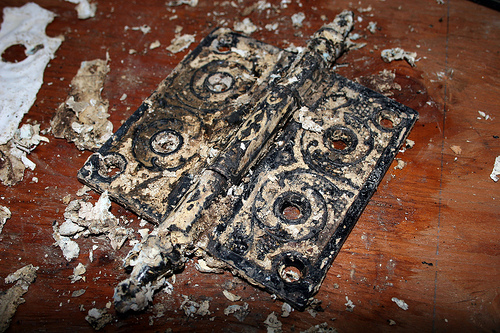
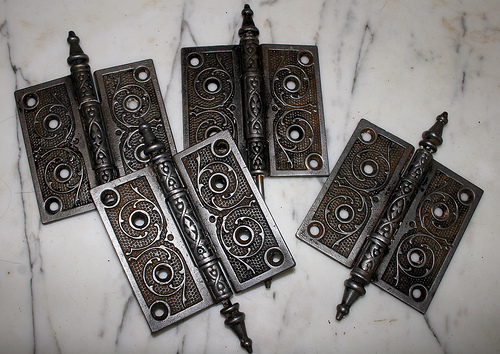
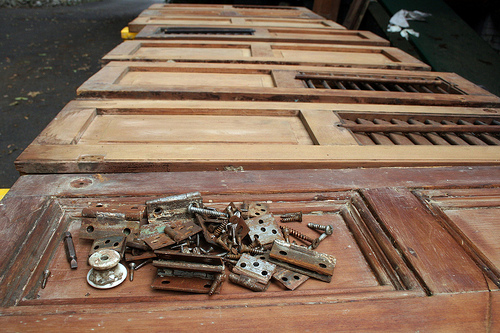
Finally got around to stripping the 10 layers of paint off of those lovely Victorian hinges I purchased at Vaccaro’s Salvage.

3625938766_508ef3699c.jpg

3698643709_f09f8b96d4.jpg

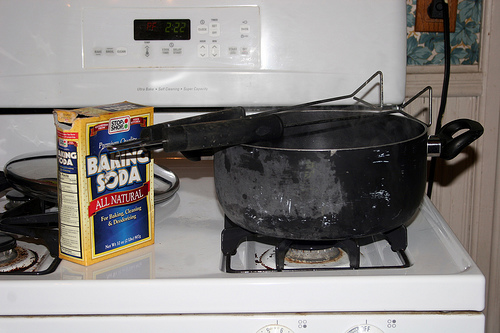
The easiest, cheapest way to strip hardware is to boil it. I add some baking soda and simmer it for 30-60 minutes. Some folks cook it in a crock pot overnight with a bit of laundry detergent. Hardware. It’s what’s for dinner.

3698642423_4877f52c2d.jpg

Once it’s soaked, the bulk of the paint will come off with no effort. You’ll have some cleaning up to do in crevices. Have a wire brush handy to scrub more paint off.

A few tips:

1. No, you don’t use a pot you use to cook.

2. Have tongs handy. That sh*t gets hot!

3. Ditto on gloves.

4. You’ll need some stripping tools for the pot action, then…

5. For clean up: chemical stripper, mask, chemical gloves, small pointy tool for teeny detail areas, wire brush or steel wool.

6. Clean up well. Chances are it is lead paint.

7. Soak in soapy water, then vinegar (scrub) to make it shine like new!

3698641475_9f7ecd6b8f.jpg

Categories

So, I Fired My Husband’s Arse

So, I Fired My Husband’s Arse published on 4 Comments on So, I Fired My Husband’s Arse

 3671574854_0fd2527b9f.jpg

The carpenter will make it all better. Won’t he?

May I kvetch? The husband takes a week off work to deal with the house and what does he do? Monday: Goes into work. Tuesday: Does office work from home. I mean, who needs him? So, I fired him. Well, I’m keeping him around for some handy work, but he’s been demoted.

I should have done this 5 years ago. I made some calls. I’m getting it done. And then I’m going to have weekends and vacations and social time and sex like normal people.

If all of these guys show up, (They ARE contractors, after all) in Beacon we’ve got the porch guys coming to do joists and sub floor today and tomorrow, a landscaper and a cleaning crew (I demoted myself too). What’s the rush? I decided to throw a July 4th shindig. Of course, even if they did show up, they won’t be able to work with all of this rain we’re having!

In Brooklyn, we need a stoop repair (Oy, quoted $10,700!) that can’t wait too much longer. It’s getting worse by the day and the block is slated for landmarking, so we want to do it before all the hassle. This is a project that takes more skill than we have, so there will be no DIY effort here.

And finally, Bill the stair guy, whom I keep forgetting is also a very good carpenter, will do our molding. That means there’s only painting left to do. Plus a couple of other items.

So, we’ll be poor but maybe, just maybe, we’ll have our lives back.

Categories

Hope Hubby Knows What He’s Doing

Hope Hubby Knows What He’s Doing published on 5 Comments on Hope Hubby Knows What He’s Doing

Last time I reported on my porch was over two months ago. Let’s see how far we’ve come since then. Shall we?

3652078526_bd7730fff3.jpg

Basically, there is no porch left. I’d just like to draw your attention to the green rain gutter with the white spout. The husband tried to kill me with this and I have a nice scar on my lower lip to prove it. He didn’t secure it so when I stepped on it, that white tip hit my face and I was cut by the sharp, dirty edge.

3651278577_23e4869e2c.jpg

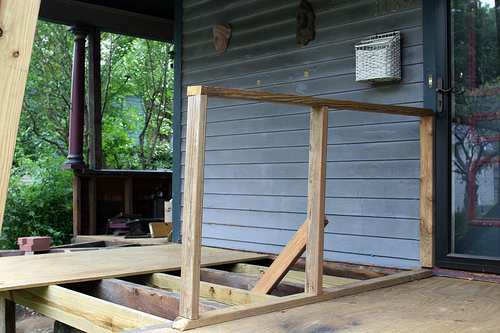
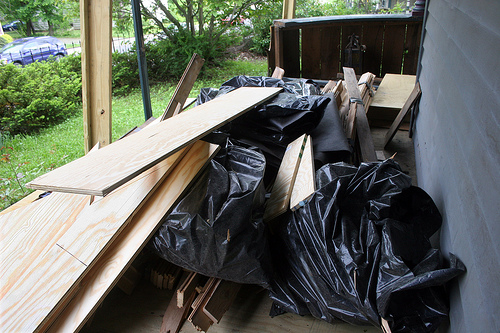
The temporary plywood was taken up for joist repair. This lovely handrail keeps the mail carrier (and us) from falling into the gaping hole. We don’t invite guests over, so that’s a non-issue.

3651280387_05aaeb4fde.jpg

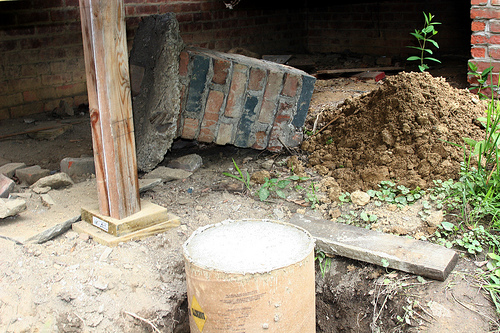
See the chunk o’ bricks in the background? That was just moving around willy nilly in the ground. A deeper hole was dug out to install proper cement footing. That ain’t going nowhere now.

3651283215_bff9bb59f7.jpg

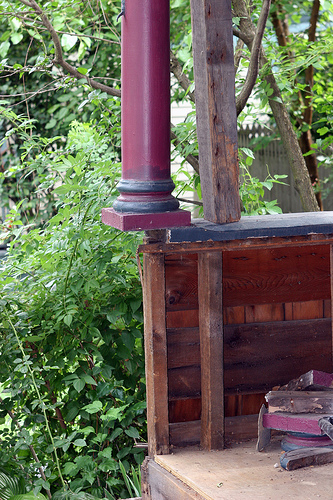
I’ve gotta say…this kind of makes me nervous. I mean, what’s it sitting on? So, hubby has worked on major bridges and structures that are still standing. Do you think this looks kosher? Or does he want to finish the job that the rain gutter didn’t take care?

Categories

Check Out The 3rd Ward Classes

Check Out The 3rd Ward Classes published on 1 Comment on Check Out The 3rd Ward Classes

htmcsa1.jpg

3rd Ward in Williamsburg is a member-based community for creative professionals. Their 20,000 sq. ft. of space houses media and art studios, offices and an educational program.  

Take a look at some of the upcoming summer classes! Good stuff.

Here’s what looks good to me….

Welding Techniques for Sculpture and Furniture. A six week in-depth course for all levels. Evening classes start June 24. There are weekend classes later in the summer. $500 including equipment if you’re a non-member.

How To Make Crappy Stuff Awesome. I love the title! “In this course, students will learn the basic concepts for creating furniture and other useful objects out of recycled and found materials for little or no investment. Give new life to a boring Ikea cabinet, fix a hand-me-down nightstand, or turn a bus window you found on the street into a coffee table.” Been there. Live that. Classes start in August. $380 for non-members includes equipment.

There are also basic woodworking, welding and furniture restoration courses. I wish I had time and money. This self taught stuff is a pain in my vintage arse.

Categories

The Shutter Project

The Shutter Project published on 9 Comments on The Shutter Project

 3604466637_80b4eab9c8.jpg

Three out of four stories of our brownstone had the original shutters on the windows. This was both a blessing and a curse. Obvious as to why it was a blessing, but have you ever stripped shutters? What a *%#{$# tedious job!

On the third floor, we found them painted and caulked into their housing. Again, a spectacular discovery until the actual rescue process.

Anyway, that’s mostly behind us now. The only shutters that need work are for our garden apartment. They’ve already been stripped, so the weekend project was just to paint them. Why are we choosing to paint instead of leaving the wood exposed? Well, first of all, they are not in good shape. After lots of glue and wood putty, the soft, water damaged pine didn’t look too great with stain. Secondly, I wanted to bounce the sunlight from the windows a bit with white paint. I think I actually tested this theory with a meter reading at the time, but I forgot the results.

As with all of our weekend projects, not a lot got done. Actually, there was no painting. It took close to 2 hours to take off all of the antique hardware, what with the stripped screws and all. Wiping all the shutters down, getting painting supplies, gossiping on the phone……too late to start painting!

Today is painting day. The quickest way to paint plantation shutters is to spray them. Although I do own a paint sprayer, it’s such a pain in the arse to set it up and break it down that I bought some Shur Line pad applicators to do the job. Haven’t decided which route I’ll take yet.

One tip I can give you is that you don’t use a brush. Well, it’s fine on the flat bits, but don’t even attempt to use it on the louvers. That’s where Shur Line is your friend. They make a small pad that fits between each slat and won’t get damaged as quickly as brushes or foam.

No matter what you use, it’s still a painful process.

DIY Classes From City Tech

DIY Classes From City Tech published on 2 Comments on DIY Classes From City Tech

 115.jpg

The Spring classes from City Tech have already begun and they’re going on all summer.

June 11th is a “toolkit” entitled “Hands on Green Home”. The workshop will be repeated in July.

“The Well Dressed Window” is June 18th.

July brings “Electricity 101”, kitchen design and home staging.

More info at NYC College of Technology, Continuing Ed.

*PS: Find the typo

Categories

Not Your Average Stencils

Not Your Average Stencils published on

 obamastencil.jpg

Since I’m all about stenciling now, I thought I’d share some info about Stencil 1 with you.

Up until now I was just running over to the local upstate farts and crafts store to buy run of the mill designs. Although….I DO love them! Well, I just got hip to Stencil 1….”graffiti stencils”.

How cool…

stencil.jpg

A few things that perhaps everyone except me knew about….

Stencil 1 is sold in stores throughout the city. In fact, throughout the world.

They have a book! It includes 25 reusable stencils plus instructionals. Plus, there’s a new book on the way that covers repeat patterns.

Their website includes how-to guides and a kick ass blog.

Related: The Stencil Library

Leaves of Three. Let Them Be.

Leaves of Three. Let Them Be. published on 3 Comments on Leaves of Three. Let Them Be.

 3590542970_836d3d7ae4.jpg

The husband has a nasty poison ivy rash all over his body. He’s all freaked out about it and he’s hiding down in Brooklyn until I get the situation under control in our Beacon backyard. I guess I’m not as sensitive to it as I didn’t break out. So I got stuck with the dirty work.

I spent a large part of the day yesterday dealing with this while I should have been working. I pulled up the leaves (more on that in a sec), washed the dogs and all the bedding. I drew the line at washing all six cats by myself.

Last year I went out there with long pants and a pair of gloves and just pulled the bastards up. I thought I’d take more precautions this time, so I researched it a bit.

Here are a few handy tips:

The leaves have different variations, making them more difficult to identify. They can be short growth or long vines. Always three though!

The roots have the highest concentration of the poison. You should dig down and make sure to get it all. I couldn’t be bothered, so mine will be back next year. Or later this season.

Make sure to carefully clean your gloves, shoes and clothes afterward. I just used old painting clothes that were ready for the trash and threw them out.

Wait to use soap and water until after cleansing with vinegar or rubbing alcohol first. Oops.

Don’t rip out the vines as this can release the toxins. Use a pruner.

Never compost or burn poison ivy! The smoke can cause damage to your lungs. In fact, wearing a mask is recommended while removing the leaves, but I thought that was overkill. That and the goggles.

Spray herbicide on the batch (oops) and throw in trash.

Ok, I was fine until I wrote this. Now I’m feeling itchy.

PoisonIvy.org Check out the skin rash hall of fame. You won’t be sorry!

PoisonIvy.aesir.com

Hate Thy Neighbor

Hate Thy Neighbor published on 2 Comments on Hate Thy Neighbor

 2241578442_35500eab04.jpg

Look at him out there. Working on his house morning and night, rain or shine. He’s almost finished with that elaborate fence he started building a few weeks ago. We hate him.

How dare he throw his finished porch and fully painted exterior in our faces? Oh, he hired contractors for that. Hey buddy, we’re doing it ourselves! There’s a reason our porch has looked like this for 2 years!

We see him out there mocking us. Smug bastard. With his ambition and his energy and all his free time. His job is probably really kushy and he doesn’t have to commute. So what if he has kids? Looks like the wife is a stay at home mom. She probably cooks and cleans by herself. Thinks she’s all that. We haven’t seen her hauling debris out of the house or lifting as much as a paint brush. A real lady, she is.

We like our other neighbors. They have 5 cats and their house smells worse than ours. They have don’t have unfinished projects because they haven’t even started any yet. They still have a piece of plastic in their attic window where the glass broke 3 years ago.

And those other neighbors across the street. They left their Halloween pumpkin out until after the New Year. Now that’s our type of people.

DIY Classes at Makeville

DIY Classes at Makeville published on

 speakers1.jpg

FYI, there’s a DIY building/woodworking school right here in Gowanus.

Makeville offers a range of classes, from “Intro to Handtools” for $160 to “DIY Architectural Woodwork” for $225 to a six session furniture making class for $525.

Better still, they try to use reclaimed materials when possible.

Better still, if you’re qualified, you can rent studio time.

Better still, thinking of a gift? You can purchase gift certificates online.

Better still, there’s a free lathe demo class on June 1st.

Categories

I Love Stenciling!

I Love Stenciling! published on 6 Comments on I Love Stenciling!

 3564083700_2930511214.jpg

3563266731_08bae97968.jpg

3563266397_bcf37bfefc.jpg

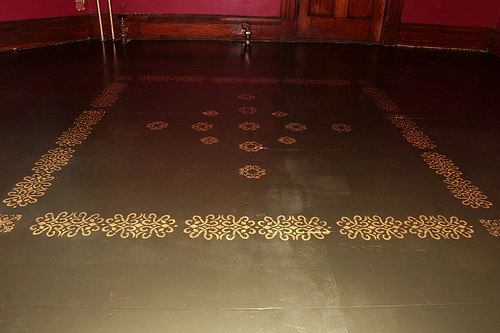
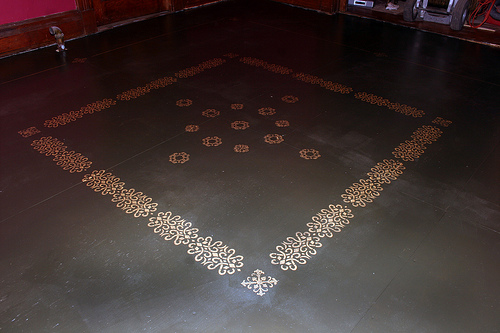
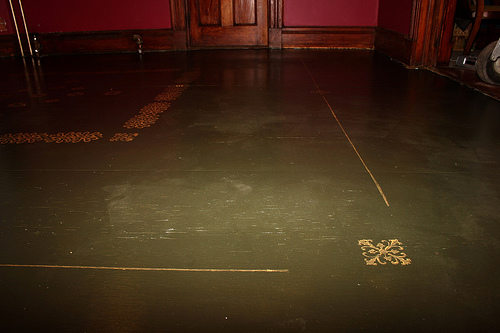
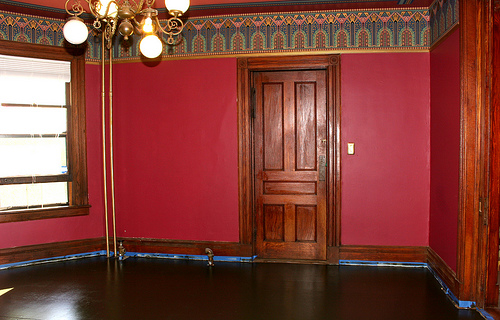
Ok, I promise this is the last time I’m gonna talk about this God forsaken floor. I have to show the (near) finished product though. Please disregard the patchy areas. I took the picture while the polyurethane was still wet.

Anyhoo, I really wanted to make life easy and use a design roller. I had never seen one before, but it was something I made up in my head. Well, after some internet research I found out it actually exists. Un- Wallpaper has a two roller system that evenly distributes paint while creating a pattern. Sounds like a great idea. The only problem I had was that I planned this out 5 minutes in advance, so ordering online wasn’t an option.

I ended up with stencils and foam stamps which I was able to buy at the local crafts store. It was time consuming to measure and layout the pattern and clean the stencils after each application, but it’s done and I love it. I noticed that Plaid, the same company behind Mod Podge, makes the stamps I used. Yay Plaid!

A few stenciling tips:

Clean the stencil or stamp each time you move it along.

Measure first! Tape or pencil in exactly where you’re placing the stencil.

There’s a spray adhesive you can use to keep it in place. I just taped it down.

You can roll, brush or spray the paint. If you’re using a brush, be sure to dab, not stroke.

Don’t breath, don’t move. As if you’re life depends on it!

What Was I Thinking?!

What Was I Thinking?! published on 2 Comments on What Was I Thinking?!

3551906897_e84fc63521.jpg

The plan to replace floors and repair walls in a single week has gone awry. Oh, we’re almost there. But almost isn’t good enough.

Our house guests will be arriving tomorrow. The third coat of floor paint was still wet as of last night, so I didn’t start to paint my stencil until this morning. Then it needs two coats of poly. We’re gonna have to go with water based at this point, but we really did want to use toxic oil for maximum pee protection. My guess is that we’ll be moving furniture back into the room five minutes before they arrive.

It wouldn’t be the first time.

There was the time we moved out of Park Slope and we were cleaning up from a last minute renovation as the new tenants were moving in. Actually, I don’t think we’ve EVER been ready when new tenants move in. There’s always a week or two of us invading their space to perfect our handy work.

Then there was the time these same house guests came to visit us in Kingston. We were out getting groceries when they arrived and they let themselves in to discover piles of sawdust all over the living room and the house wasn’t very clean. They never let us live that down and stayed in hotels for years. I don’t know what made them change their minds about the hotels. They’re completely hygienic (germophobes) so why stay in Cat Pee Central? Anyway, it’s good they come visit us once a year. It’s the only time we thoroughly clean.

But why take on these huge projects that any sane person knows they can’t accomplish in a week? Oh, if it was a simple floor, it could’ve  been done. But my husband says “You can’t do anything simple! You always have these crazy ideas!” He’s talking about the stencil design on the floor. It’s true. I always have to use a million different colors or some special technique or wallpaper. I get bored with simple. Simple is for sissies.

My husband likes to play the blame game, but he’s no better. Like it’s my idea we bought two houses that need total rehabilitation. Nobody twisted his arm! And I’m the one who has to beg him to hire help. He says he’ll take care of things, but with what time?

Here’s what I’ve discovered. I don’t know about the husband, but I’m a type B personality who thinks she’s type A. I take on all this crap at once…2 DIY restorations, 2 businesses, 8 pets, I’m planning my high school reunion and hosting the Blogade within a week of each other….and I think I can do it all. But nothing gets done right.

Is it me or is the whole world like this?

Categories

One Week. One Room. Day Two.

One Week. One Room. Day Two. published on

 3543233811_5eb9789e7a.jpg

Yay, let’s go to the dump!

Yesterday was the first day of my week off to renovate a room (and clean the house). I ended up tweeting/twittering/twitting my every move, which was a good idea, because it kept me honest. No long lunch breaks. No chatting on the phone. I worked my ass off. Ok, maybe I spent too much time buying caulk…running into a couple of people and chatting up a storm. Hey, errands are my social life these days! It beats talking to myself and dancing alone to my ipod.

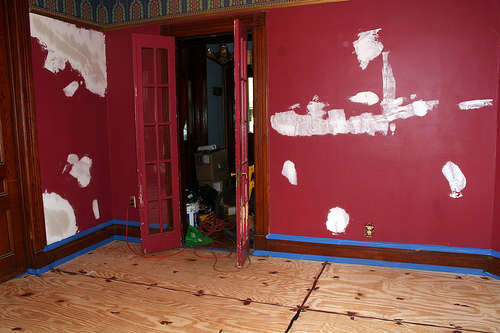
Ok, so where did I get to? Doesn’t look like much, but it’s all in the prep work. I had to sand the pre-sanded floor, mask moulding, chase cracks, vaccuum, plaster said cracks, caulk seams and screws and load the van to go to the dump.

The wall will need a second coat of plaster today, so no painting. The floors will need to be hit with caulk again as it shrinks when it dries. That can be primed in the afternoon. I forgot I also have to paint the radiator that’s sitting on a dolly in the dining room.

And here I was thinking this was a weekend project.

3543234109_e6c7e7cbb5.jpg

Thought I’d get away without priming the walls. Ha!

Categories

Primary Sidebar