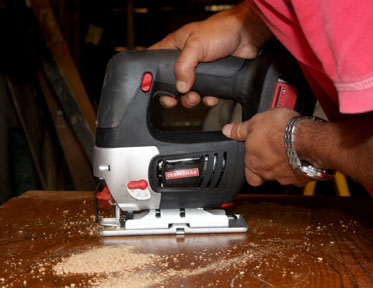
Cutting hole with jigsaw
This isn’t a very difficult project and hey kids, it can be fun and creative too!
I disagree with HGTV when they say pick out the sink first. I think it’s more difficult to find an antique piece of furniture. Soo, I suggest you find the perfect piece first. Height should be around 32 inches, but you can make it higher or lower (if it has legs). Large dressers and sideboards work well for double vanities.
Tools and Materials:
Sink
Faucet
Drain
Jigsaw
Hole Saw
Drill
Scissors
1. Assuming you’re using a new sink, it should come with a template. Cut it out, measure (twice!) and mark. Keep in mind you’ll need to leave room for the faucet if the sink doesn’t have holes for it. If it doesn’t have a template, don’t panic. Turn the sink upside down and trace its outline onto a piece of paper. Add about 1/4″ extra for details.
2. Take the top 2 drawers out.
3. Drill 2-3 pilot holes with 3/8″ bit along outline.
4. Stick jigsaw blade in hole and start cutting. I recommend other holes just in case you get stuck along the way, but one hole is sufficient if you’re comfortable with the jigsaw.
5. If you need to cut for faucet, use a hole saw. Make sure it’s the right size!! Look at the manufacturer’s instructions for size and info.
6. I won’t get fancy here. There are ways to make the top drawer functional, but that involves some carpentry, so we’ll just worry about getting in back in place. Carefully remove the front of the drawer from the rest of it.
7. Use wood scraps on both interior sides to support top drawer. Screw from back. Your aim is to support the drawer and make it look nice, but not functional. Make sure you don’t use screws that are too long.
8. You may need to mess around with the second drawer as drain and plumbing may come down that far. Again, use jigsaw and/or hole saw. Don’t worry…nobody will see it!
9. Read the manufacturer’s instructions on how to attach faucet.
10. Only when you’ve made absolutely sure everything fits, you can run caulk under sink and seal it in permanently.
11. Attach to wall with L brackets.
12. Seal counter top with some heavy duty water proof stuff. The best time to do this is after the cut, but before the sink is sealed in.
These are instructions for wood top vanity. If you’re using a different counter top, you should carefully remove the top, use plywood and wonderboard, then tile. Wonderboard may not be needed for solid surfaces.

