Before anything, try a quick fix. Pour some baby powder into the grooves. Don’t vacuum the mess on the floor because you don’t want to remove the powder between the cracks. Wipe it up with a damp rag.
If that doesn’t work, there are a couple of companies that make easy DIY products specifically for stopping creaks. Squeak No More and Squeak Ender each get good reviews. But really, you can just do it yourself with some screws, shims and scrap lumber.
First of all, determine exactly where the squeak is coming from. It could be loose boards or the joists underneath.
If you can view the floor from underneath, try to find gaps between the floor and joist. If any exist, put some glue on a shim and knock it in there. Not so much that the floor pops up! For extra support, drive a screw at an angle up through the joist, shim and into the sub floor. And um, make sure it doesn’t go all the way through the floor above.
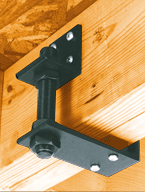
If it looks like your joist is sagging, you’ll need to support that. Squeak Ender is a brace for such a job. Or you can bridge between the joists with a 2×6. Or screw in support against the joist.
Can’t get underneath? Good for you. That makes the job even easier. Squeak No More makes a Countersnap Kit in which the screwheads automatically snap off when driven into the depth control fixture. Alternatively, all you need to do is drill tiny pilot holes at angles and drive finish nails or screws through the floor, catching the sub floor below. You can fill the holes with wood putty when done.
Easy 2 DIY
This Old House
Be Jane

1 Comment
[…] read more here […]