
Finally, a new product for our store! We’ve been concentrating so much on our posts that it’s taking us ages to create lovely reclaimed home fixtures to sell. Which is how we’ll make money. So we can keep this blog going. Get the hint?
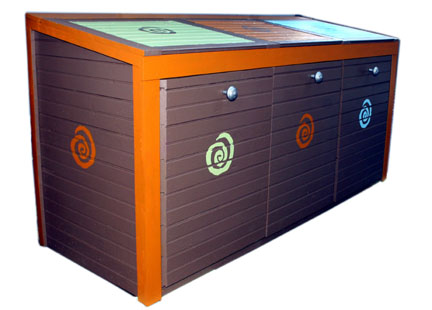
The siding on this prototype is made with 100% reclaimed wainscoting from an 1865 farmhouse in Poughkeepsie. The cedar framing is new material. This is the second prototype we built. The first one didn’t work out so well. We thought it would be a great idea to use discarded shipping pallets. Well, if someone knows of a way to take pallets apart EASILY, please let us know. In the meantime, we cut them down for our much smaller kitty litter box enclosures (not built yet).
Using recycled materials is a labor of love. Although it’s less expensive, hours are spent stripping paint, sanding and figuring out how to make the different sized pieces work together. We should have remembered this from our Bed Stuy restoration when we kept saying “Why didn’t we just rip it all out and put in new?” No, we would never!
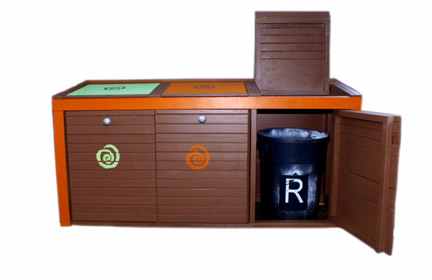
Anyway, the trash bin enclosure will be a made to order item as we’ll never know what material we’ll come across next. We can use new sustainable cedar siding, but that’s not as much fun as reclaimed, is it? This particular one, in brownstone brown, is all ours. It has room for 3 bins: orange trash, blue plastic/glass and green paper and it’s embellished with antique hardware. Unfortunately, due to the cost and time of producing this one, we can’t see charging less than $2300.
HGTV Article on hiding bins
DIY plans for simple enclosure. (Ours wasn’t simple.) :
5 Comments
Nice! How longdid it take to build – do you have any plans for this if I want to build it myself?
L, too long! Well, we were kind of working it out as we went along. The first one we did was pretty crude (we followed the diy plans I linked to). We called in help from a real carpenter (unlike us, diy-carpenter wannabees). He was cutting the wood at angles and putting notches in it. I was on paint stripping duty and finishing, as always. I can probably come up with some kind of plan, but I have a feeling it takes a high level of skill to do what he did.
I love it!
And I thought I was great when I built a picket fence around my cans.
Wow, that is definetly the coolest trash bin enclosure I have ever seen!